Home Gallery Tutorials Downloads Other Stuff Links About Me Email
TUTORIALS
More Boolean Operations
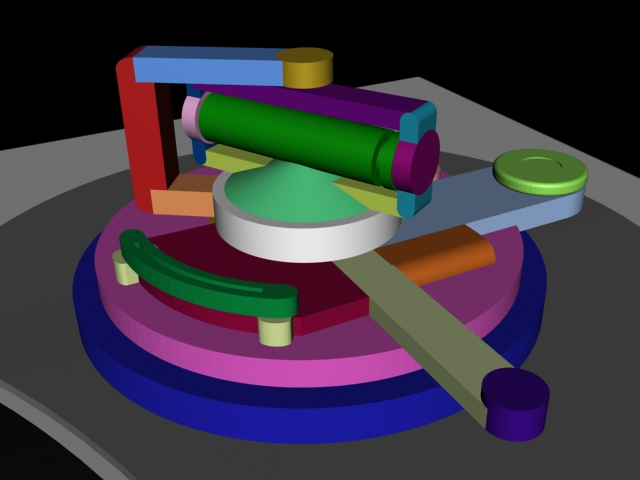
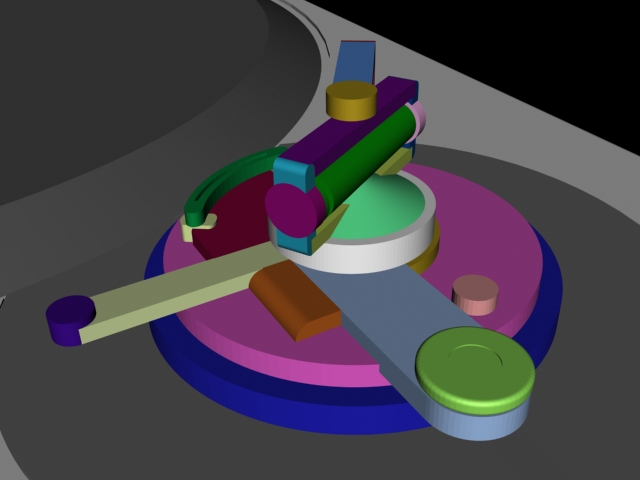
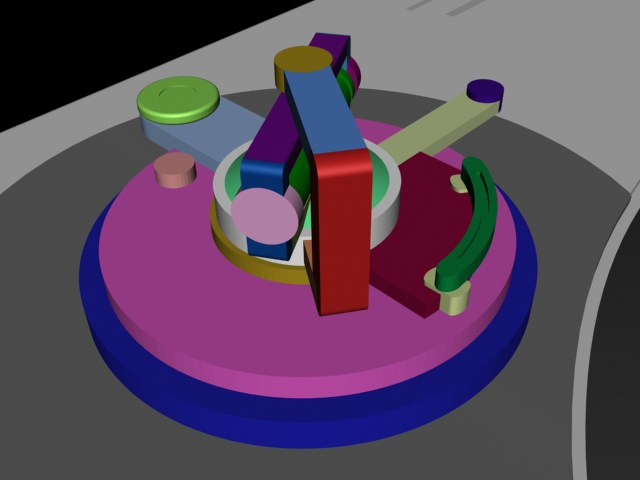
9. This is the step I've been dreading to write, so I won't :) This is simply because it would be way too much writing, and no doubt be hard as hell to understand. Instead I've colour coded every different piece used to create the deck arm base and the task is upto you to copy it. I think this is the easiest way for both of us. Remeber that all the parts created are just basic primatives and boolean operations. My advice is to start from the base up and use as many primatives as possible. See you at the next step!
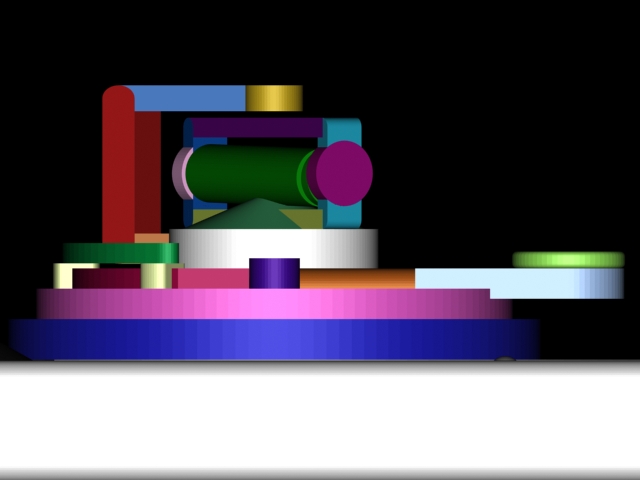
Front view
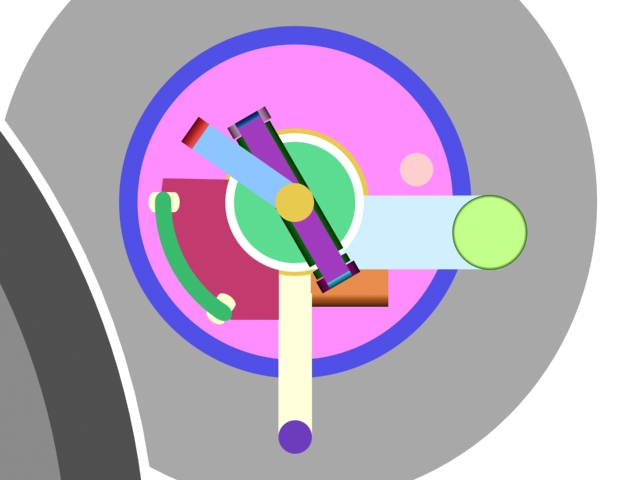
Top view
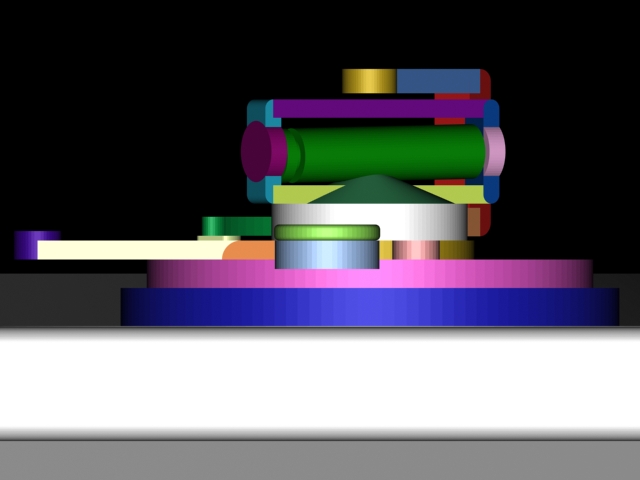
Right view
10. You made it! The final step in the modelling process is the deck arm itself. Firstly, if the program you are using doesn't have more advanced modelling like NURBS or the ability to manipulate individual vertices, grab sPatch now! This deck will have a curvy deck arm, so create a cylinder in either your program or sPatch. Make it just smaller than the thickness of the central green cylinder in the above pictures. Using your reference pictures, extrude one of the faces of the cylinder a few times so you have a cylinder with about 5 sub-divisions and move the vertices into the shape of the deck arm. If you need more detail, create more extrusions and use the extra subdivisions. I created my deck arm in sPatch using a 16 pt. cylinder extruded from a single 16 pt. circle.
11. Export the deck arm if you are using sPatch and import it into your program. Resize it and position it in the correct place. Don't rotate it yet (unless it is to get it flat) as we still have to add the counter weight to the end. Create a small cone, with it's base the same radius as the central green cylinder from the above pictures. Position the cone at the straighter end of the deck arm so it looks like the cone is part of the arm itself. Make a cylinder with a radius slightly smaller than the cone and about on unit long and put it just behing the cone. Do the same thing again, but make the cylinder the same radius as the cone and much longer, about 10 units. Clone the previous cylinder (the smaller one) and place it at the end of the long cylinder. Now clone the long cylinder, make it about 3 units long and place it at the end. Make a cone with a radius of about twice the previous cone/cylinders and place it at the end, positioning it like the first cone with the deck arm. Create a cylinder with the larger radius and about 5 unts in length and place it at the end. Now make a cylinder with a smaller radius, but larger than the first radius with a length of 1.5 to 2 and place it at the end. Clone this cylinder but change the radius to the larger radius size and place it at the end. At the other end of the arm, make two cylinders, one with a radius just larger than the arm about 3 units in length and the other with a radius just larger still, but with a length of 2. Sit the larger radius one centrally through the smaller one. Hopefully it looks like the arm below.
Best viewed in 1024x768 using Netscape Navigator
Copyright Michael Balzer 2002
[email protected]