Home Gallery Tutorials Downloads Other Stuff Links About Me Email
TUTORIALS
2D Planes
Smart use of 2D images can produce great effects. This tutorial will show you how to create a record with transparency for the hole in the centre.
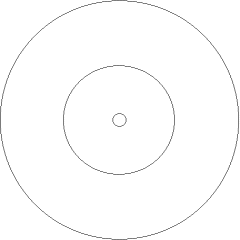
1. Fire up your paint program with an image about 500x500. Draw a black circle which fills the whole image, then a smaller circle for the central hole. Also another circle for the label. It should look something like this:
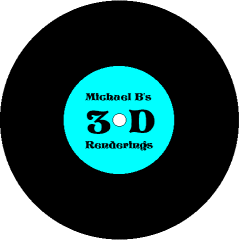
Save this file as record.bmp. Now fill the outer circle (the actual record) black. Design a label in the second circle. The third circle leave white. Save this file as record1.bmp. Mine looks like this.
2. Open up record.bmp. Fill in everything black except the central most circle (the hole) and the outer part of the image. This is the mask for the record1.bmp image. The white parts of the mask cut out that section of the record you don't want, while the black part keeps the section of the record you do want. The mask for my record is below.
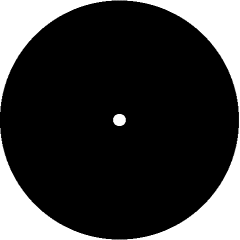
Because I don't want the hole or the outer part of the image, I have coloured them white. The rest is black, which is the section I want to see in Bryce. Save this mask file you have drawn as record1_mask.bmp.
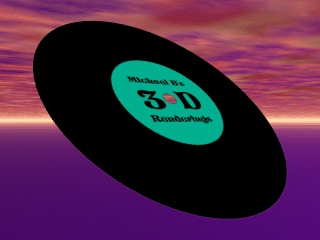
3. Start Bryce and click on create 2D picture object (the little man with 4 arms and 4 legs). In the first box load up record1.bmp. In the second box load up record1_mask.bmp. Click the tick in the bottom right hand corner. Render the picture and there you have it!
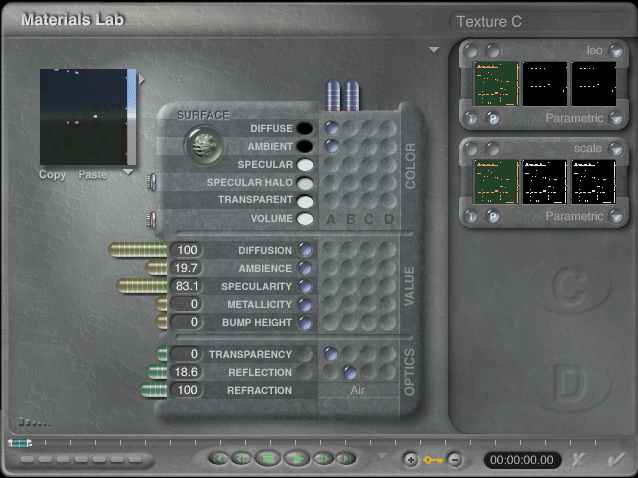
I used this method to make my mixer, except instead of a circle, I drew a rectangle with rounded corners. To make the mask, the parts of the mixer I didn't want (the slots for the sliders and the excess on the corners) were painted white, while the rest was black. To get the reflections, I created another mask, this time parts I didn't want reflecting (all the text and lines) were white, while the parts I wanted to reflect (the green base) was painted black. I then created the 2D image in the same way, using the image and the first mask. I then selected the 2D image, clicked M and then clicked in column B on the reflection line. When the random reflection pattern came up, I then clicked the P under it, then the pinkish coloured button above it. Then in the second box I loaded in my second mask. Sounds complicated, but once you get the hang of it, it's easy. Below is what my materials editor for the mixer looked like when I was finished. Any questions or comments? Send them to [email protected].
Best viewed in 1024x768 using Netscape Navigator
Copyright Michael Balzer 2000
[email protected]