|

* ~ *
Christmas Ball Wish
* ~ *
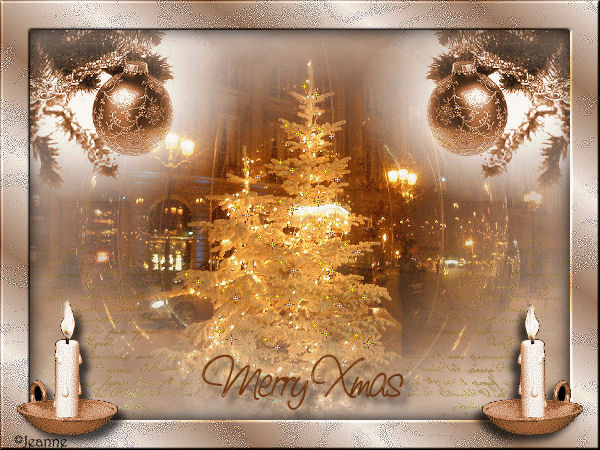
This is
the non-animated version
Jeanne's original
animated Dutch
tutorial can be viewed
here.
Image
size is 353kb
MATERIALS NEEDED:
Supplies:
download here.
(File size - 2,228 kb)
Filters
1. Unlimited
2. Filter XX Xtra`s -
Elemental -
download here.
Foreground color on
#fbe9df.
Change the foreground
color to gradient:
Style - Linear
Angle - 0
Repeats - 1
Invert - unchecked.
Change the background
color to #6d3004
and set the background on
gold pattern.
Open a new transparent
image, 600 x 450 pixels.
Fill with the foreground
color.
Filters Unlimited -->
Render: Cloud
fore/backgroundcolor
Reduce the opacity of this
layer to 70%
in the Layers palette.
Copy and paste the text
tube onto the canvas.
Shift to the left.
Layers --> Duplicate
Image --> Mirror.
Copy and paste the tube
'Nadine-Kerst04'
onto the canvas.
Layers --> Merge --> Merge
All.
Selections --> Select All.
Selections --> Modify by
30
Effects --> 3D Effects -->
Cutout:
H & V - 0
Opacity - 100
Blur - 25
Color - black.
Selections --> Invert.
Add a new layer.
Style - linear
Angle - 38
Repeats - 8
Invert - unchecked
Fill the border with the
gradient.
Filter XX Xtra`s-
Elemental - Organics -
Drifter
Drag the opacity's arrow
to O ( zero).
Effects --> Edge Effects
--> Enhance.
Effects --> 3D Effects -->
Inner Bevel:
Bevel 2
Width 1
Smoothness 10
Depth 5
Ambiance 0
Shinniness 80
Angle 315
Intensity 25
Elevation 40
Color - white
Selections --> Select
None.
Open the Xmas balls tube.
Adjust --> Hue and
Saturation --> Colorize:
18 122.
Copy and paste it onto the
canvas.
Image --> Resize to 70% -
'Resize All Layers'
unchecked.
Repeat 1x.
Shift it to the top right.
Layers --> Duplicate.
Image --> Mirror.
Lock the three bottom
layers in the Layers
palette.
Activate one of the
others.
Layers --> Merge --> Merge
Visible.
Unlock the three bottom
layers again.
Drag the merged layer
below the
second layer in the Layers
palette.
Layers --> Merge --> Merge
All.
Open the candle tube.
Adjust --> Hue and
Saturation --> Colorize
same settings as before.
Copy and paste the tube
onto the canvas.
Drag it to the bottom
left.
Apply a drop shadow.
H & V - 2
Opacity - 70
Blur - 10
Color - black.
Layers --> Duplicate
Image --> Mirror.
Activate the Text tool.
Choose a nice font:
Jeanne used 'Copper Alt
Caps Extra', size 30,
in the tag example.
Type your text.
Apply a drop shadow.
Layers --> Merge --> Merge
All/
Add your name or
watermark.
Click
here for the
animation tutorial.
Please take a few
minutes to write
a message in
Jeanne's Guestbook.
Thank you kindly.
Back to Index

translated on the 30th
December 2006

The graphic
design of this page is
copyrighted to
©Magstags - All Rights
Reserved.
Home |
Filter Links |
Email |
Terms Of Use |