| Basic Stamping Instructions |
 |
 |
| Embossing Embossing is the technique that gets most people hooked on stamping. The thrill of putting a fairly boring embossing powder onto your design, blasting it with a heat gun and seeing the boring powder turn into a glossy and beautiful (usually in my case gold) design. WOW! For really professional looking embossing you will need a few items, although initially expensive, if you use them well they are well worth it. You will need: Pigment Stamp pad - it's slow drying and holds the powder, Embossing powder [EP] (a myriad of colours are available - email the Stamping Ground for some great varieties of powder) and a heat gun (The Stamping Ground stocks Milwaukee) You can use also use a toaster (personally I find this slow, annoying, unreliable and frustrating. My suggestion is spend the money and buy the gun if you want it to work out well � it will save you money in the long run.) To emboss, ink your stamp with pigment stamp pad, it's slow drying so you have time to be careful. Sprinkle embossing powder over the ink (be generous and make sure to completely cover the image) and then tap off excess onto a spare piece of paper. This paper should have a crisp fold down the middle so that you can use it to funnel the unused powder back into the bottle - saves on wastage. (I prefer to use thin lunch boxes, 1 for each of the four main colours, as it saves having to have that paper and also saves accidental spillage). Give a little tap to make sure you have it all,. When ready heat the EP with the heat gun - hold it about 10-15cm away from the paper and remove heat as soon as the EP is melted. If you overheat it then the EP can sink into the paper and it looks dull, flat and yuck! Practice makes perfect. Hint: use a small paintbrush to remove any stray EP from the image and paper. |
| Dye Stamping The easiest stamping technique is to stamp an image using black permanent dye ink such as Archival and then colour. The image can be coloured with pencil, felt pen or even glitter. Simple but effective. If you're looking for a little more colour you can use coloured stamping inks, there are a few ways to go about this. Here's a couple. 1. Coloured stamp pads (Kaleidacolor is a great brand for rainbow pads) and can be used to add colour to a stamp, just ink the stamp with the coloured ink and stamp away. If using a rainbow pad try not to move the stamp too far across the pad but rather follow the direction of the colour. To do otherwise will mix the ink colours and leave you with a very messy and muddied stamp pad. 2. Coloured markers (normal or embossing markers) can be used to colour in a stamp, so you can use different colours on a stamp at once. This technique gives greater precision over where the different colours are placed on your stamp. Turn the stamp over so you can colour directly onto the stamping surface. Lay down your lighter colours first (so as not to contaminate markers with different colours) and colour the stamp. These will dry a little by the time you have coloured the entire stamp so breathe on it a little to remoisten before stamping (this is called HUFFING). Glossy paper gives the best effect with this technique - but you can try it on matte paper too. |
| Paper /Card Basically there are 2 types of paper/card: Glossy and Matte for basic stamping. Matte is the stuff most of us are familiar with: normal printer, writing and notepaper. It generally isn't coated with anything and is great for stamping on. The ink dries fast on matte paper and the paper can be coloured with just about anything including felt pen, Radiant Pearls, watercolours, oil pastels or pencils. Glossy paper is different, it has a �plastic� coating to give it a shiny look, it won't take watercolours, felt pen or Radiant Pearls, though dye ink, permanent markers and embossing markers are OK. The ink stays wet longer and has a brighter colour when they eventually dry. (May fade in the long term though) Both are great for different effects - it just depends what you want to do and the effect you wish to achieve. |
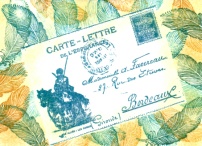 |
| Dye Stamping & masking |
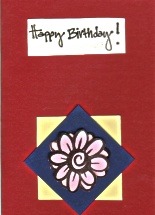
| Simple & effective: stamped & embossed |
| Hints For general card making I use Matte card with a weight of around 180-200gsm (photocopy paper is 80gsm). Also an A4 card cut in half is the standard card size (and fits into a C6 envelope.) The larger the stamped image the more difficult it is to master. Stick with the small to medium stamps for your first few attempts. Standing above your work table, rather than sitting also helps to transfer the ink evenly. A special Puff Away pad is available from the Stamping Ground if you have lots of problems with excess embossing powder sticking to your cards. Supplies Suppplies are available by mail order direct from The Stamping Ground (Wollongong Australia 02 42715917) You can also pick up supplies from most reputable stamping stores nad larger craft stores.. |
 |
| Michelle's Stamping Ground |
| Fast Links Home Latest Madness Next Project |