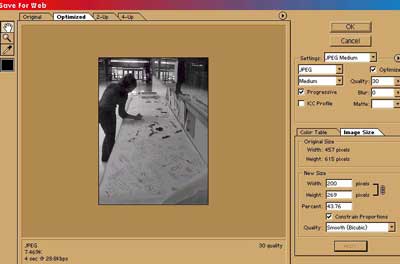
| You will see a screen like the one to the right. Now the file size is reduced to 7.4 MB. Much better. |
| Choose JPEG and Medium quality. Reduce you image size so the largest dimension is 300 pixels. |
| Instructions for Building a Virtual Tour in Microsoft Front Page. |
 |
 |
 |
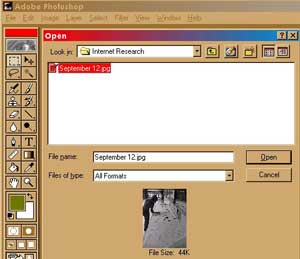
| Saving your images for the web: You must edit your images to an efficient file size and quality before they can be posted to the web. There are two reasons for this. One is that there is a limited amount of space on our server. Two is that the pages will load more quickly. Open your image in Adobe Photoshop. |
| You can see the file size is 44K. This can be reduced to somewhere between 10 and 15K without significantly reducing the quality. |
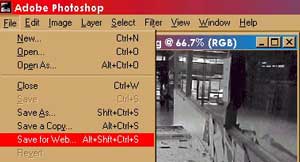
| Click on File, then Save for Web |
| Getting your images into Microsoft FrontPage : |
| In order for your images to show on the page you place them on, they must be in the images folder. |
 |
| You can either save to the folder or copy and paste your image in. It is not sufficient to simply copy and paste to the page you are working on. Unless there is a link to the file in the images folder, the picture will not show up on the web. Instead, you will get a broken link that looks like this: |
| Now you are ready to build the virtual tour. |
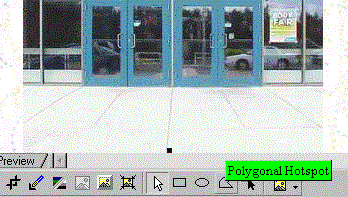
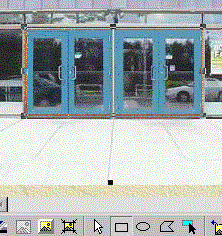
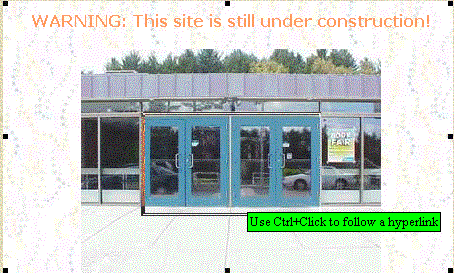
| Here is the first page of the present vitual tour, still under construction. There is a toolbar at the bottom of the page. You must select your image first, indicated by the box around it, to bring up the toolbar. You can use either the rectangular, circular, or polygonal hotspot tool. |
| Let's assume you want the next link to lead you inside the front doors. Select the rectagular hotspot tool and draw a box around the doors. |
 |
 |
| When you let go of the mouse, a screen that looks like this will come up: |
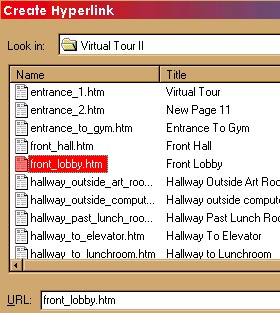
| Here you can choose the file that you want to link to and the rectangle you have drawn will become a hotspot to get you there. You should have your new page already created, with the next image, any descriptive text, and home and up links, as mentioned above. |
 |
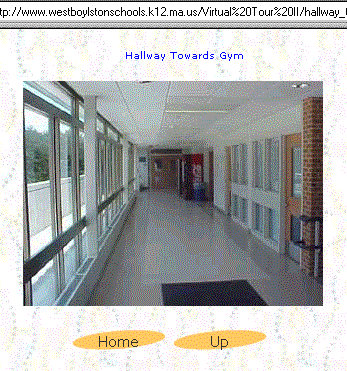
| You will repeat the steps above until your tour is complete. You can include more than one hotspot on a page. For example, there are 6 hallways off of this view, one to the left and right on the first level, one to the left and right up the ramp, and one to the left and right at the end of the hallway. You could add 6 seperate hotspots to get you where you want to go. Easy ! |
 |
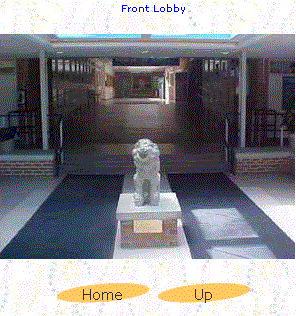
| Link the hotspot to the file name for the next page. For example: Our next image, in logical order, will be the front lobby, inside the front doors. |
| You will be working in Microsoft FrontPage. First, create your pages, post your images to them and add any text to describe them. Insert home and up links, so the viewers can turn around. Save them with a logical name, so you can find them in the folder list easily. |
 |
| These instructions were put together by Lynne Benoit as part of the Looking Through Our Lens WebQuest. It is located in the curriculum at a point that assumes students have a basic knowledge of how to build and edit web pages using Microsoft FrontPage. |
 |
| Last updated July 16, 2002. |