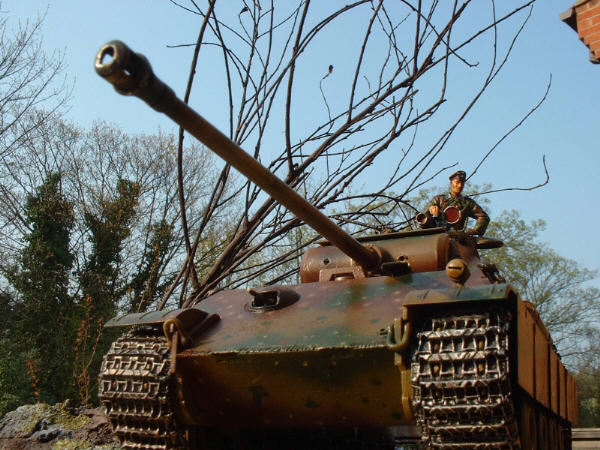
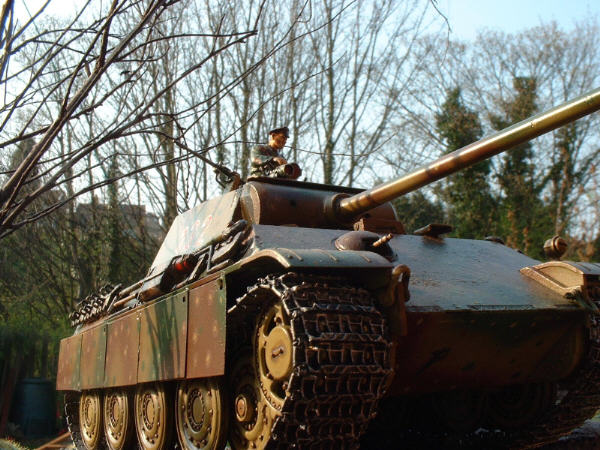
This is my 8th Kit, I purchased it at christmas and although it is a pricey kit its absolutely delicious in my opinion. I used several new techniques in its construction which I obtained from reading AFV Modeller, a bi-monthly publication and Angus Creightons" How to build Tamiyas Steel Wheeled Tiger", a must have book for any serious afv modeller. The fit of the parts was perfect, as you would expect from Tamiya, and the detailing is delightful. However, I purchased the follwing items for addition, a Jordi Rubio kwk42/L70 aluminium barrel, Eduards brass etched set for the panther G and I also splashed out on a set of Fruil Modellisimo white metal track links, which whilst very expensive are fabulous.
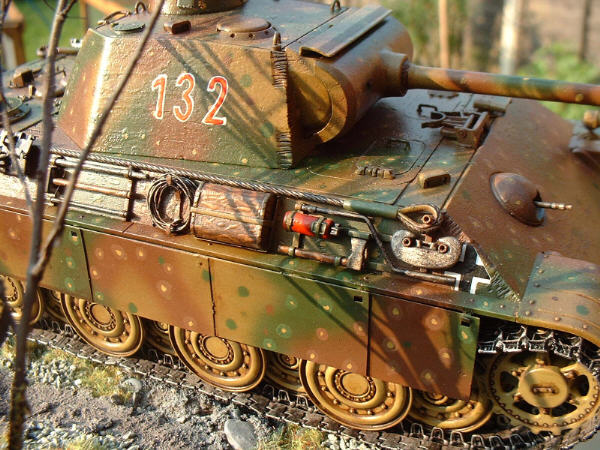
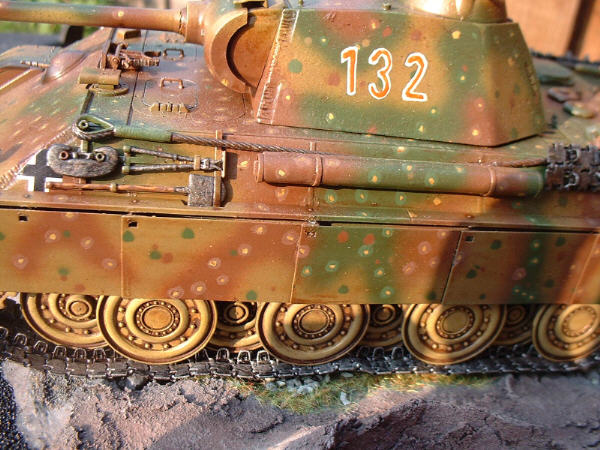
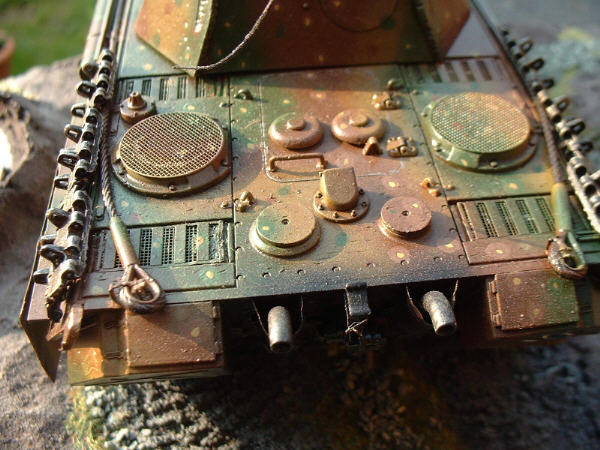
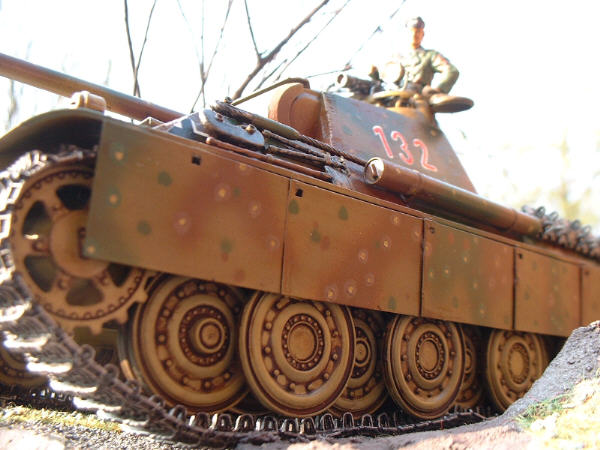
Because no zimmerit was required assembly was very straight forward. For the first time I assembled the complete model including tool racks and acessories before I undercoated the tank in black acrylic ( I usually paint these seperately then glue in place after main painting is complete ). I also stippled the hull with an old short cut paint brush and liquid poly glue in order to give the hull surface the uneven rough texture of rolled steel plate ( got that in an excellent Jagdpanther article in AFV modeller). It did work but because of the gloss laquer, its hard to appreciate it on the photographs. The tracks were tedious to assemble, each link having to be pinned by hand to the other after having cut each track pin from fine wire, but the end justified the means, a fully articulated set of tracks that sit realistically over the running gear and are actually far easier to install than plastic or rubber tracks you usually find. All of the major weld joints were enhanced using a milling tool on a hobby drill ( got that tip from Angus`book ). Finally I laquered the hull in spray gloss clear acrylic to give a polished look to the finished article, which worked a treat.
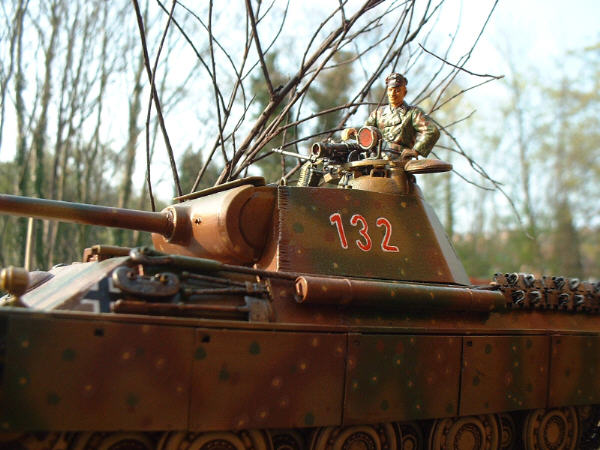
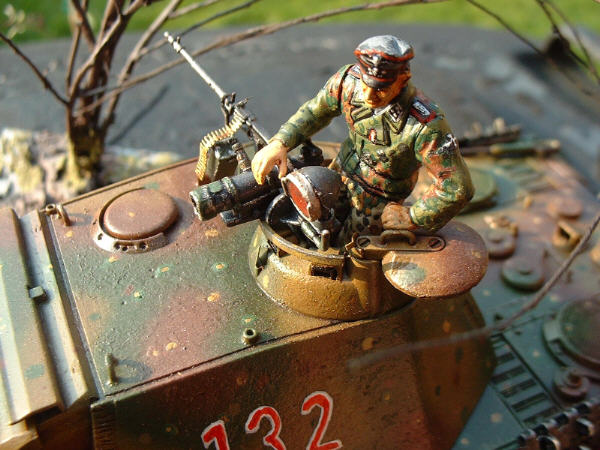
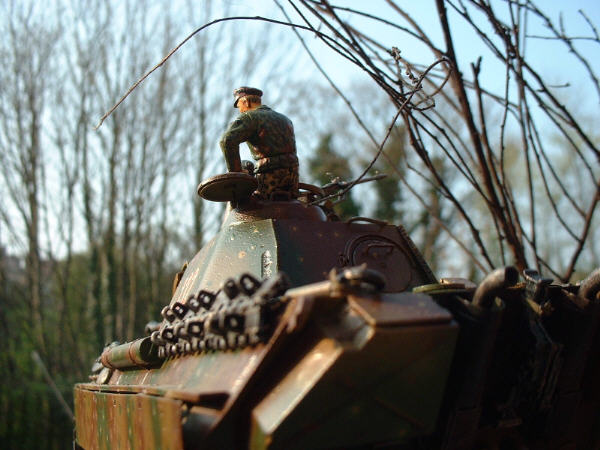
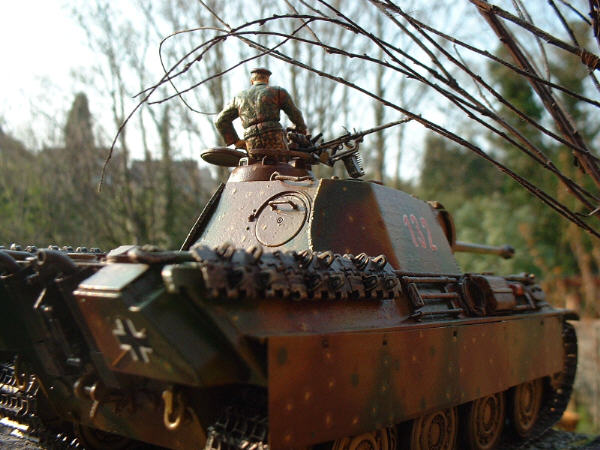
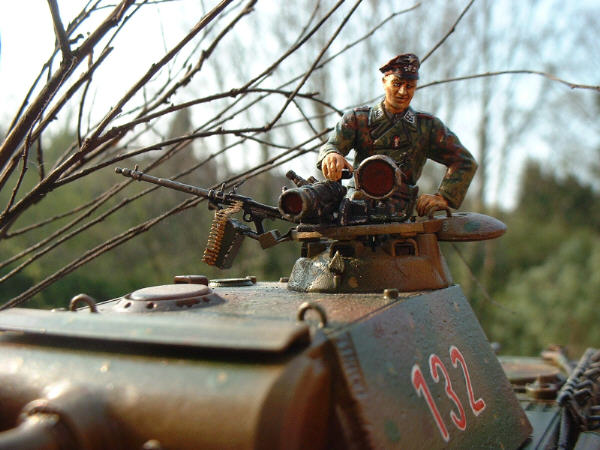
Painting ambush camouflage is a pain. I initially sprayed the dots in place, but i found spraying with a template tricky and the paint quickly blocked the hole in the template producing uneven blobs. I also made the spots too big, so I had to down size them by hand which detracts from the final finish. Still, it was a valuable experience and I will probably paint the spots on by hand in future. The hull was also dry brushed and washed using burnt umber oil paints in white spirit, absolutely the best wash I have ever used, far better than acrylic washes that tend to be to strong and stain too deeply. I also went to the trouble to assemble a commander for the cupola. The figure supplied is too stiff to pose in the cupola with the Infra Red illuminator in place so I used several parts from a Dragon tank crew sprue to assemble a command figure that would fit. Again, painting was a pain as I just cannot get SS camouflage to look right!!!! ( any one out there with any tips PLEASE!!!!! email me).
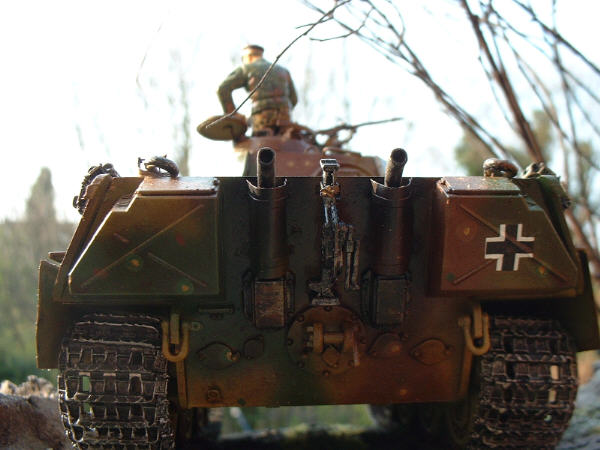
Operationally, the Panther G was the ultimate Panther of the family. It served on both Eastern and Western fronts eventually counting for up to half the strength of what remained of the Panzer divisions in the last months of the war. This particular model was one of the few G`s fitted with the steel wheels of the PzKwVI Tiger and also an Infra Red gun sighting mechanism. Other modifications included A chin of armor plate fitted to the gun mantlet to eliminate the shot trap of the earlier Panther models, however not all G`s recieved this valuable addition and many went into service with the standard mantlet, as this one has. The I.R. system was made to be used in conjunction with a special command vehicle outfitted with a large I.R. searchlight. The idea was that the command vehicle illuminated the target for the four Panthers of the platoon to use thier I.R. apparatus to destroy enemy vehicles at night. |