 |
|
| The first thing I did was to start sketching ideas (photo to the right). I used conceptual ideas from other amateur astronomers' sights I had visited. I drew up a couple to full scale to help me envision the dimensions I had in mind from a better perspective. I have included only two of my concept drawings I did as examples. Drawings of each side of my field power supply took shape constantly and were just as oftern revised afterwards! The important thing is to get your ideas down on paper so when you forget that great idea you can drag out the notebook and look them up. Whatever works for you that will refresh your memory while collecting ideas will work! |
| Click to enlarge |
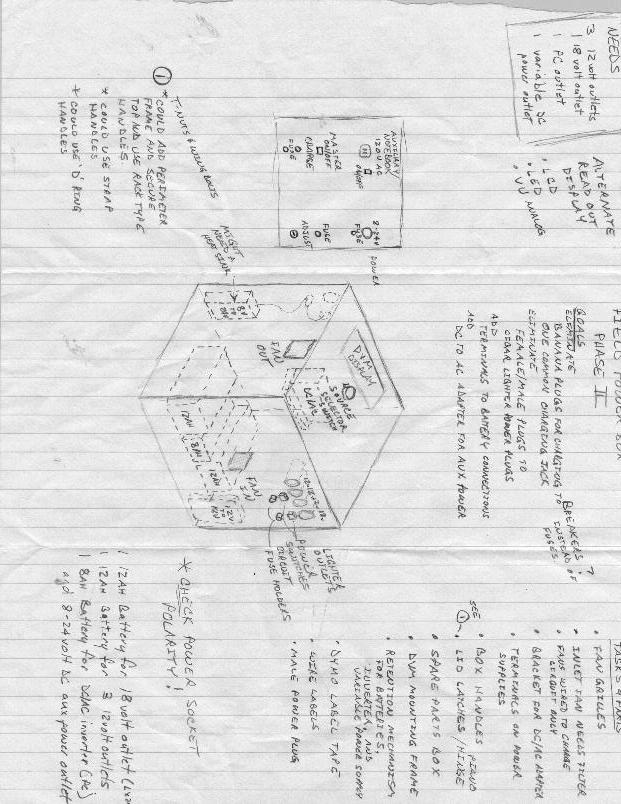 |
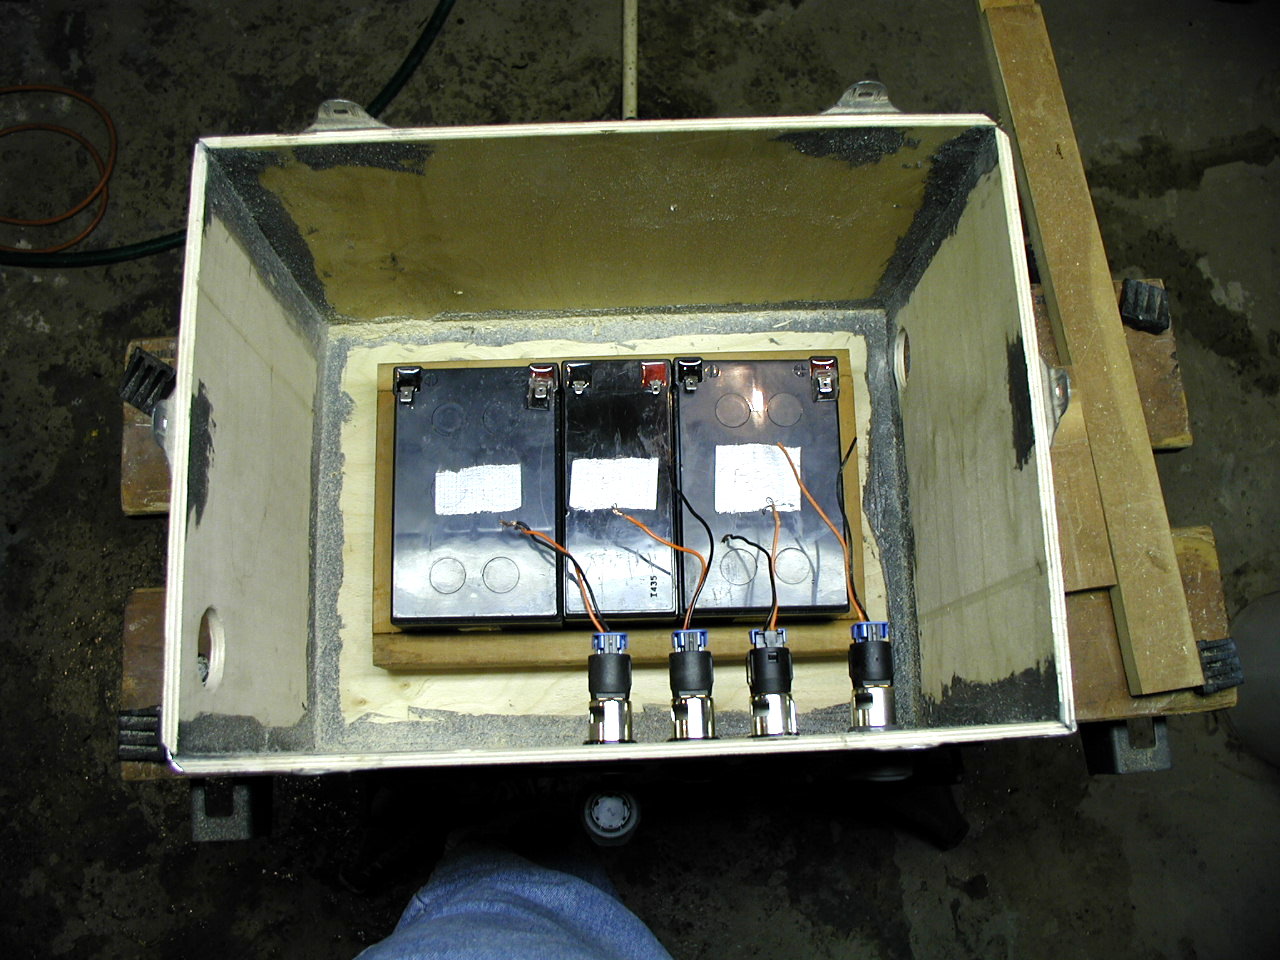
| This is actually prototype #2 under construction. Having completed one other power supply using a small plastic toolbox it didn't take long to see that the container was being out grown. I wanted more than battery power for my telescope. I wanted power to run my Kendrick Dew Removal System, my Micron GoBook2 notebook, a CCD camera I don't own yet and have a couple of spare 12 volt outlets for future additions. I also wanted to have the recharging system intergal with the power supply. The following photos and description is my version of a home-made field power supply. It would be hard for me to tell you what the total cost of this project was. I am basically a packrat and some the parts for this power supply came from my stash. Most of the electrical parts came from Radio Shack and the other hardware I bought for this project came from either True Value Hardware or Home Depot, but it is probably available at many other sources as well. The most expensive item was the Meade #1812 18 volt power inverter at almost $100.00, there has got to be one out there that isn't so expensive! |
| The BAC Telescope & Accessory Field Power Supply |
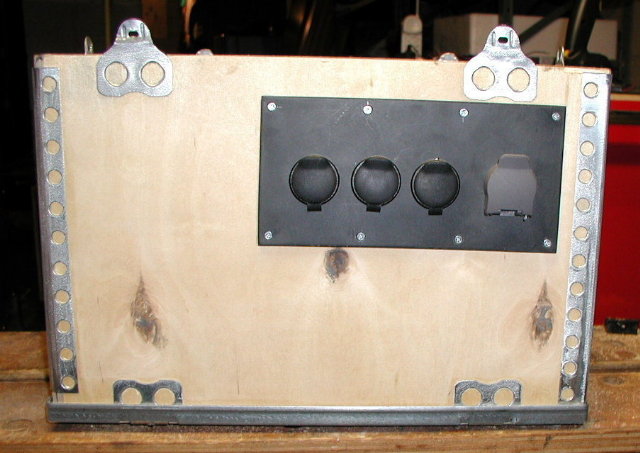
| My first objective was to find some sort of container to put all of the components in. As luck, and my scrounging, would have it there was this really great shipping box in the trash at work. The box is a nice five-ply plywood box with galvanized corners and edges. The box dimensions are, H 10 1/4"x W 15 1/2"x D 11 1/2" which provides ample room for the parts I wanted to include. I decided to start with the power rectpticle center first, since I had an idea (from my sketches) of how I wanted it laid out. You will note that what I ended up with and my concept sketch are not one in the same. This change was due to the size of the ABS plastic sheet the outlets are mounted in. The box itseld was too thick to mount the cigar-type outlets (local junk yard) in, so the 1/8" plastic holds them and is attached to the box. Ample holes were cut into the side of the box for clearance and service if needed. |
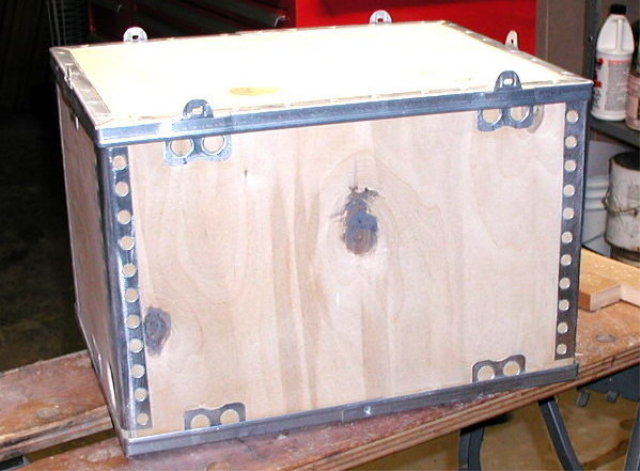 |
| The beginning |
 |
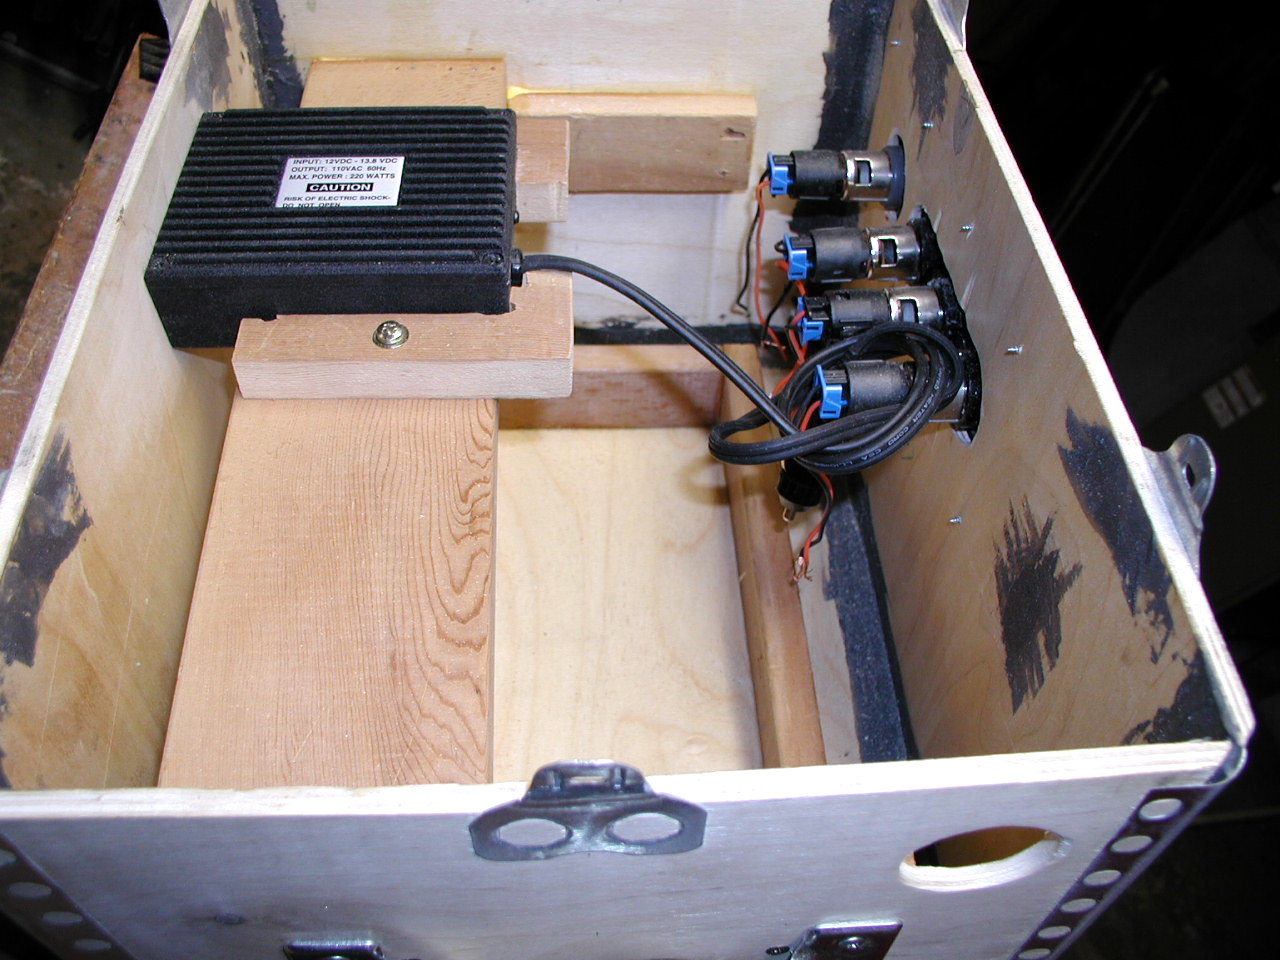 |
| Deciding where to locate everything in the box presented a bit more of a problem than I had anticipated. Conceptual sketches of how things would look and deciding what I wanted was the easy part. It was another matter to come up with placement that was handy and kept everything in an orderly manner. My goal of wiring everything nice and neat seems to have gone out the window. I guess I'll just settle for a form of routing that keept the wiring out of the way to make getting at the batteries easier. The two photos at the left show a side view of the box with the 12 volt recepticles on the right and the DC to 110 AC inverter on the left. I decided not to permenantly attach the inverter because I use it to power my notebook computer while traveling. The second photo shows the three batteries in the tray. |
 |