 |
|
|
|
|
|
|
|
|
|
|
|
|
|
|
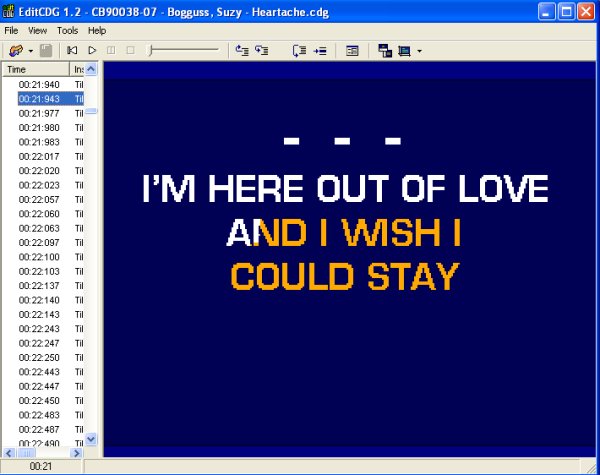
For the purposes of this Tutorial, we will assume you dont know where the mistakes are in the cdg, and we will scroll thru it to find them. This will familarize you with the keys used in the program. So we are ready to start editing our first CDG now. Going back to your Edit CDG program, scroll down and put your mouse on the first TILE BLOCK you see, click on it and then hit F9. This will take the program to the first of the cdg. Your screen should now have a blue block in the middle on the right hand side. By hitting the F8 key, we can scroll thru the CDG and watch for mistakes. To make this easier to see, I usually increase the size of the block on the right hand side. To do this, right click on the block and hit 2X, which will increase the block 2 times.... you probably all got that with out me saying so eh? lol |
|
|
|
We now need to hit F8 and keep hitting it until we see a mistake show up on the screen. Just hold it down and let it continue until you see a mistake, remember if you go whizzing by it you can go back with F7 key. In the Time Column you will see when you get to the first mistake where it is, if you found it correctly, you should be at 00:21:943. You will notice on the N there is an extra dot there. This is the easiest type of mistake to correct. |
|
|
|
 |
|
|
|
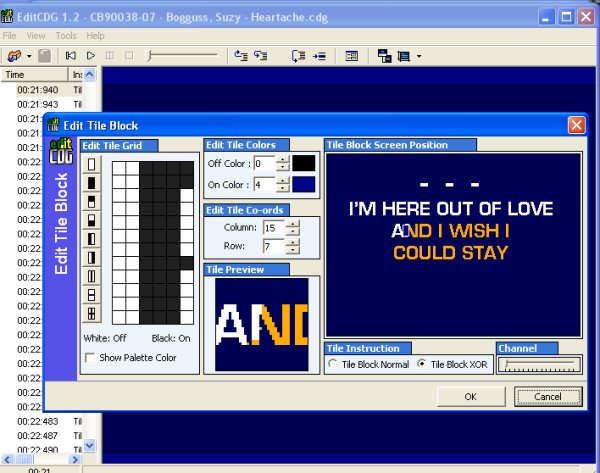
Ok, we found our first mistake, now how to correct it. If you remember, I told you in order to correct a mistake we need to be in the time frame right before it, so we need to hit F7 now to take us BACK one time frame. After you hit F7 and are now back at 00:21:940 in the time Column we now need to hit F2. F2 is our edit key and it will pop up an edit box for us to work with which in this case will look like this. |
|
|
|
 |
|
|
|
 |
|
|
 |
|
|
|
|