Back-up battery replacement for the Kenwood TS450
First off... you are on your own doing this. This page is presented for information only.
The battery that provides backup power to keep the setting in the 450 does eventually die and/or leak. You can replace the OEM battery (a solder-in) or do as I have done and remove the original and replace it with a battery/battery holder in a different location.
Why not do a direct replacement of the battery?
you can put the replacement in an easy to reach location
you may not be able to find a direct replacement now or in the future
you can put the battery in an area not as susceptible to corrosion should it leak
apparently if you send the radio in, Kenwood techs do this!!!
Some other pages to review on battery replacement and other Kenwood items of interest:
So, on with it! (remember you are accepting all responsibility!!)
What you will need:
|
|
Phillips screw drivers | Hook-up wire | |
|
Anti static strap (don’t bother trying this if you haven’t got one – lots of CMOS items on the board) |
Tweezers (for picking up the screws dropped into the radio) | ||
| Manual | Low wattage ESD safe soldering iron | ||
|
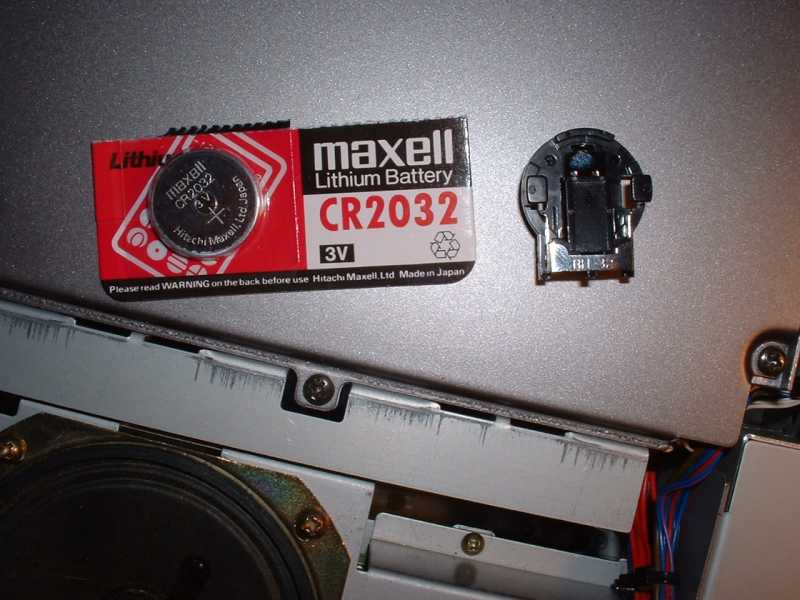
New battery (I used a Maxell CR2032) and holder |
Magnifier (depending on yer vision) | ||
| Electrical tape | Parts tray (I use an egg carton) | ||
| Solder | Well lit work space | ||
| Desoldering ribbon |
STEPS
1. If you have a computer interface, save all your settings (the radio will probably loose them during this process)
2. Turn off radio and disconnect the power, antenna, microphone etc.
3. Hook up your anti static strap
4. Remove the top and bottom radio covers
5. Remove the two top screws from faceplate
6. Loosen the two lower screws from the faceplate and drop the faceplate down.
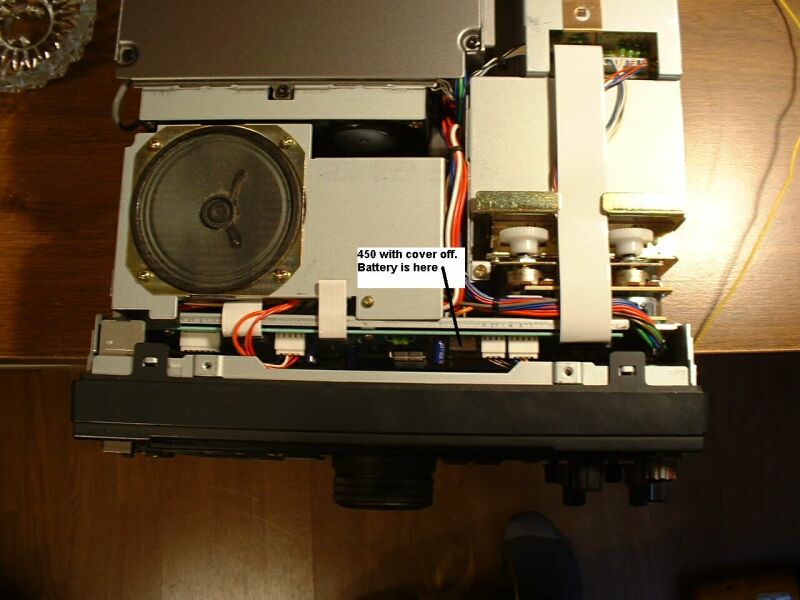
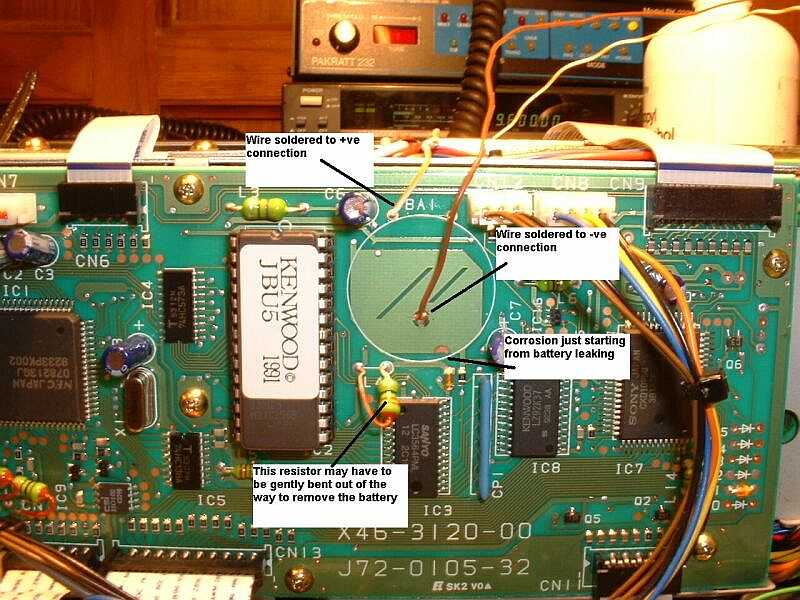
7. Remove the connectors along the top of the board (the lower connectors can stay in place unless you decide to entirely remove the board). See picture below for notes. Be careful removing the connectors, don't pull them the wrong way.
8. Remove the screws holding the board in place, one is partially hidden under the ACC-1 connector on the left.
9. Slide board to slightly right to clear the ACC-1 connector and tilt board forward
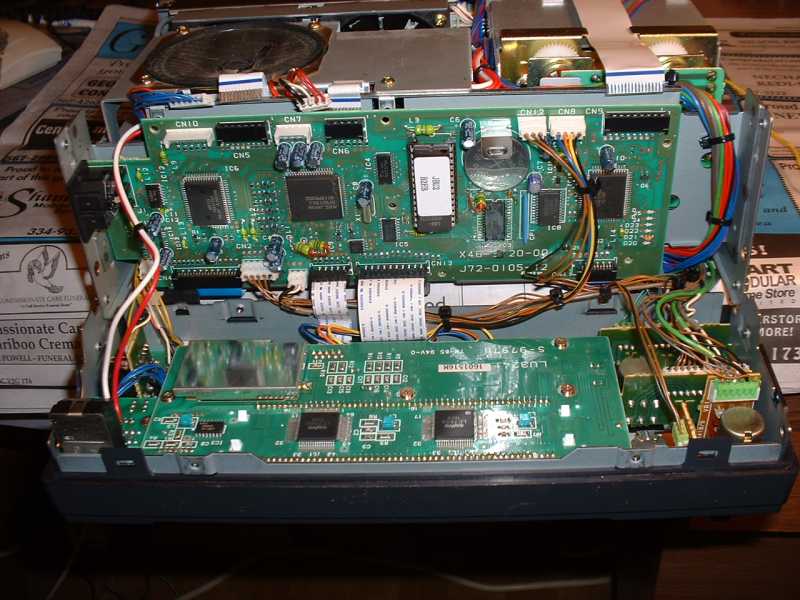
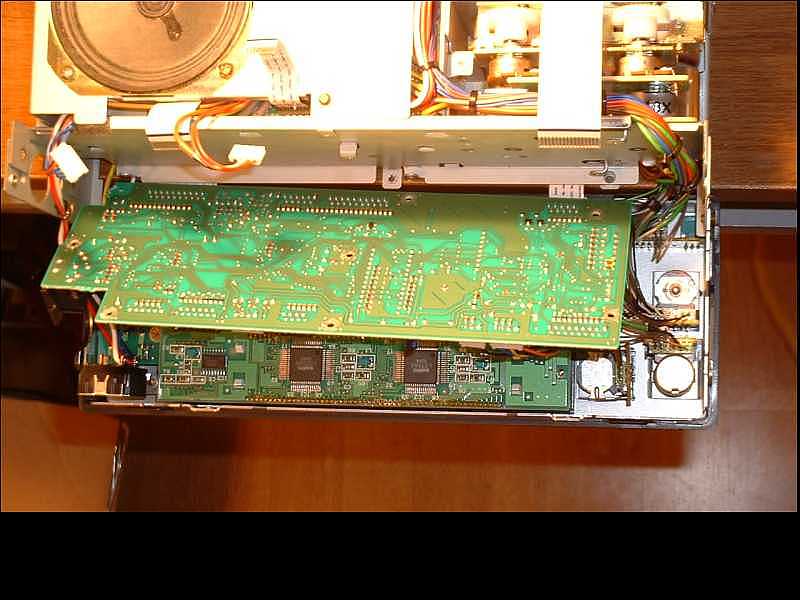 circuit board lowered
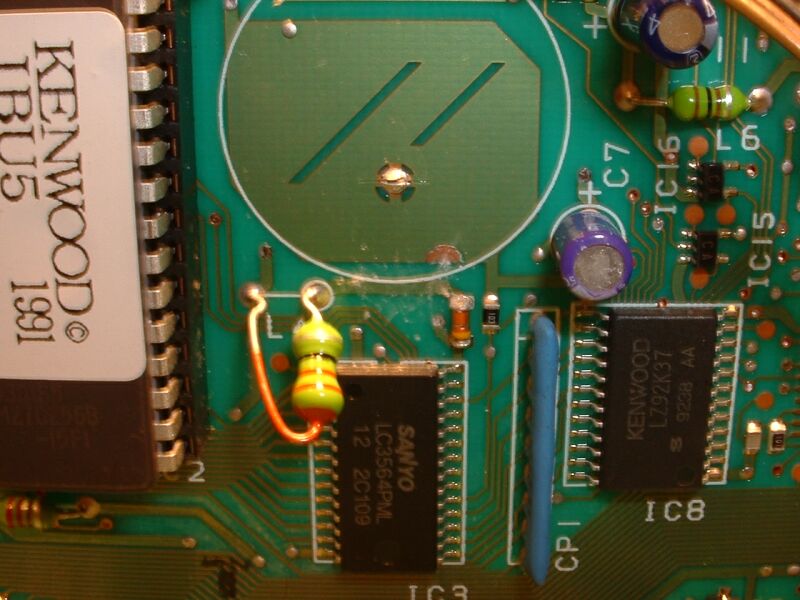
 old
battery in place. Note corrosion at bottom of battery
old
battery in place. Note corrosion at bottom of battery
10. De-solder the three battery pins and remove the battery
11. Check the board for corrosion. Depending on severity, you may be able to clean it up yourself or you may have to contact Kenwood or a repair shop.
 battery
removed, note corrosion
battery
removed, note corrosion
12. Either replace battery with a OEM solder-in type or solder wires to the +ve and –ve locations . use enough wire to solder onto the battery holder and reach the spot you have chosen.
13. Replace board and connectors
14. Solder other end of wires to battery holder making sure of polarity!
15. Bend battery holder pins flat
16. Insert new battery into holder (do not set on radio as it might short out)
17. Wrap battery holder in electrical tape or otherwise insulate (tubing?).
18. Tuck in beside ATU (or wherever you are happy with)
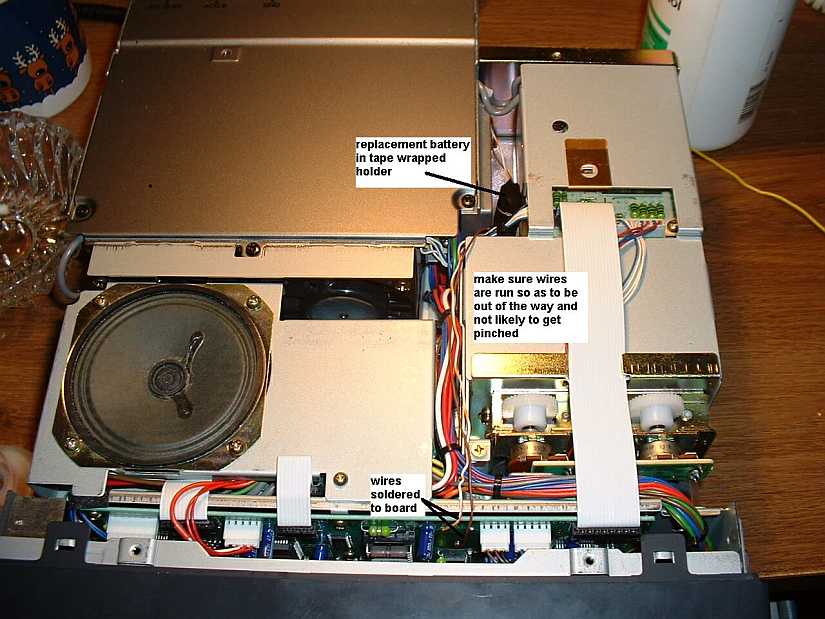
19. Route wires so they will be out of the way and not likely to get pinched.
20. Replace covers
21. Reconnect power and turn radio on, turn off, turn back on. (this, I've been told, prevents the battery from being drained too quickly )
22. Check to see if radio settings were still as you had them. I did two 450’s. One lost all my settings the other did not. If still OK go to step 25.
23. Reset radio to factory defaults by turning radio on while holding in the A=B button.
24. Reset radio settings to your liking (manually or via computer if you have connection and saved the settings)
25. Mark the date of the battery change and battery type on the bottom of the radio with a sharpie
26. Life should now be good
Email me at 8888[email protected] (remove the 8888)

