 | |
|
|
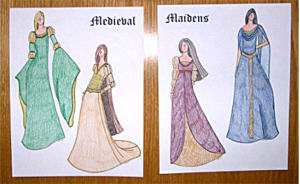 I was mostly inspired by the Yellow Lace Dress and Eowyn's White Wool Gown in Lord of the Rings and the gauntlets worn by Danielle in Ever After. I was mostly inspired by the Yellow Lace Dress and Eowyn's White Wool Gown in Lord of the Rings and the gauntlets worn by Danielle in Ever After.Bodice
The bodice was draped so that the 1-inch neckline band was a separate piece. Since the female costumes in Lord of the Rings and Ever After were fitted without darts, I included this detail on my costume. And let me say, getting the bodice to form around the breast without darts was a pain in the butt. Essentially, I transferred half of the fullness from the dart to the neckline (making it a little loose) and the other half toward the underbust, carefully draping it little by little until it lay smooth. It took a lot of time and patience but this certainly paid off. When sewing the bodice pieces together out of the fashion fabric, I overlayed just the neckline band with chiffon atop the gold crepe satin, creating a nice contrast in textures but not color (which was my goal). The bodice is self-lined.
[up] [finished costume] Gathered Midriff
This design detail was pulled directly from the Yellow Lace Dress in Lord of the Rings. I absolutely loved this dress the first time I saw it and by incorporating specific details from it into my costume conglomeration I was able to have the best of both worlds. :) I draped the midriff in two parts: the undermidriff in gold crepe satin which then provided the base for my gathered chiffon overlayer. The chiffon was pinned-gathered onto its crepe underlayer and then basted into place. After carefully ironing the gathers into place (the chiffon liked to melt...), I then sewed the side seams together and self-lined the midriff with more gold crepe satin.
[up] [finished costume] Skirt
The skirt went together very easily and has a rather nifty train. I ran out of time to line it properly but am happy with it nonetheless. I still need to hem it - right now the edges are just serged finished.
[up] [finished costume] Sleeves
I drafted the full bishop sleeves from my Shieldmaiden sleeve pattern, just lengthening it a bunch. I folded up the hem 1-inch and basted it into place, then sewed bias tape down over the folded up edge, only catching the top and bottom of the tape and leaving the center portion free. By doing this and leaving the beginning/end points open, I was able to create a casing to run elastic through. This gathers the sleeve at the wrist nicely without the bother of sewing the sleeve itself onto elastic (tried that on a sample piece and hated how it looked).
[up] [finished costume] Gauntlets
The gauntlets took a little bit of diddling with muslin before I was completely happy. I had them fitting really tight at first, but in the end added almost 1 1/2-inches to the sides to allow for more movement as well as room for the extra bulk caused by the sheer undersleeves. The top gauntlet is shorter and fatter than the bottom one - I'd provide numbers but these measurements would depend completely on the shape of your arm. I made my gauntlets out of gold crepe satin, interlined them in heavy cotton from my stash and then lined them with antique gold satin from my ever-growing pile of remnant scraps. I would like to add grommets to the edges and then cover them with matching gold thread. These would then lace together much like the gauntlets worn by Danielle in Ever After. As they are the gauntlets stay up fine...when I don't move. ;)
[up] [finished costume] Belt
The belt is two separate pieces: and 'under'-belt of gold crepe satin, interlined with sturdy duck cloth for some stability and lined in antique gold satin from my remnants. Over this is an awesome gold link belt I found at Walmart on clearance. The chain and hook in back keeps the 'under'-belt closed. I think I will have to tack the gold link belt to the fabric belt so that the two don't shift different ways when worn.
[up] [finished costume] The Finished Costume
The color in the last picture is closest to the original. 


Left to Right: with research & sketches - flash, dress with flash, no flash full, closeup, neckline, midriff, sleeve & gauntlets, skirt w/ train [up] To see the reference images that inspired this costume, check out my LOTR Costume Research and Ever After Costume Research. |
|
| |