| The
birth of a cybobird
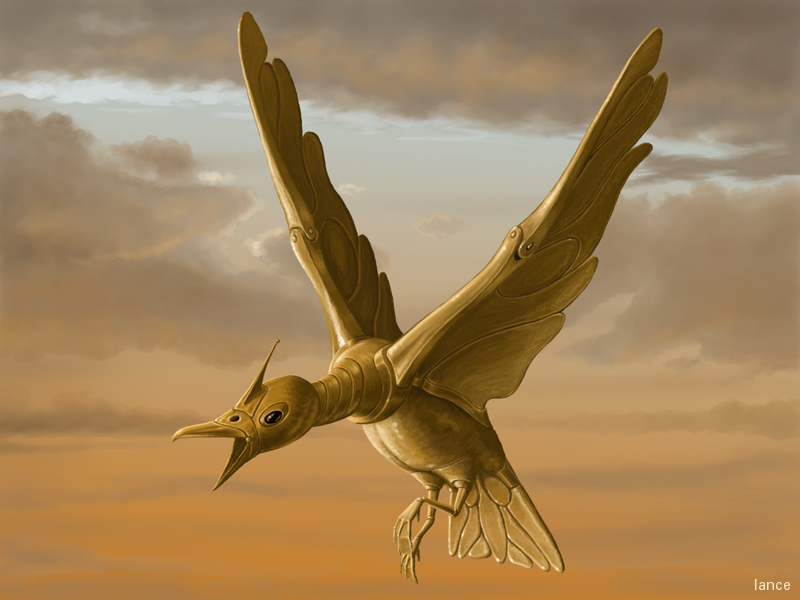
"Cybobird" was my entry for Assembly2k
pixeled graphics competition. It got the third place.
I have to point out that the picture is
completely original artwork, not copied from any image by somebody else.
On the demo scene it is quite usual
that the "reference" for an image is taken from some well known fantasy
art or photograph - making us graphic artists just human scanners. Some
people even scan the pictures and retouch them a bit to make them look
original art. The rules of Assembly prohibited that, but still the winner
picture was clearly copied and pasted together from several photos - maybe
even drawn over scanned images. But what can I prove if I can't show the
jury the "reference" material that was used...
Of course there's also copyright issue
if you use art or photos made by somebody else, but nobody seems to care
about that on the scene...
I came up with the idea of a cybernetic
bird when I was on vacation at my parents summerhouse and saw some gulls
there. The same evening I made the first sketch of the cybobird:

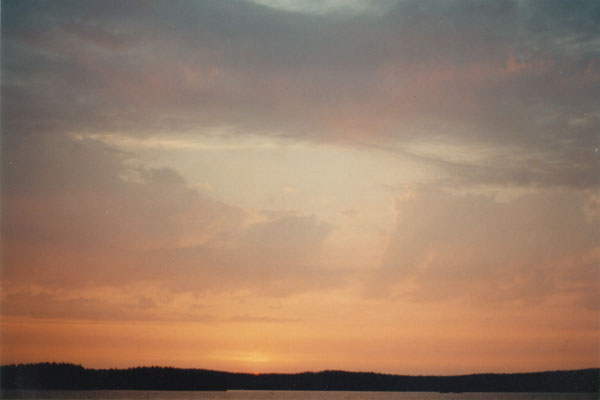
I also saw a nice sunset the same evening,
and I had to photograph it.
These were left untouched for a couple
of months, until 3rd of August - less than 24 hours before the compo deadline
of Assembly2k - I decided to make a compo picture out of my bird.
The maximum resolution for the picture
was 800x600, but I started to work with resolution twice as high, 1600x1200,
as it is easier to paint the details if the image is bigger and scale it
down when it's finished.
I didn't like the pose of the bird in the
sketch I had made earlier, but the design was nice, so I decided to start
drawing it from the scratch instead of scanning the earlier sketch. So
the first step was to make a rough sketch of the pose with Photoshop
and a Wacom tablet.
 
Cybobird01.psd
3rd August 2000 23:45
The next step was to paint some rough
shading to carve the general shape visible. I didn't care about the colour
of the surface or the light and used only black and white scale, as my
main concern was the general direction of the light.
 
Cybobird02.psd
4th August 2000 08:05
Next thing I started to paint was the
background. I used the sunset photo as reference material for cloud shapes,
but I wanted the background to be brighter and more orange than in the
photo. First step was to make a simple gradient from orange to pale blue
and then adjust it a bit with a levels layer. Over that I started to paint
the clouds on a separate layer.
 
Cybobird03.psd
4th August 2000 08:59
The first strokes were very rough with
the paintbrush tool, and then I smoothened them with the airbrush tool,
painted some more details with the paintbrush tool and a smaller brush,
and on some places blurred the clouds with the smudge tool.
 
Cybobird04.psd
4th August 2000 09:52
The point of doing the background first
was to make sure that the colour of the bird matches the colour of the
background. After I had finished with the background, I toggled the sketch
layer and the shade layer visible - but with very low visibility percentage
- and started to sketch out the bird with greater detail.
 
Cybobird05.psd
4th August 2000 10:36
I continued with the more accurate
sketch and tried to keep the perspective correct.
 
Cybobird06.psd
4th August 2000 11:04
For the wings I made some extra arcs
to measure that they are correctly positioned. Even then the lower frontal
part of the right wing is too short, but I didn't have time to fix it when
I later noticed that it's not perfect.
 
Cybobird07.psd
4th August 2000 12:00
I finished the more accurate sketch...
 
Cybobird08.psd
4th August 2000 12:23
...and started to give colour to the
bird. I proceeded one part at a time and painted each of them completely.
As I had sketched the general shading earlier, I didn't have to think about
it so much, and I could concentrate on the details. I started to paint
from the head.
 
Cybobird09.psd
4th August 2000 13:37
Then I proceeded to the neck and shoulders.
Each of these parts were on separate layers, so I didn't have to care about
painting over an existing part.
 
Cybobird10.psd
4th August 2000 14:20
The arc around the chest was a bit
difficult to get right.
 
Cybobird11.psd
4th August 2000 14:43
After that I painted the left "wing
bone", the frontal part of the left wing.
 
Cybobird12.psd
4th August 2000 15:29
Then I proceeded to the stomach, legs
and the tail. Here you can see how the tail is under progress: I have painted
the general shade there, but not yet the details.
 
Cybobird13.psd
4th August 2000 16:35
Here you can see the details of the
tail. I would have wanted to work with the tail a bit longer, but the schedule
was tight.
 
Cybobird14.psd
4th August 2000 17:05
Then I started to paint the wings.
I had to hurry, as there was only a couple of hours left before the deadline.
 
Cybobird15.psd
4th August 2000 18:30
Especially the right wing was made
in a real hurry. Here you can see the rough colouring of it.
 
Cybobird16.psd
4th August 2000 19:03
I would have wanted to add a bit more
detail to the right wing, but I simply run out of time. The deadline was
at 20:00 and I finished the picture at 19:26.
 
Cybobird17.psd
4th August 2000 19:26
Click on the image above to see the
800x600 version that was delivered to the competition jury.
The layers of the final image are as follows
- from top to bottom:
-
head
-
neck
-
left wing bone
-
chest arc
-
shoulder ball
-
legs
-
left wing
-
right wing bone
-
right wing
-
stomach
-
tail
-
accurate sketch
-
shade
-
sketch
-
fog
-
clouds
-
Levels
-
sky gradient
-
Background
As you can see, the process of drawing such
an image is quite straightforward. There's no secret tricks of how to do
it - just learn to draw. It's probably a good idea to get away from the
computer and start drawing with pencil and paper first - or gouache, water
colour or oil paint, whatever traditional technique you like. The "secret"
is in the coordination of the eye and the hand, and it is easier to learn
that with traditional tools. When you are good with them, obtain a drawing
tablet and try to do the same with your computer.
Of course you can draw with mouse as well,
but tablet gives you much better control over your image. Trust me, I have
drawn lots of pictures with mouse in the past.
Last updated
8th August 2000
|