 |
 |
 |
 |
| Ballerina Tutorial This tutorial was written using Paint Shop Pro 7 This is the first real tricky tutorial I have done so I hope you bear with me. You will need my selections for this one. You will also need to have a decent working knowledge of PSP. Here are the colors I used I will just refer to them as color #1 etc in the tutorial save then by right clicking and open in PSP then I use the eyedropper to just select the color I want. |
 |
| Alright ready to start? Remember to save often! I have tried to cut down on using to many pictures so there is a lot of writing If you have a problem or can�t work anything out please let me know. Here's what we are making. |
| Here we go! Start by opening a new transparent image 398 x 444 funny size I know but that�s what the selections fit into. Go-to selections > load from disk > and open 1-face.sel. Flood fill with the skin color #3 on the color chart. Go-to selections > load from disk > and open 2-face.sel. Flood fill with the darker skin color #2 on the color chart. Go-to selections > load from disk > and open 3-face.sel. Flood fill with the skin color #2 on the chart. (You can zoom in your image to make it easier if you want to). Don't forget to Save! |
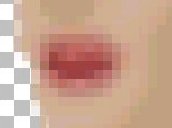
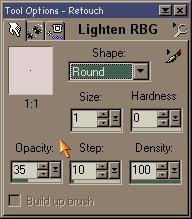
| Now something a little harder. Go-to selections > load from disk > and open 4-mouth.sel and fill with color #6. Click on the Retouch tool. Using these settings create some mouth lines. What I do is darken a line through the middle. Then lighten a little bit in the top and the bottom. You can use the same settings for both darken and lighten. Don�t worry too much about this step as its actual size is pretty small whatever you do will look great. You could of course just paint different colors in. |
| This is my finished product. |
| Settings |