|
Intermediate Art E.P.S.S. |
'Making Art Education Accessible' |
| Home | Curriculum | Lesson Database | Discussion Forum | Help |
|
|
|
Key Learning The Pencil Because we are familiar with the pencil as a writing tool, we often only use the point of the pencil in drawing. Artists manipulate the pencil in a variety of ways according to how they want the drawing to look and feel. They use its side as well as its point, use varying pressure to create dark or light, move the pencil quickly or slowly, vigorously or softly, rub with a circular motion, stab, twist, dot, dash, etc. Space Light marks on a two-dimensional surface seem to be far away from the viewer; dark marks appear to be close. Dark marks and light marks can be achieved by varying the pressure used to draw. Even a single line may be produced using varying pressure. Materials ! 2B pencils! small pieces of drawing paper for experimenting and sketching! cartridge paper for final workMotivation Visuals DR 1, DR, 2, DR 3, DR 4. After studying the images individually, compare them in terms of marks and space. How does the quality of the line help the artist interpret his/her subject? Experimenting To learn about the pencil, try some of the following activities: a) Make rubbings of textured surfaces. Extend the boundaries of the rubbings by duplicating the kinds of marks made during the rubbing. b) Make three drawings of one object by using outline only, using non outline, and combining these approaches c) Make a large doodle exhibiting a variety of marks. Suggested Theme Natural objects (e.g., branches, flowers, plants, leaves, rocks, shells). These provide a variety of possible marks. Study them closely and make rough sketches. Decide which textures, shapes, points of view and composition you prefer. Studio Make a final drawing incorporating a variety of marks with the pencil and creating a sense of space. Summary Post all student work and discussion in terms of the objectives. Address the process (successes, problems, surprises) and feeling in the discussion.
Grade 7 Mark Making #1 Drawing Unit: Mark Making (Grade Seven) Materials: Class sets of Art in Your World Newsprint Crayons Pencils (Non-mechanical) Scissors Glue 1-2 large sheets of Bristol board, markers for labelling Introduce topic of texture by showing students the sign created with the word texture, which letters are cut from various textured surfaces. Have them guess at the definition and find examples around the room. Read through p. 126 of Art in Your World. Discuss the ex�s on both 126 and 127. Studio Exercise: Have students explore textures in the room by taking 3 rubbings around the room using the side of their pencils. Have them label these with a texture type: bumpy, smooth, rough, etc. When they have this completed have them take 3 more with crayons to see the difference in media. Have them label these as well. Display student work in categories of textures � using their suggestions of texture types from their findings label different areas of Bristol board with types of texture. Have students glue their rubbings (1 or 2 each) in the appropriate area of the Bristol board. Display on bulletin board in the art room. #1 Drawing Unit: Mark Making (Grade Eight) Materials: Class sets of Discovering Canadian Art Bristol Board or equivalent (cut into eighths or other desirable size) Crayons, Pencils (Non-mechanical), leads and other desired drawing materials Scissors Glue Shapes for templates (for student use) Introduce topic of texture by showing students the sign created with the word texture, which letters are cut from various textured surfaces. Have them guess at the definition and find examples around the room. Read through p. 25 of Discovering Canadian Art. Mention the difference between pattern and texture. Show ex�s around the room � fabric will often have different patterns but will feel the same. Studio Exercise: Have students look through magazines and collect various textures (not patterns). A few large textures will be needed as a background for the landscape that they will create. Have them create a lower and upper texture for land and air. Use shapes (cookie cutters or other shapes, or freehand drawings) to outline areas onto cut textures. Using these, arrange on background textures and when satisfied with composition glue in place. Another method of creating shapes is to find a shape you like in a magazine (person, building, etc.) and double this up with a texture and cut both out at the same time. Illustrate this. Display student work on walls � have them put their own up when finished.
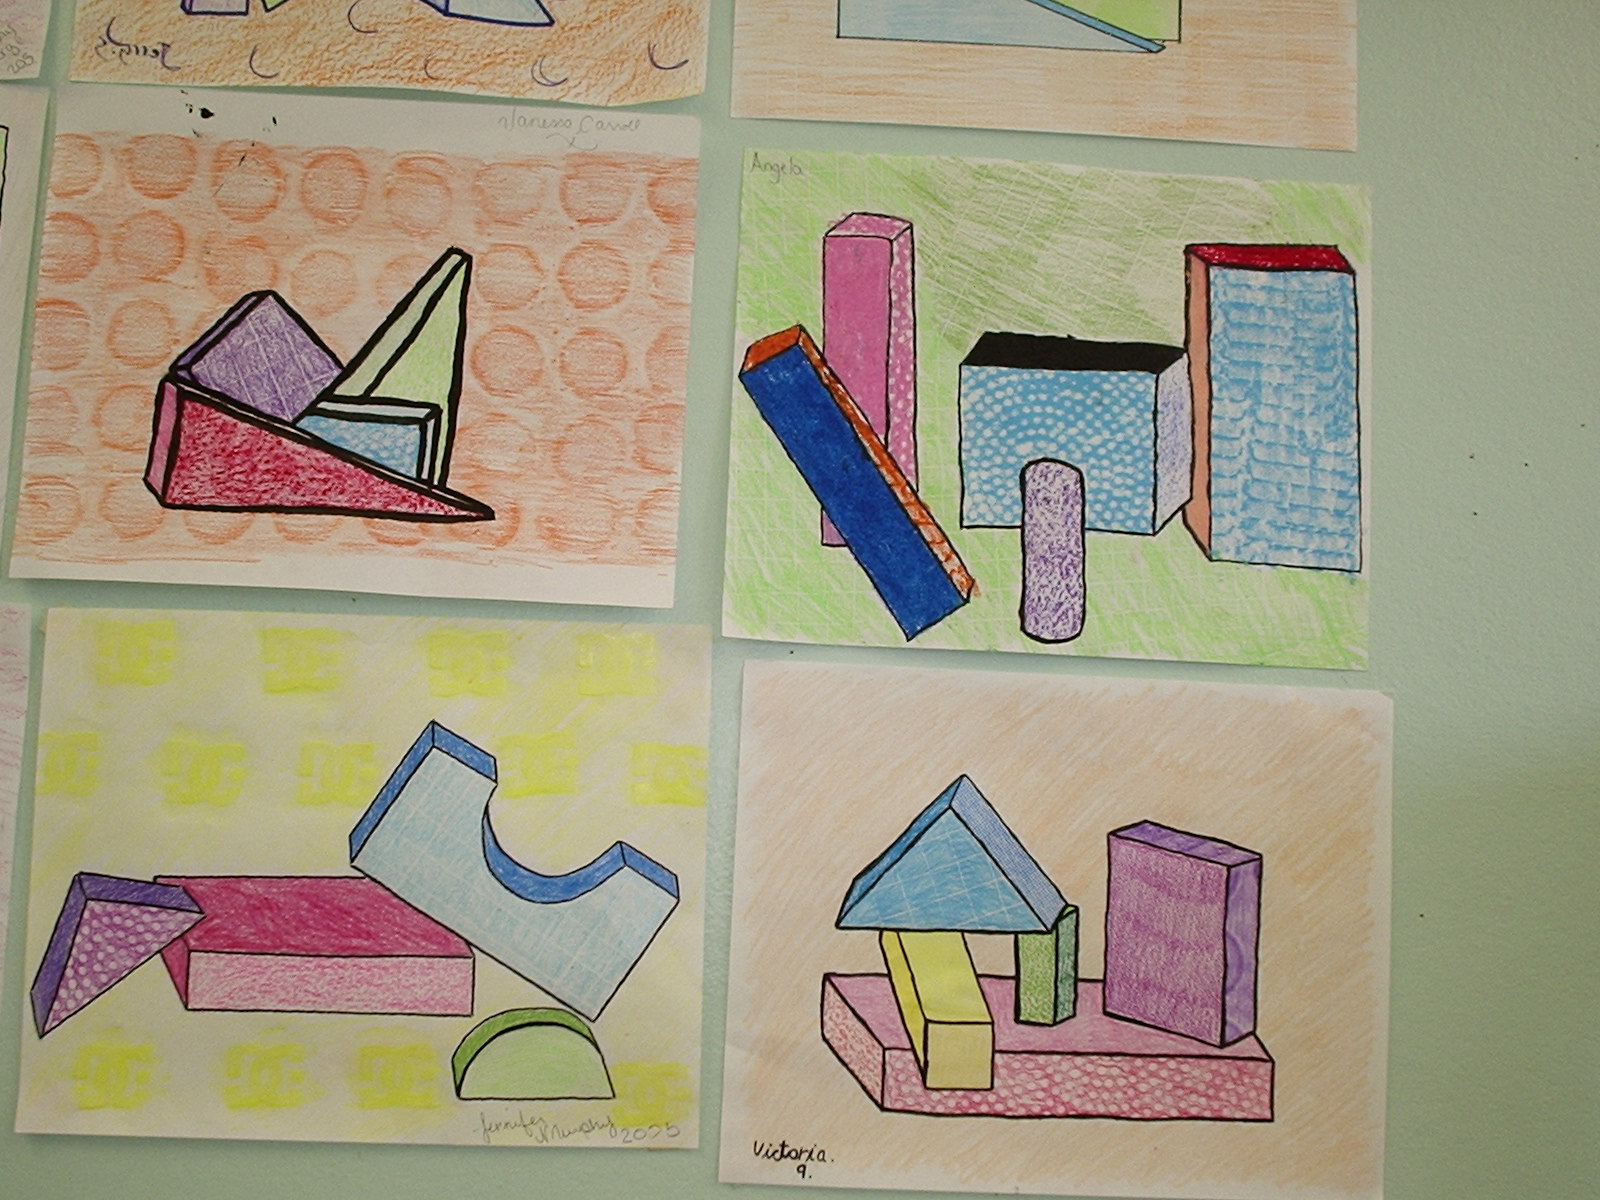
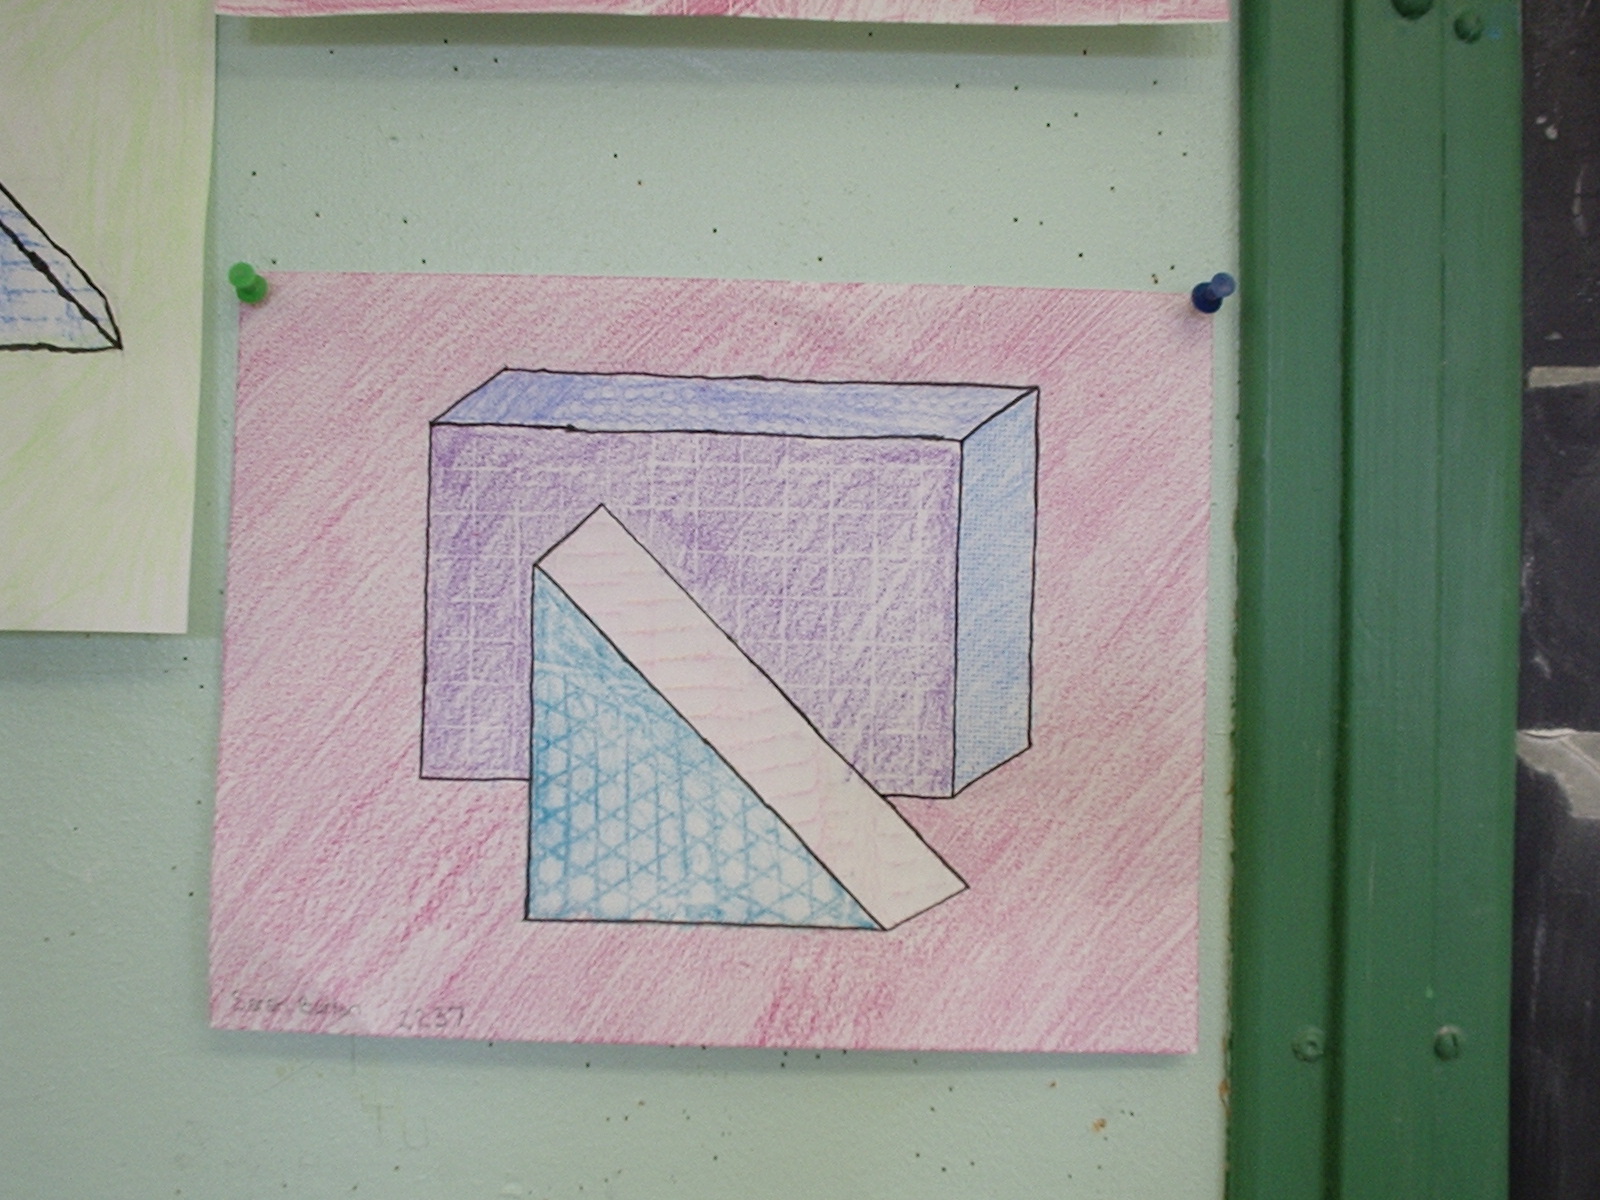
#1 Drawing Unit: Mark Making (Grade Nine) Materials: An overhead with definitions of texture and pattern and also images showing ex�s of each. Overheads of images showing texture Newsprint for practicing texture making White drawing paper for final still life drawing Crayons, Pencils (Non-mechanical), leads and other desired drawing materials Objects for a still life (wooden blocks, Styrofoam shapes or water cups?) Introduce topic of texture by showing students the definitions of real (discuss ex�s) and implied texture (discuss ex�s of Mary Pratt�s work) on the overhead. Highlight the difference between pattern and texture, using ex�s to reinforce the concept that all texture has pattern but not vice versa. First two ex�s have no texture � they are pure pattern. The fabric swatch has pattern (dark/light brown shapes) and texture (soft and bumpy surface). The bricks in the walkway show pattern (rectangular) while their texture is rough. The leopard close-up also exhibits pattern (spots) and texture (fur). The last image of the porcupine has a pointy/sharp texture while its pattern is one of criss-crossing lines. Studio Exercise: Show students an example of the final product (drawing of bottles in a still life) and explain the process through which this will be completed: Set up a simple 2-3-object still life. Students can turn to a table near-by and do this in groups of four or so. Have them create a drawing of outlines of shapes only on white drawing paper. Show them the example provided of this step. Once a drawing of outlines has been completed have them move back to their own table and use newsprint to practice achieving several different textures with different types of drawing materials. Textures can be achieved by taking rubbings from surfaces around the room, and also by experimenting with various mark-making gestures. Discuss the ex�s from 126 and 127 of Art in Your World on the overhead to see various created textures. When they�ve experimented and have a good choice of textures, tell them to begin filling in the shapes. Remind them that too many areas of texture will make the image too busy and that viewers need some areas of little to no texture to allow their eyes to rest (see ex of final product of this assignment, the grey areas left without texture in and around the bottles). Optional: After the outlines have been filled in with either texture or tone/colour have students finish this image by outlining the shapes with dark marker or ink. Display student work when finished. Here are some students' work:
|
|
|||||
|
Copyright 2003 Krista Simmons. All Rights Reserved. Created by FrontPage Templates Resources |