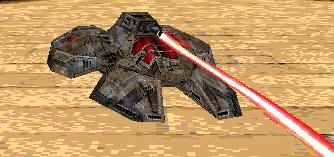
| Aspects of the Repair Beam |
| Healing Energy: First off, notice the first aid symbol at the top of your screen alongside the bar. The bar is precisely what is meant by "healing energy." The repair beam, besides damaging enemy units, can do what its name suggests and heal a friendly unit. At approximately 200 meters, this beam will begin healing a base unit, tank, or scout that is on your team. The only way to lose this ability besides going out of the healing range is losing all of the healing energy shown by quantity in the bar in the upper-right of the screen. To fill this up once more, simply use the beam on enemy units. The beam regenerates energy faster than it loses it from healing, but even stealing the healing energy is fairly slow. Just try to not get discouraged. Combat: As the secondary unit to the scout, it is recommended you use it when battling an enemy for one more edge on your opponent. One strategy, specifically used for regaining healing energy, is to remain hidden behind a hill and occasionally raise your altitude and suck the health from a close by enemy. This helps to gradually lower the player's hit points as well as gaining you more and more of the power to assist you team in keeping your units filled to the brim with health. The second main strategy that can be used is for close combat with a tank only. When engaging the tank, try and find the closest depression or rise in the terrain to him/her. The reason for this is the fact that a tank has an autocannon range of 550 meters while your chain gun (scout primary weapon) has a range of only 350 meters. Therefore, bursting out into the open or rushing the tank on flat terrain is highly dangerous and should never be suggested for a scout. All you will gain is your scout being torn apart. Now, when you get to this depression or rise, simply raise your altitude around 3/4 of the way up and then burst out upon your victim. It is always good to cover the initial distance towards the enemy tank with the repair beam for the damage you gain. With this foothold, you can begin using your chain gun at around 250 meters and cut in close with both weapons. Once close, try and limit your repair beam usage for the extra fuel you consume. |
 |
 |
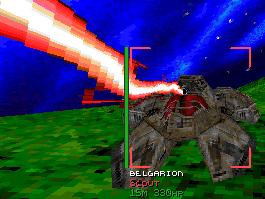
| Your main target... |
 |
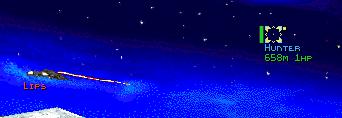
| Range: The repair beam, an extremely useful weapon equipped only on the scout. Technically, this beam has a range of 550 meters, and yet for more effectiveness and for the sake of saving fuel, it is suggested you don't use this until about 525-530 meters distance on an enemy unit. Though, if your target is a missile, 550 meters will be adequate to engage it with your repair beam. The reason for this is that the repair beam only does around two hit points in damage per hit when used at maximum distance. Now, please do not get the idea that the closer you get the more damaging the repair beam is, this is only effective from approximately 535-550 meters. The one hit point a missile of any type has therefore only takes two seconds to eliminate. It is always good to remember that the sooner a missile dies, the sooner you can place you mind on other matters. Plus, the two missiles you have to mainly worry about at a distance (the piercer and hunter missile) do quite a bit of damage to scouts. The general thing to remember is to eliminate the smaller things first. Once you get that down, remember to nail those missiles because one or two missile hits can, or rather, will be the end if your current scout. |
| To Main |
| The final strategy for your use is really what the scout is meant for. It is, of course, to support a tank or group of tanks on your team. The first way to do this is assistance in combat with an oncoming enemy tank. (Most scouts will not be suicidal enough to take on a scout and tank(s) if it can be avoided, so the following methods are based on tank versus scout combat.) Now, in your first few months or few hundred hours of scout piloting, I do not suggest you go out and engage the tank first. While you are still practicing to use your crosshairs and fight tank versus scout to win with your chain gun, allow your tank(s) to engage the enemy before you follow up and flank the enemy to add your impressive destructive force to the autocannon(s) on your team. Aside from the aspect of fighting, you can also present your teammate(s) with missile-free skies. If you have not already, visit the keymap assistance page and change your keymap to better assist your tank or tank group in eliminating the missile threats of thumpers, piercers, and hunters easily. The third main assistance you can offer is quite simply to heal a partner. After an engagement or a missile impact that has penetrated your hopefully attentive watch, offer your assistance by getting within 200 meters of the friendly tank and healing them. |
 |
| It is your choice, the repair beam can either be essential or a waste of space in combat... |