Animated Celestial Clock
Page 2
Change your FG & BG back to white.
Add a new layer and name it numbers.
Choose your font for your numbers. Try to make it a thick font. That shows up the best.
Place your numbers on your clock face. Use about size 14 or 16. Whatever you like.
To make your numbers show up really well, deselect. Selections<Select All<Selections Float and either apply a shiny gold blade pro preset or flood fill them with a shiny, gold gradient. You may even want to apply an inner bevel. Just experiment and see what looks best to you. This is what mine looks like, I filled mine with a gold gradient and applied an inner bevel & a slight drop shadow to make it show up more.
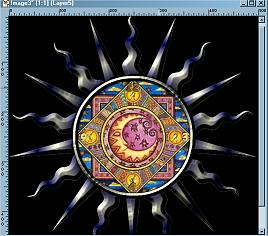
Yours will be easier to see. I've resized my clock a lot to save on download time.
Choose your presets shapes option and use Arrow1, line width on about 4 or 5. Make sure you have vector checked in case you need to make any adjustments to get it just right.
Now draw your hour hand. Remember it needs to be kinda long. Put it wherever you want to. It doesn't matter what time it is <G>.
When you have it where you want it, convert to raster layer and rename this layer "hour hand".
Selections<Select All<Float and apply whatever colors and setting that you used for your numbers.
Now do the same for your minute hand. Just make it a little shorter than your hour hand.
Don't forget to apply your gradient or blade pro preset or whatever you've been using for your numbers and the other clock hand.
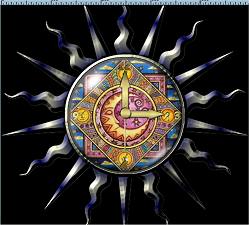
Here's what I have so far:

Now we need to add a second hand, this is what we're going to animate.
Add a new layer and name it second hand.
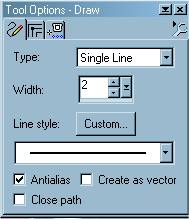
Choose your draw tool. Make sure FG & BG are still white and use these settings:
Hold down your shift button so your line will be straight and draw your second hand.
Selections<Select All<Selections Float and apply the same gradient or blade pro present that you have been using for your other hands and numbers.
Click on your layer pallette and drag your second hand layer beneath your other two hand layers.
Now we need to add a little ball to cover where our clock hands join at.
Choose your preset shapes option and select the elipse, vector checked and make a little circle right in the center of your clock.
When you get it like you want it, convert it to a raster layer.
Selections<Select All<Selections Float and either flood fill it with your gradient or apply your blade pro preset just like we did with the numbers and the clock hands.
Rename this layer "Ball" and drag this layer to the top of the list in your layers pallette if it's not already there.
Now to add the glass cover to our clock.
Add a new layer and name it "glass".
Go to Selections<Load from Alpha Channel and choose your face selection.
Open the glass tube in another window and click on Selections<Select All and copy.
Now go back to your clock image and past into selection. You should have something like this:
OK, now you have your clock.
You can merge all layers and save it as a Jpeg and add a border or whatever you'd like.
A little hint though. If you'd like to save it so you can change the image in the middle, merge all of your layers except the one with your image and save it as a PSP image. That way if you want to change your image, all you have to do it copy and paste into the selection and Viola.... a whole new look!
If you want your background something other than black, just flood fill that layer with your background pattern or some other color.
If you choose not to animate it, you can also save it as a transparent gif. It's your choice.
<S>.
Now if you'd like to continue on to the animation section, lets go on over to page 3.
(Animation Shop)
This tutorial was written by Tina of ©KreationzByTina (2000-2002)