 |
|
|
|
|
|
|
|
|
|
|
|
|
|
|
|
|
|
|
|
|
|
|
|
|
|
|
|
|
|
|
|
|
Construction of the Magnum
Final Assembly and Burn In |
|
|
|
 |
|
|
|
 |
|
|
|
|
|
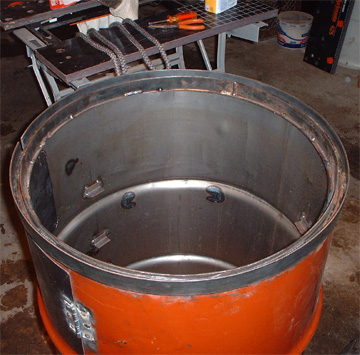
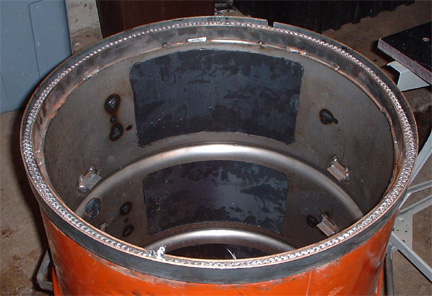
These pictures show the bottom/mating flanges on the cooking section upside-down. I was in the process of cleaning up the welds and wiping out any debris/solvent/oil with acetone in preparation for installing the wood stove gasket. I memory serves (and don't hold me to this) I bought a 5/8 inch wood stove door gasket and it fit like a dream. The picture on the right shows the gasket test fit in place and trimmed for length. I only had to cut off about 4" from the gasket to make it the right length. You can also see the bottom side of the cooking rack brackets welded to the inside of the cooking section. In order to allow the extra 2 shelves to tilt into place, we used a stepped bracket design that only extends about 1/2" under the rack edges. The bracket has a small piece of 3/8" square bar stock welded to the top to keep the racks centered in the cooker and ensuring that the racks won't fall off the bracket. |
|
|
|
 |
|
|
|
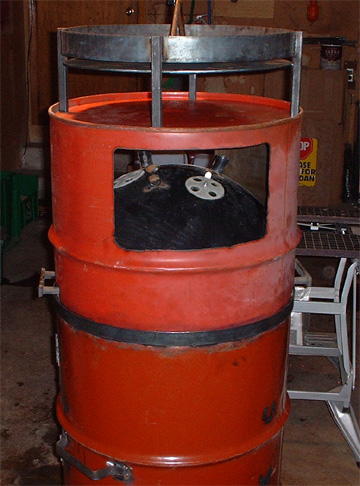
Ok, you're probably asking, "what in the....." This is what I did to ensure the wood stove gasket was seated properly after I had applied the adhesive and installed the gasket. I turned the bottom section of the cooker upside down and set it in place (not really HEAVY but some weight involved) and then put the heat baffle/water pan/drip pan on top to add a little more weight (it's quite heavy.) |
|
|
|
 |
|
|
|
 |
|
|
|
|
|
 |
|
|
|
|
|
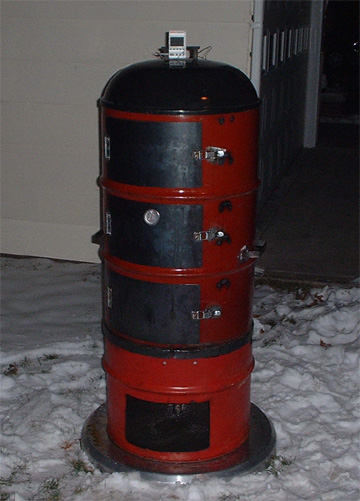
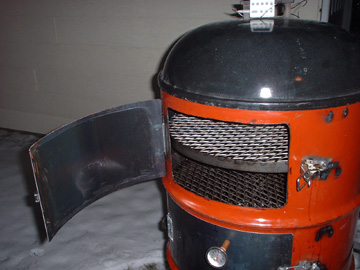
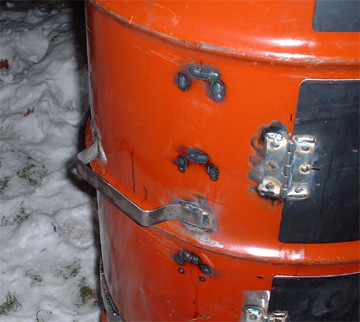
Here are a few pictures taken during the burn in/seasoning of my new magnum cooker. I used about 5 lbs of Kingsford and had a nice 250 degree cooker for 4 hours before the temp started to taper off some. I started with the door temp measuring 225 but the probe therm in the lid was reading in the 190's so I ran the door temp up to 250 and the lid got up to 225 to 230..... this was something that would be a problem in my first couple of cooks due to the lower outside temps but after building the 'Magnum Hut' insulation box to put over the cooker I didn't have any more trouble with cooking temps. The picture on the top right shows the top door of the cooker open, this reveals the middle cooking shelf and the top auxilary cooking shelf. The bottom right picture shows the simple fabricated steel handle on one side of the cooker. The handles are very much necessary to make assemling the cooker reasonable. With the baffle/drip pan inside the cooking chamber, it almost takes 2 to get that bad boy on.
My magnum was now ready for it's first cook which was good as the next day was the scheduled maiden voyage! As my friend Stan in Maryland (Stan in Md on the BBQ forum) said, "you're pretty brave to put a full load of brisket flats in a brand new cooker" well, I'm not sure if it was brave, confident or just plain stupid but my first cook went very well. I cooked 101.5 lbs of brisket flats in 2 groups, the first was 12 flats using all 5 cooking racks and the second was 8 flats and an injected venison loin. I started the first batch at 6 am and they were off the cooker by the time the 20 lbs of charcoal had burned away. After going to my son's varsity basketball game, I dumped the ashes, emptied the drip pan and restarted the cooker. I put the second batch of meat in the cooker at around midnight. This meat was for a Scout Leaders' awards banquet, we server the brisket along with 70 lbs of injected-fried turkey breasts, tossed green salad, mashed party potatoes and green beans to 185 attendees and about 25 helpers (Scouts and Troop Leaders from my Scout Troop.) By far, my biggest event and a HUGE success. |
|
|
|
Cooking on the Magnum |
|
|
|
Engineering Sketches of the Magnum |
|
|
|
Back to KJ's BBQ Page |
|
|
|
Use of the information and pictures on this page is strictly prohibited without the express written consent of the Webmaster. |
|
|
|
email the WEBMASTER (and all around great guy!) |
|