 |
|
|
|
|
|
|
|
|
|
|
|
|
|
|
|
|
|
|
|
|
|
|
|
|
|
|
|
|
|
|
|
|
|
|
|
|
|
|
Construction of the Magnum |
|
|
|
 |
|
|
|
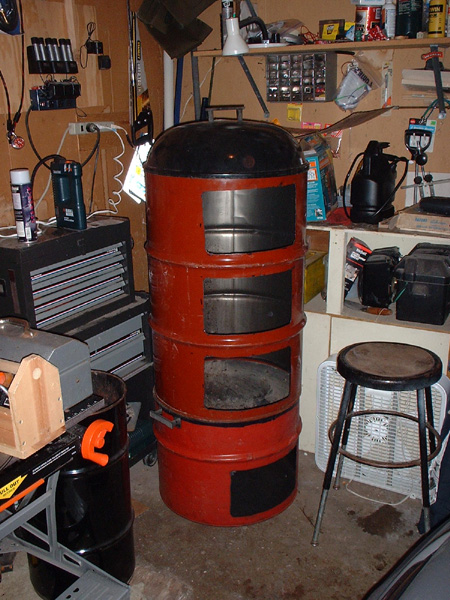
This picture shows the main components of the magnum after Day 1 of the build (prior to the start of the fabrication of the internal components.) The barrels have been cut and the salvage yard Weber kettle is in place here. The bottom barrel was cut off by setting the barrel on a surface plate and scribing a line around at the predetermined height. I then used a hand held plasma cutter to cut close to the line, a little noisy work with a 4" angle grinder at home dressed the top edge to the line. I also marked and free handed the notches for the kettle handles. I cut the doors slighly larger than the instructions by mikey, I made a cardboard template to help cut the opening 8" tall by 14" wide. I simply taped this template down where I wanted a window and buzzed the plasma torch around the inside of the template. Another minor departure from mikey's plans, I decided to fabricate my cooker doors from new steel and used the same template to cut 2 windows in the base (as opposed to 3 windows, the scrap which he used to make his doors.) Luckily for me, the kettle grill cover fit like a glove (possibly just a bit tight but nothing a touch up with the angle grinder won't take care of.) |
|
|
|
On to Day(well Night) 2 of the Build |
|
|
|
 |
|
|
|
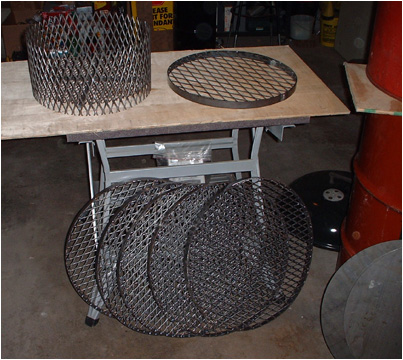
This is a picture of the majority of the fabricated steel components. I fabricated an expanded steel charcoal basket using #9 x 3/4 expanded steel for the walls and a finer expanded steel (I don't know exactly what size) for the floor. Because this finer expanded seemed a little more flimsy than the #9 x 3/4, I added the cross bracing under the mesh to keep the basket bottom from drooping. The basket bottom is mounted 1-1/2" from the bottom of the basket wall allowing a littte more space for ash fall during a cook. You can also see the 5 cooking grates in this picture, these are #9 x 3/4 expanded steel with a 12 gage by 1" wide band around the outside. |
|
|
|
 |
|
|
|
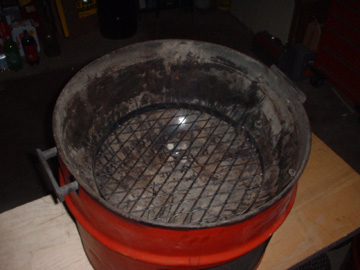
Here is the base of the cooker, this is the bottom/partial barrel with the bottom of the kettle grill fitted inside. At left you can see the coal basket rack sitting in position (flange up, expanded down for maximum head room.) Below you can see the charcoal basket installed on top of the baseket rack. This basket was designed to be as large as possible for maximum cook time capability. |
|
|
|
|
|
 |
|
|
|
 |
|
|
|
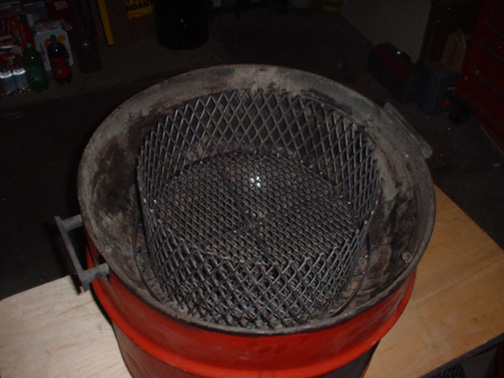
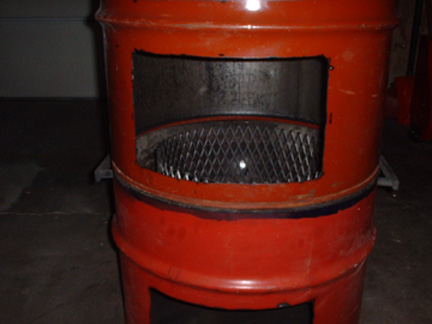
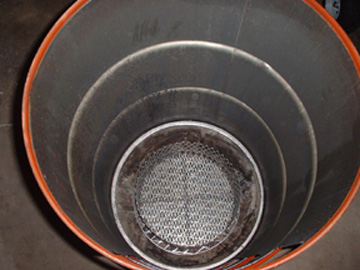
These 2 views show the coal basket inside the cooker looking through the fire door and also down through the top of the cooking chamber. |
|
|
|
|
|
 |
|
|
|
On to Day (ok Night again) 3 of the Build |
|
|
|
Cooking on the Magnum |
|
|
|
Engineering Sketches of the Magnum |
|
|
|
Back to KJ's BBQ Page |
|
|
|
Use of the information and pictures on this page is strictly prohibited without the express written consent of the Webmaster. |
|
|
|
email the WEBMASTER (and all around great guy!) |
|