 |
|
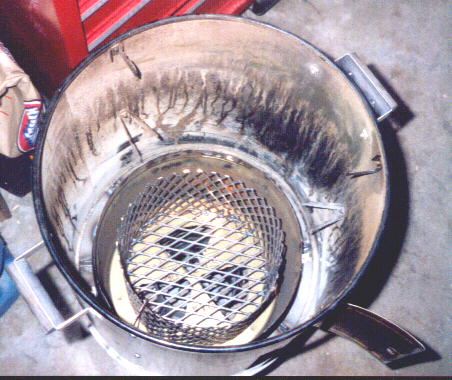 |
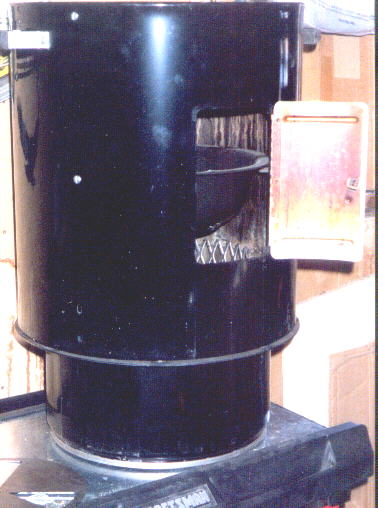
| This picture and the next were taken before the unit was complete but when it was far enough along to assemble to check for fit up. The first picture is looking "down the barrel" of the unit, the firebox wall and coal basket are visible at the bottom of the cooking chamber. You can also see the large vent holes in the floor of the firebox (these are intentionally large to allow ash fall removal by over rotating the damper.) |
| This picture shows the relationship of the water pan to the top of the coal basket through the open access door. Because the fire box is designed so that the entire cooking chamber may be lifted off to replentish coals and smoke wood when needed, the access door will only be used to refill the water pan and to check the level of coals in the coal basket. This is also a fairly good view of how the cooking chamber sits atop the support ring attached to the fire box. |
 |
| Construction of the Super ECB |
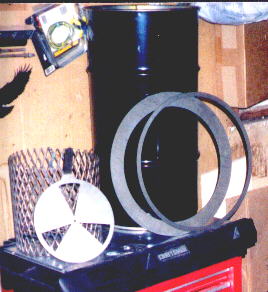 |
| Here are the pieces ready for the start of construction. The 2 large steel rings are the cooking chamber support ring (the wide one, made of .135" thick steel) and the lid seal ring (made of .078" thick steel.) The 18 gallon drum was eventually cut off approximately 11-1/2" from the bottom with a plasma cutter as well as having the bottom cut out leaving about a 2" flange around it's circumference. A .135" think steel plate was cut to fit the bottom of the drum from the "slug" out of the chamber support ring. This plate also had the vent holes cut with the plasma cutter. The first iteration damper (CNC laser cut) is shown leaning on the coal basket which was fabricated by hand from expanded steel. |
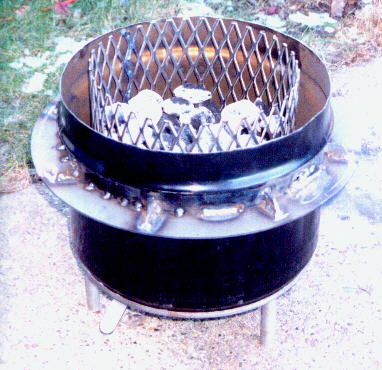
| This is the "maiden voyage." I filled the basket half full of unlit Kingsford and then dumped 20 hot briquets on top. I then made the mistake of letting the unlit charcoal get too hot before assembling the cooking chamber and water pan. With the initial design and the mistake with the assembly procedure, I had trouble keeping the top grate temperature below 350. I decided to attribute this to the air leaks around the bottom of the cooking chamber (where it rests on the support ring) and the fact that my .078" damper ended up looking like an umbrella from the heat. I went to work getting a thicker damper cut out as well as looking for a way to seal the gap between the cooking chamber and the support ring. |
| Use of the information and pictures on this page is strictly prohibited without the express written consent of the Webmaster. |
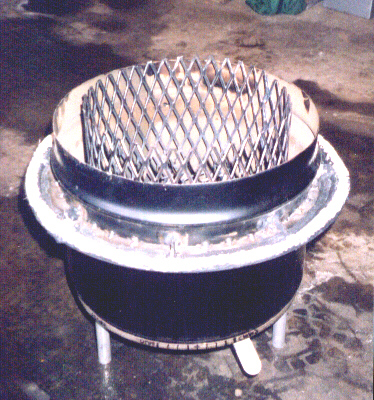 |
| Here you can see the addition of the wood stove door seal gasket material for the body of the cooker to sit on. By adding this gasket (and putting the screws back in the old unused leg mounting holes) I was able to control my cooking temperature down to about 250. I still have a few areas that might be seeping air that I plan on closing off with the same 3000 degree adhesive that was used with the gasket. If you look closely, you can see my crude damper calibration along the bottom edge of the firebox (permanent magic marker) These marks work pretty well for damper adjustment without laying on the ground to check the opening! |