|
ROTATING A GRADIENT
IN PI 11
Making the Tile
You will need Mura's Seamless Plug-in
filter E
HERE
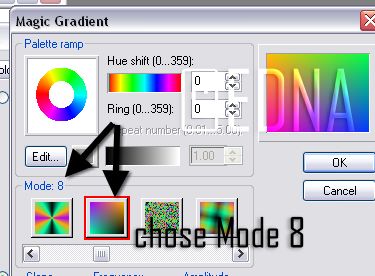
1. Open a new image 100 x 100, goto: Edit/Fill and choose a
multi-coloured gradient.
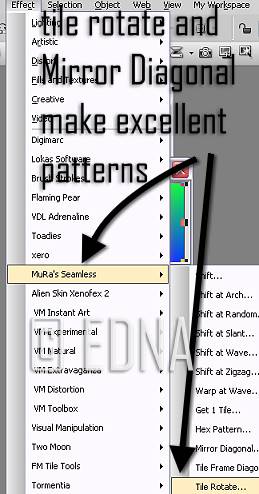
2. Goto: Effects Mura's Seamless/Tile Rotate and accept
defaults and click ok
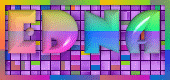
3. What you should have is this

Make a new folder and name it something like Tiles for PI (or
whatever you like) and save the newly made tile as a jpg to
that folder (do
not save as a gif as you will get the error message This operation can
only be applied to 24 bit true colour images)
. OK, now we are
ready to move on the making our tag.
MAKING THE TAG
TIP:
If you would like more spacing
between your letters you can either do Split text after you have typed your name
or you can click on the base, put a tick in the Kerning box and add 3 (I find this enough most
times) before you type, then click on the base again and type your name.
-
Open a new image 170 x 80 (good forum size sig tag) and fill
with white.
-
Grab your text tool and choose a font and type your name, make
it 3D. At this stage we will leave adding the shadow until last.
-
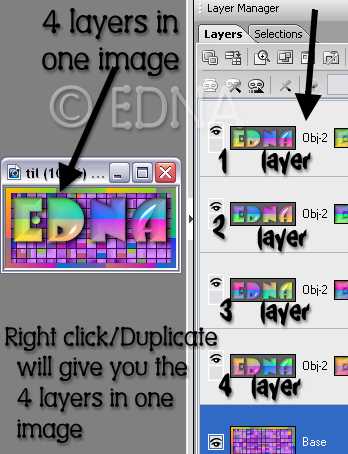
Highlight your name layer Right Click/Duplicate your name
do this 3 times, making a total of 4 name layers,
(Do not do
Ctrl D as this will give you 4 separate images) What I have
is 4 names in the one image.
This is what my image layer
looks like in PI 11
-
Highlight one of your name layers then right-click/select all objects, then close the eye to hide all
layers.
-
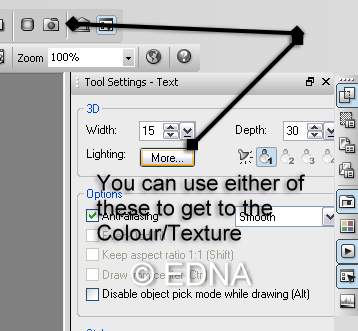
Click on the bottom layer, highlight it and open the eye.
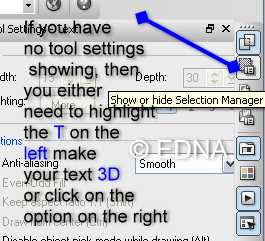
(At this stage you should still have your T (text)
tool highlight on the left.) Goto:
More on the Text Tool Settings Palette on the right hand side.
6. Click on the
Colour/Texture and then click on the open folder and navigate to where you
have saved your tile, click OK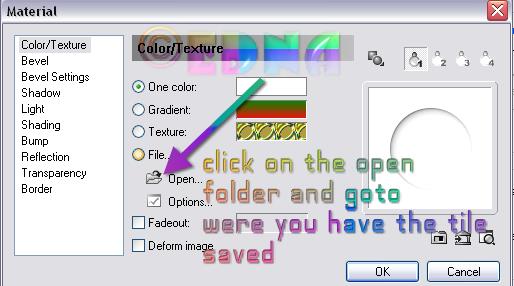
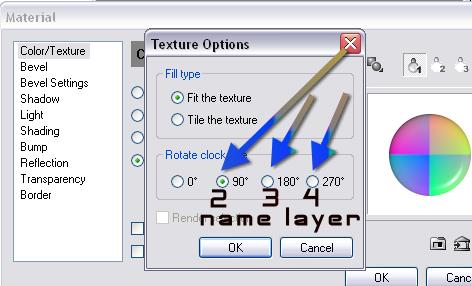
Repeat step 6. for the 3rd and 4th name layer using 180 for
your 3rd name layer and 270 for your 4th name layer.
-
Make you background, give your name layers a shadow.
-
Highlight a name layer Right Click/Select all objects. Click on
the eye, as all your layers are highlighted this will hide all layers, the only
image that will be showing is the base image.
(The reason for this
is, so that you don't have to do it in GA (Gif Animator)) Save as a
UFO file.
In GA5 it is the same steps as in the Adding a Sparkle
tut HERE from
Step
7.
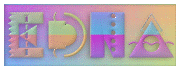
These are examples of what you can do with this
method


Hope you enjoyed making yourself some new tags
for your group.
Thank you for trying my tutorial
Please feel free to print
this tutorial
out for your own personal use, but do not copy it in any way to
put on-line, pass out, or
re-write and claim as your own
Any resemblance to any other
tutorial like this is purely coincidental
and not intentional.
This tutorial was written
on the 26th December 2006 and is therefore
Website and web set Design
by and
© to Edna Munn
MENU
|