|
ADDING A SPARKLE STAR
IN
PHOTOIMPACT 11
Part one

Sparkle Star Supplies
are HERE Some Christmas fonts
HERE
Step 1.
Make you background in PI, ( I used 350x200)
adding any borders or other effects that you like.
Step 2.
Choose a Christmas font that has a Christmas
tree, size the text to 200. I have chosen 2 Peas Let it Snow, Which is a pay4
but there are a lot of free fonts out there that have just as nice trees.
Step 3.
Duplicate your tree to the number of times you
want the colour to change.
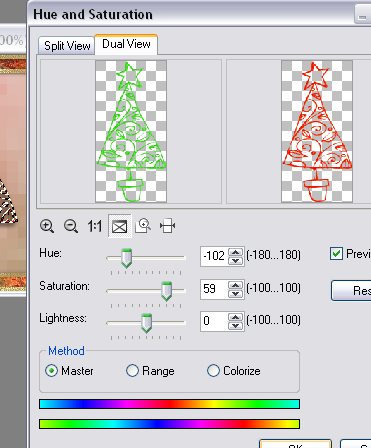
Step 4.
Goto: Photo/Color/Hue and Saturation and give each
duplicated tree a different colour by using the settings in the screenshot. To
get different colours just move the top slider and leave Saturation at 59 and
Lightness at 0.
Step 5.
Write you greeting (I wrote Merry Christmas)
on your sig tag, make sure that you are happy with the font, your shadow and the
colour you have chosen, only then
do you duplicate your greetings text and change it to a different
colour. The colour that you change it to is up to you. I usually use a gradient.
IMPORTANT
Make sure your greetings text has the same shadow!!!
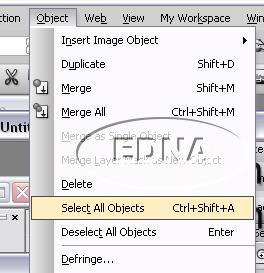
Step 6.
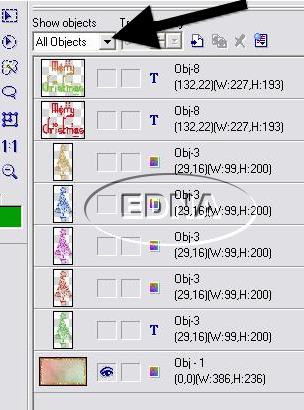
Goto: Object/Select all objects in the drop down
menu
Your Layer Manager should now look like this
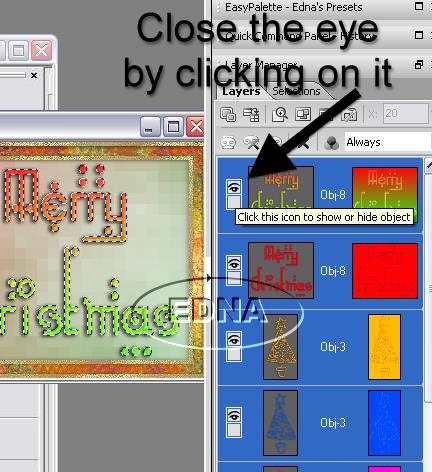
Click on the eye and hide all layers, the
only image that will be showing is the base image.
(The reason for this is, so that you
don't have to do it in GA (Gif Animator)) Save as a UFO file.
Step 7.
Open GA and open your UFO file. This will give
you one frame with the background base image.
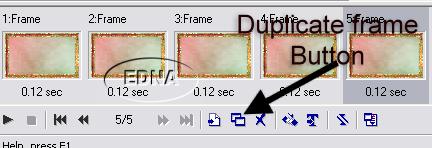
I have 5 trees so I will add 5 frames,
you will notice that the background
image is on all 5 frames
Make sure that your Object Manager is open and
that All Objects is showing in the Show objects drop down list.
Step 8.
In the Object Layer Manager in GA, open the eye on one tree and the text colour you
would like on the first frame.
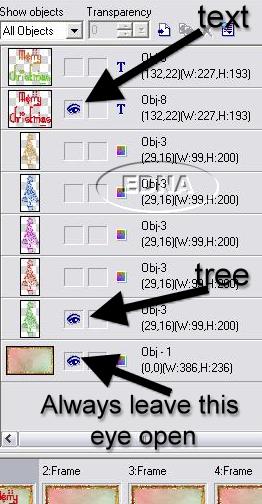
Then click and highlight frame 2 and open the eye on the
next tree up, and text that you want showing.
Click and highlight frame 3, opening the eye and
text you want.
Repeat this step as you click and highlight each
frame, until you are satisfied, that you like the way it looks and are
happy with the speed that it runs at, this is
also important.
Adding the star
sparkle
PART TWO
Website and web set Design
by and
© to Edna Munn
|