Speed: 32.4kph (3MP)
Max. Speed: 54kph (5MP)
Jump: 90m (3MP)
Heat Sinks: 16
Op. Range: 100km
Wp. Range: 640m
Tech Base: 2575
Class: Assault
Armor: 17 tons
Engine: Vlar 300
Role: Spearhead
2nd Role: Fire Support
| |
Name: HERC-2 Heracles Speed: 32.4kph (3MP) Max. Speed: 54kph (5MP) Jump: 90m (3MP) Heat Sinks: 16 Op. Range: 100km Wp. Range: 640m |
Weight: 100 tons Tech Base: 2575 Class: Assault Armor: 17 tons Engine: Vlar 300 Role: Spearhead 2nd Role: Fire Support |
Although the Ishitandai Urban Defender was not well suited to battlefield opperations, it proved to be an effective Atlas killer. Many pilots would back off and allow the two giants to slug it out. The UDM-1A's superior long-range firepower far outweighed the Atlas' slightly better speed. The jump jets on the Urban Defender gave it excellent maneuverability and made it a harder target. Many Atlas pilots were surprised that the equally huge Urban Defender could fly.
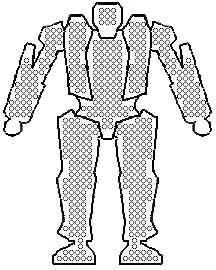
Following the mission-specific design plan, Ishitandai MechWyrks created the Heracles, borrowing the name of a mythical hero who was as strong as the titan Atlas and easily outwitted him. The Heracles was designed to be as fast and tough as the Atlas but still keep the jump advantage. The long-range capabilities of the Atlas were more than doubled in the Heracles. This would give a Heracles pilot a chance to devastate an Atlas before it came close enough to use its massive autocannon. If on the off chance an Atlas did close, and it's autocannon was still intact, the Heracles could unleash 4 lasers to finish the job.
Although not as vulnerable to long-range 'mechs like the Catapult, the Heracles did have problems. An overzealous (or fearful) pilot could overheat the 'mech by firing the missiles and the lasers at the same time. At extreme range, lasers can miss the target resulting in no damage to the enemy and a surplus of heat making it even harder to aim. Experienced pilots would fire one LRM and one laser at once to avoid heat build up and allow the other weapons to recharge. Others would empty their missile racks into the enemy, using laser to finish him off as range closed. With careful heat management, a Heracles could cripple an Atlas at a distance but still give chase if it ran.
| Weapons Inventory | Armor | |||||||||||||||||||||
| 2 | LRM20 | 12 rds ea | HEAD | |||||||||||||||||||
| 2 | LL | 9 | ||||||||||||||||||||
| 2 | ML | FLT | FCT | FRT | ||||||||||||||||||
| 30 | 48 | 30 | ||||||||||||||||||||
| RLT | RCT | RRT | ||||||||||||||||||||
| 10 | 11 | 10 | ||||||||||||||||||||
| LA | RA | |||||||||||||||||||||
| 29 | 29 | |||||||||||||||||||||
| LL | RL | |||||||||||||||||||||
| 33 | 33 | |||||||||||||||||||||
| Critical Hit Table | ||||||||
Left Arm |
Head |
Right Arm |
||||||
| 1 | Shoulder | 1 | Life Support | 1 | Shoulder | |||
| 2 | Upper Arm Actuator | 2 | Sensors | 2 | Upper Arm Actuator | |||
| 1-3 | 3 | Lower Arm Actuator | 3 | Cockpit | 1-3 | 3 | Lower Arm Actuator | |
| 4 | Hand Actuator | 4 | HS | 4 | Hand Actuator | |||
| 5 | 5 | Sensors | 5 | |||||
| 6 | 6 | Life Support | 6 | |||||
Left Torso |
Center Torso |
Right Torso |
||||||
| 1 | LRM20 | 1 | Engine | 1 | LRM20 | |||
| 2 | LRM20 | 2 | Engine | 2 | LRM20 | |||
| 1-3 | 3 | LRM20 | 1-3 | 3 | Engine | 1-3 | 3 | LRM20 |
| 4 | LRM20 | 4 | Gyro | 4 | LRM20 | |||
| 5 | LRM20 | 5 | Gyro | 5 | LRM20 | |||
| 6 | LRM20 Ammo | 6 | Gyro | 6 | LRM20 Ammo | |||
| 1 | LRM20 Ammo | 1 | Gyro | 1 | LRM20 Ammo | |||
| 2 | LL | 2 | Engine | 2 | LL | |||
| 4-6 | 3 | LL | 4-6 | 3 | Engine | 4-6 | 3 | LL |
| 4 | LL | 4 | Engine | 4 | LL | |||
| 5 | LL | 5 | HS | 5 | LL | |||
| 6 | ML | 6 | Jump Jet | 6 | ML | |||
Left Leg |
Right Leg |
|||||||
| 1 | Hip | 1 | Hip | |||||
| 2 | Upper Leg Actuator | 2 | Upper Leg Actuator | |||||
| 3 | Lower Leg Actuator | 3 | Lower Leg Actuator | |||||
| 4 | Foot Actuator | 4 | Foot Actuator | |||||
| 5 | Jump Jet | 5 | Jump Jet | |||||
| 6 | HS | 6 | HS |
This mech was designed by Jason Caesar.
![]() to the NSDA Main Hall (frames)
to the NSDA Main Hall (frames)
Copyright © 1997-2001 by Koichi Ishitandai, Kioshi Ishitandai, and Jason Caesar. All rights reserved.