Framing Tutorial
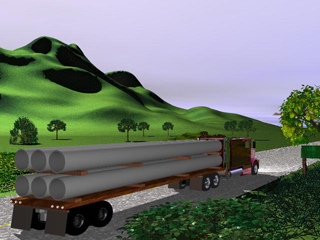
Are you looking to give your art wallpapers that extra touch of class? Perhaps trying to show that it really is "done?" A simple frame or border around your work can give it that extra touch and help improve the contrast from the rest of the screen at DA. Here's a quick and easy way to build one using Photoshop, and you'll be able to use the file you create to easily frame other works you may have or create in the future. We'll start out using a rendered picture that's ready to be posted, i.e., all post-processing, color correction, etc. has been performed.
Step 1. Selection and Trimming
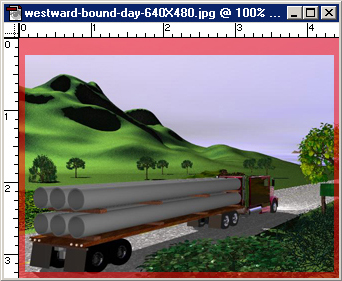
The first thing we'll do is trim the picture down to give us some screen space for the border. While this may sound odd, as in, why didn't we just render to the size we need?, we'll do it this way because you may want different border sizes than the ones used here. This method will allow you to make your borders your size without a problem. For this example, we will be working with a 1024X768 resolution monitor. Simply adding a border would put the border outside the monitor's borders, or squash the picture unnaturally if it was mashed down to fit. We will also assume that you have rendered your image to the same size as your monitor, 1024X768 in this case. After loading your picture into Photoshop, select the square selection tool, on the top of the tool bar, and make a selection around your piece, of the general area that you want to be seen inside the borders.
Once you have the amount you want to keep selected on all sides, go up to the Select menu and look for the Inverse command. This will take what you have selected, deselect it, and select everything you didn't select. Confused yet? Take a look below.
If you don't catch everything the first pass, don't worry. Holding down the Shift key and drawing another selection outside your current one will ADD to your selection.
If you select too much, hold down the Alt key and drawing another selection inside your current one will Subtract from your selection.
Note that we are not using the cropping tool. It would shrink the canvas size to match the picture after it deleted what you didn't select. This way we don't have to worry about resizing issues!
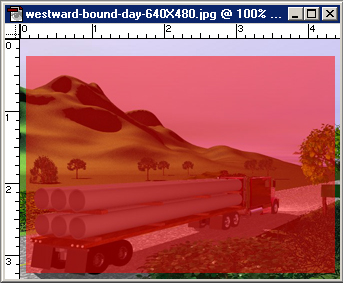
Everything you can clearly see was selected, while the red area was not selected.
Hit Select >Inverse and you get...
Before we go any further, we need to make sure we have the proper background color set. Over on the tool bar you will see two boxes that overlap.
![]()
These are the boxes.
The red one is your Foreground color box. The blue one is your Background color box. The arrows cause the two to switch places. The black and white squares in the lower left are the Default switch. Click the Default switch to cause your colored boxes to become black and white.
![]()
It will look like this.
![]()
This is the way it should look.
Setting the background to black will allow us to clear the unwanted art where we are putting the border, and draw the frame at the same time! If you want another color for your frame, you should click in the Background box. A colored box will pop up and you can choose which color you want from that. Use the rainbow tower in the center of the pop up box to choose an approximate color, and then click in the main color box to choose the specific color you want. Then hit OK and you'll be returned to the main screen and ready to continue.
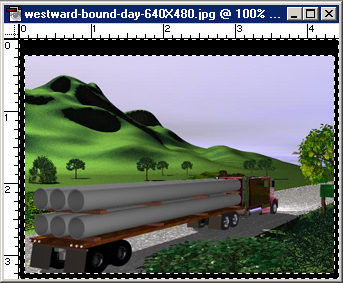
Now that we have everything selected and our border color chosen, hit the Delete Key. This will erase everything that is selected to your background color, or to the transparent background if you selected that when you set up your new file in Photoshop.

Step 2. Modifying The Border
Now we have our border. Just to make it look a little smoother, though, we're going to add a small amount of blurring to the edges, which will make the background blend onto the picture just a little.
Then hit Select >Inverse to return your selection to its original area, which is everything inside the border.
Once this is done, go back to the Select menu (we're going there an awful lot, aren't we?) and this time around, we'll go down to the Modify submenu, which should flyout and present you with a few more options. These all control size and functional properties of selections. The one we want is the Contract option. Click it to bring up the Contract option box.
This simple box has only one option, where you put in a number. Bear in mind that whatever number you choose, Photoshop will take half of that number off every side of the square selection.
Contracting four pixels means two pixels come off the top, and two pixels come off the bottom, resulting in a total contraction of four pixels, top to bottom. The same is true for the sides.
After you've accomplished this, once again we're going to go to the Select menu and hit the Inverse command. This will reselect the border and the four pixels we contracted. Now we get to go to a different menu. (Yay!)
Go up and click on the Filter menu and go to the Blur submenu. Find and click on the Motion Blur option. This will bring up the Motion Blur option box. We'll start off with a tilt of ninety degrees and a blur distance of ten pixels.
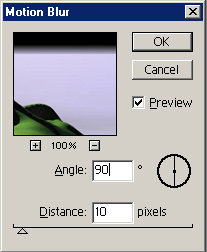
The Angle box is the angle that the blur will be executed on. For this one we will use a straight up and down blur. Type the number 90 into the box to get a straight up and down angle. You can also click and drag the wheel to change your angle.
The Distance box and slider control how far the computer tries to stretch the pixels that are selected. In this case, it tries to stretch each selected pixel to a location 10 pixels away. That means that part of the black background blurs onto the picture, and vice versa. You can click and drag the preview picture around to see how the effect looks.
Depending on the size of your image and border, you may need to use a higher or lower number. Higher numbers will give a gentler fade from the picture into the border, and smaller numbers will give you a faster fade.
After you have like the effect you're getting, hit the OK button and you'll be returned to the main screen. Now we get to do it all over! Again, head back to the Filter menu, Blur submenu, and Motion Blur screen. This time though, we'll enter an Angle value of zero. This will allow us to blur the sides, which didn't show the effect last time since the blur was along their axis. You'll notice that Photoshop remembers your previous values, so you shouldn't have to change anything else, unless you want to. Again, hit the OK button to return to the main screen.
That's all there is to the border, the next step is to add a title! Let's go!