Last week I placed an order with Brownell's for some custom parts, and they showed up promptly a few days later.
124-152-100 1911 AUTO BEAVERTAIL GRIP SAFETY, BLUE
This is the Les Baer beavertail, which is pretty much a required item on all my 1911's. Of course this means I'll have to replace the spur hammer as well.
584-300-451 MGW221 COMBAT HAMMER
I like the ring-style Commander hammers, so I decided to try the MGW hammer.
296-060-200 EGW 60 DEGREE .200 FIBER OPTIC SIGHT
The fiber optic sights sold by Dawson Precision and others seem to be really helpful for speed shooting. This one comes with two light fibers, green and red. It also requires milling a dovetail in the front of the slide, which required ordering the
080-621-300 DOVETAIL CUTTER .300 x 60 DEGREES
This one should be slightly undersized, which will require two passes to cut the dovetail to the proper width.
601-027-124 MK20010 MK II REAR SIGHT, TARGET
I wanted a black, serrated target sight that wouldn't distract the eye from the high contrast front sight blade. I also wanted one that wouldn't require drastic milling operations on the slide. The Millett MkII sight fits in the factory dovetail and overhangs the rear of the slide a bit. It has two lock screws that lock the sight into the dovetail.
There were also a few minor replacement parts in this order. I didn't feel comfortable with the quality of the ones in the Sarco kit.
965-011-190 R19 HAMMER STRUT
965-011-330 R33A PLUNGER SPRING ASSEMBLY BLUE (Sarco spring was too soft)
969-262-200 26220 20# HAMMER SPRING (factory weight is 23#, the 20# should help improve the trigger a bit)
With shipping, the list totals over $130. This is further proof that building up a custom 1911 can get expensive quickly. But at least I can remove all the parts and reuse them on other 1911's in the future, if I want.
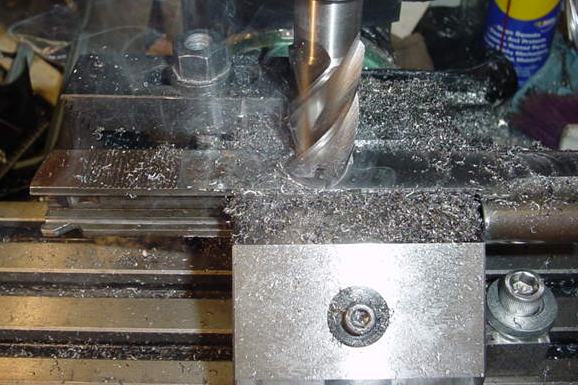
One thing I wanted to do was to cut a flat plane along the top of the slide. This will provide a flat sighting plane, as well as coming in handy for what I want to do next. I used a 1/2" HSS endmill, and took off about .015". I started about 1/4" behind the front sight area, and continued the cut up to the edge of the rear sight dovetail. I didn't want to remove any material where the front sight will eventually go. I don't have any photos of this process but the cut will be clearly shown in the photos later in this section.
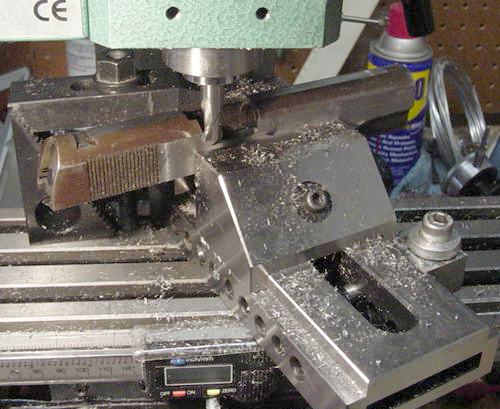
To remove the rollmarks on the slide, I decided to try milling them off. I used a fairly large endmill, I think it was a 1" or so. I think I took off a little less than .018" per side, to finally remove the rollmarks. I stopped the cut at the beginning of the rear slide serrations, with no problems. The flats on the slide have really straightened up, and it should look like a new slide when I'm done.
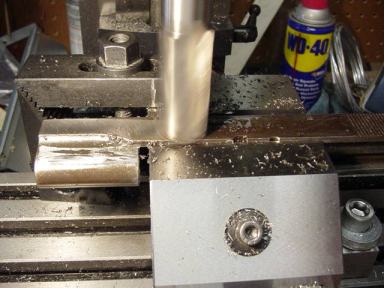
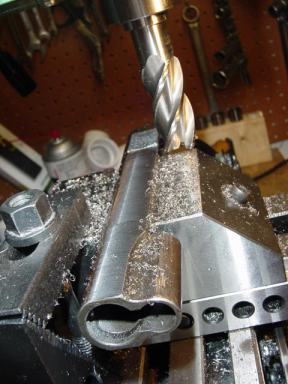
Since I had the slide out in the garage, I figured now was as good a time as any to lower the ejection port. I used a 3/8" carbide endmill for this, and cut the port down to a height of .475". I believe I had to remove about .130" of metal from the top of the port.
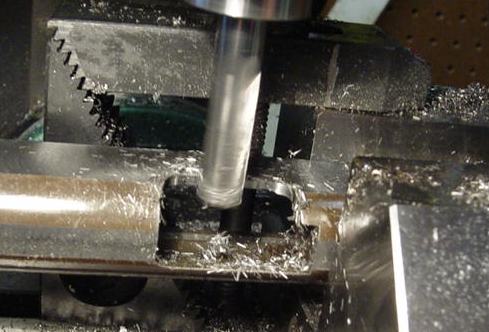
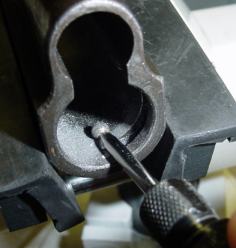
Then I reclamped the slide in the vise, angled the whole thing about 30 degrees, and used a 3/8" ball endmill to make an angled cut at the rear of the ejection port. The finished area resembles an STI ejection port more than anything.