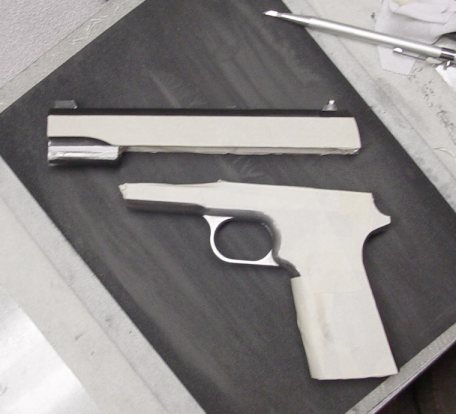
I'll begin by using two layers of masking tape to cover the polished surfaces. A razor knife is a fairly good way I have found to trim the tape to match the contours of the surface. A better way, I discovered, is to take a needle file and lightly file the paper where it crosses an edge, just enough to cut the paper. It's easier to do it than describe it. This way you don't risk scratching the frame with your knife blade. Once the tape is trimmed, it's a good idea to firmly press down the edges, since the air blast has a tendency to lift the edges and ruin the polished surface. I am also going to tape over the checkering so the diamonds won't be eroded. Cover or plug any holes you don't want grit to enter (magwell, extractor tunnel, firing pin channel, etc). Here I've masked off the polished areas and the parts are ready go to to the blast cabinet. In addition to the frame and slide, I am going to blast the grip safety and rear face of the extractor (so it will match the rear of the slide).
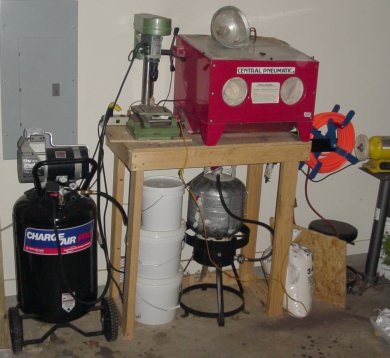
This is my abrasive blast cabinet, filled with 100 grit aluminum oxide. It's a Harbor Freight model that I think I paid $50 for, on sale. It's a pretty fair cabinet. It leaks, but this is nothing that $5.00 worth of caulk won't fix -- one of these days, maybe. I'm always diligent about wearing a respirator and face shield when sandblasting. The cabinet is fairly airtight but there is always some dust that escapes somehow. And since the viewport gets dusty quick, I have to pull the frame out periodically to check my progress. Wearing a respirator and eye protection is mandatory with this setup. The compressor is loud enough that I wear earmuffs as well. When I have everything on I resemble a TIE fighter pilot flying combat air patrol around the Death Star. The compressor is a new one, replacing my undersized Craftsman. I think this one delivers 6.0 scfm at 90 psi, which is adequate for eliminating those long pauses while you wait for the compressor to fully pressurize. I do my sandblasting with the pressure cranked all the way up, so it does tend to go through air fast, and the compressor's running constantly.
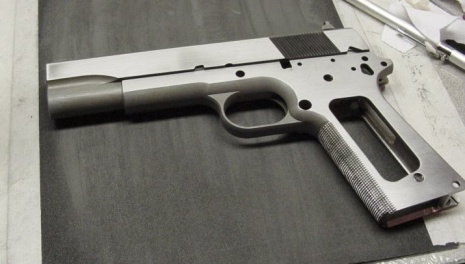
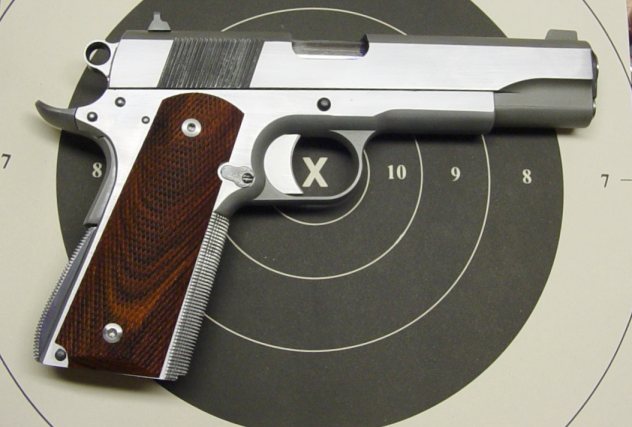
After blasting, I removed the tape and flushed out the rest of the grit with some brake cleaner, and then rinsed it in the sink. Immediate application of oil is necessary to prevent rusting. And I do mean immediate. I set the wet pieces down on my bench and ran downstairs to get a paper towel. They had begun to rust before I got back. Anyway, here is how it looks so far:
In true Roderus style, I will now go off on a tangent (what can I say, I learned my lessons well).
I have no plunger tube staking tool. I had entertained vague notions of building my own Vice-Grip type tool, but for several reasons this never came to pass (not the least of which was that I didn't want to sacrifice a pair of Vice-Grips.) It wasn't long before I conceived an idea that was even more harebrained, however. I found a spare 2" C-clamp, and decided I could adapt it. I milled a flat surface on the bottom of the fixed jaw, as shown in the photo. I drilled and tapped the fixed jaw for an 8-32 threaded machine screw. I hacked the head off that machine screw, chucked it up in the lathe, and turned a sharp point on one end. I cut the screw down to about 1/2 inch, and hacksawed a makeshift screw slot in the other end. I heated it up to cherry red with a torch, and quenched it. Now I had a hardened point for staking. I threaded it into the tapped hole in the bottom of the C-clamp with a screwdriver. My improvised staking tool was complete.

To make the plunger tube support block, I took a small piece of scrap aluminum and milled a slot roughly the length and depth of the plunger tube. It would fit over the tube and allow me a good surface to clamp against. End of tangent.
With the plunger tube in place on the frame, and with a drill bit inserted into it to insure against collapsing it, I gingerly tightened the clamp. It took a good deal of pressure, but the first leg was staked! I did the second leg the same way, after having to shave off more material from the fixed jaw to get enough clearance to get it into position. Unfortunately, I applied too much pressure, and the damn C-clamp snapped in half, right in the middle (cheap piece of crap!) The good news was that both legs were now staked. Oh well, at least I can re-use the hardened point to make another clamp. I am encouraged, I suppose the design will work fine with a stronger clamp.
The only assembly work left is to pin the ejector. Then it should be ready for test firing and final fitting, tweaking, and polishing.