 |
|
|
|
|
|
|
|
|
|
|
|
|
|
|
|
|
|
|
|
|
|
|
|
|
|
|
|
|
|
|
Page 9. tidying up for the finishing keith gregg's guitar building site |
|
|
 |
|
|
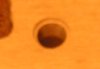
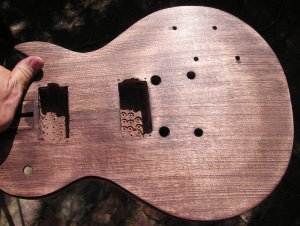
Recesses for the bridge-posts were cut by hand, starting with a craft-knife, to trace a circle, drawn around the post. Then using a curved wood-carving chisel to deepen the cuts and remove the wood. The photo (right) shows the original post-height (top) and the recessed height. |
|
|
|
 |
|
|
|
|
|
|
|
During this project, a number of steps were very difficult to begin, because they were crucial to the final outcome and could very easily be messed up. But getting close to the final stages, these kind of steps were becoming more daunting still. Fortunately, there is lots of help available on the internet, from people who have made plenty of mistakes themselves.
I had originally pictured a solid colour painted guitar, of deep burgundy red, with ivory-coloured binding. But looking at the grain on the top I decided to try staining it, and if it didn't come out as well as I wanted, I could still paint it. |
|
|
|
|
|
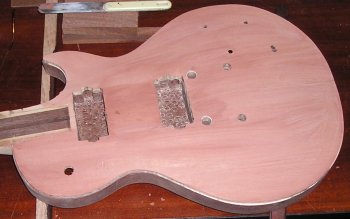
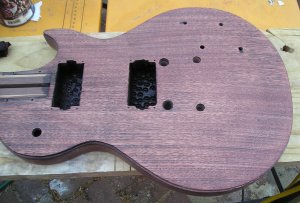
The first step was to make sure that the surface of the wood would be smooth enough to take a high-gloss. Since I wanted to stain the Tasmanian oak top a reddish colour, like jarrah, I filled the grain on the top with a jarrah-coloured filler. This was spread over the entire top, and the headstock, and then sanded back to leave filler just in the grain spaces.
I have to admit that the pink colour of the dry filler was a little disconcerting, but the next step would certainly fix that. |
|
|
 |
|
|
|
|
|
|
One of the tutorials on Project Guitar.com is a page on staining figured wood tops by Kevan Geier and the process is designed to create a deep, 3-dimensional finish. Sounded good to me, so I tested it on a piece of Tasmanian oak, because different finishes can look quite different on different types of wood. The test looked quite good, but I wasn't able to get a clear photo that showed it properly, because it was done on just a small piece of wood. |
|
|
|
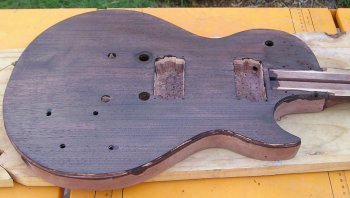
The first step was to put a heavy coat of dark stain onto the wood. I didn't want to use plain black, but instead made a mixture of black and jarrah-coloured stain that came out a very dark brown. This is intended to put dark colouring into the deeper staining parts of the grain pattern. Since I wanted to leave the back a natural jarrah colour, this wasn't stained. At this stage, the effect of the staining can be summed up in one word... Yuk!
But you can already see the darker staining parts |
|
|
|
 |
|
|
|
|
|
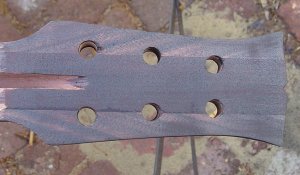
on the head, where the end-grain of the wood makes radiating rays. This was all left to dry overnight before sanding it back.
Now the benefit of staining the body black is more than just emphasizing the grain. When sanded back it also emphasizes all the imperfections in the surface. All the low spots show up as black patches after the rest has been sanded to a lighter colour. This made it obvious where my shaping had fallen down. |
|
|
|
|
 |
|
|
|
|
|
|
 |
|
|
|
|
This meant sanding until the colour was even, being sure to sand the top evenly. This should bring the whole surface down to the level of the depressions.
Just to be sure the surface was shaped correctly, I stained the top again, with a light application of black stain. This also reinforced the staining of the grain where there had been high-spots. |
|
|
|
|
|
 |
|
|
|
|
|
|
This time it sanded back to an even colour, so the next step was to apply the final jarrah-coloured stain.
This was done by light application, using an absorbant paper pad to apply the stain. Then after the first light coat had dried, a second coat was applied the same way. |
|
|
|
|
|
Next... the final stain.
INDEX |
|