 |
|
|
|
|
|
|
|
|
|
|
|
|
|
|
|
|
|
|
|
|
|
|
|
|
|
|
|
|
|
Close to finishing... bursts and frets and such... keith gregg - first time guitar builder |
|
|
|
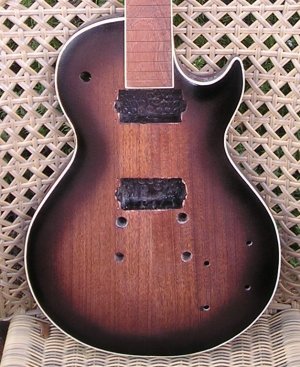
I had decided to spray a "sunburst" effect onto the front of the guitar. The method was described by Brian Calvert in the ProjectGuitar.com tutorials. |
|
|
|
 |
|
| A piece of plywood was cut to match the shape of the guitar. This was mounted on a central support that held it 4 cm above the edge of the guitar, being sure that all the edges were level with the guitar body. The binding and the rest of the body had been masked using conventional masking tape, and fine-line or pin-striping tape to mask the binding. The dark brown lacquer was sprayed at a distance of about 18 inches to produce a brown rim on the body, with a "feathered" edge. |
|
|
|
|
|
 |
|
|
|
|
|
|
Then the plywood mask was lowered to around 2 cm above the edges of the body. |
|
|
|
|
|
 |
|
|
|
|
And holding the spray-can the same distance and angle from the guitar body, a black edge was sprayed onto it. |
|
|
|
|
|
 |
|
|
|
|
|
|
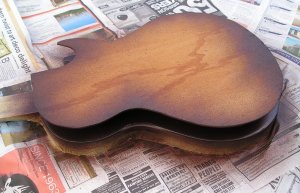
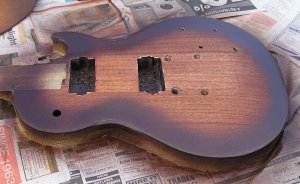
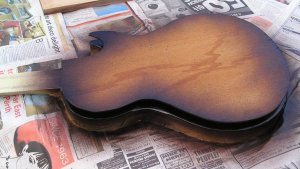
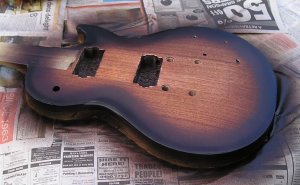
This produced a two-coloured burst effect, fading from the central golden brown through dark brown to black at the edges. Then the whole thing was unmasked and a brush was used to touch up the edges, and a sharp blade was used to remove tiny traces of paint from the binding. |
|
|
|
|
|
 |
|
|
|
|
And the result was a complete change of character for the guitar. The black edges really emphasised the sharp contrast of the ivory coloured binding.
The spray... being a light coat, repeated twice, had a real "orange peel" texture, which would have to be sanded down before clear-coating the whole thing. I started this with some 600 grit emery, to soften the edges of the burst effect and flatten the orange-peel texture.
Fretting
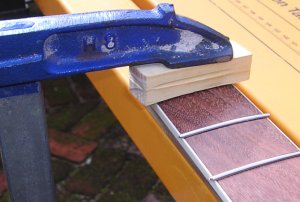
Before going any further with the painting, the fret-board had to be finished. After making a precise 12" radius on the jumbo fret-wire, it was cut to just over the width of the board and the edges of the tang ground off where the wire would overlap the bound edge of the board. After fitting the first piece into its slot, I found that it was neater and easier to make a smaller radius so that the |
|
|
|
|
|
|
middle of the fret would stand up from the board, while the edges would sit down tight. The frets were given a tiny dab of superglue in the middle and at the edges (spread thinly over the tang) and then pressed into place using a clamp and a piece of pine that had been sanded into a 12" radius. This worked okay for most frets, but some didn't want to sit down neatly in the middle, and they had to be clamped using the flat side of the block, to put more pressure on the middle of the fret. The pine was soft enough to mould itself around the wire and provide fairly even pressure. I had read that many professional luthiers make the slots tight and hammer the frets into place, but I could just imagine putting dents into the board... or worse! |
|
|
 |
|
|
|
|
|
| The pressing method appeared to work okay. The board was masked with tape and the ends of the frets levelled off with a coarse file When it was unmasked the board looked okay, but final levelling was still to be done.. |
|
 |
|
|
|
|
|
 |
|
|
|
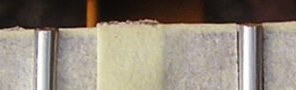
Aaaaaaaaargh!!! While checking frets for the final levelling, I noticed that three or four were not quite flush with the board. While removing them as carefully as I could... I managed to chip the board in 3 places. I had been advised to bevel the lower edge of the tang, to avoid this problem, but forgot. So it's back to the beginning and make a new fretboard. This would be GIGANTIC mistake #12.
Making the new Fretboard INDEX |
|