 |
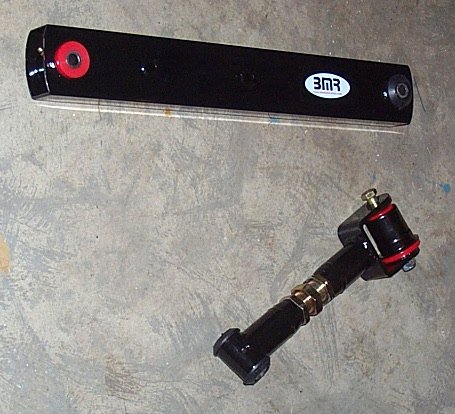
| There is a pic of my BMR boxed lower control arms and adjustable upper arms at the bottom of this page. They are very high quality. I ordered poly for the rear bushings and rubber for the front (as recommended to avoid squeaking). The worst part of the install was removing the old ones and sway bar. At this time I didn't install the poly bushing for the upper control arms because I plan on going to a 8.5" rear soon. If I had to do this modification again, I would use Global West lower control arms instead of the BMR arms. That is because I am interested in all around performance including autocross not just drag racing. The GW arms excel in handling because they use a spherical joint in the front and a delalum bushing in the rear. This is the ultimate system, but it is more costly than the BMR arms. If you have a drag only car, go with the BMRs. Also, if you are setting up a handling car, use 1LE rubber bushings, NOT POLY !!! The part # for the 1LE rear bushings which is a harder rubber than stock is 10164152. To see the rest of my suspension setup, go here. Lower control arms: Tools Required: 2 Jacks, 2 Jack stands, 2 15mm wrenches (if equipped w/ sway bar), 2 18mm wrenches, Penetrating oil, Grease gun Installation: 1. Raise vehicle high enough so that both rear wheels are off the ground and support under frame. Do not support under axle. 2. Using 15mm wrenches, remove the rear sway bar (if so equipped) (this is a good time to sand/paint it) 3. Using 18mm wrenches, remove both control arm bolts and remove control arm. 4. Lube external bushing surfaces of new control arms (with grease, NOT WD-40) and install. Do not tighten bolts yet, the vehicles weight must be resting on the rear end before tightening to prevent bushing preload. 5. Lift car by rearend and support under the rear. Tighten all 4 mounting bolts. Using grease gun, lube each grease fitting with one pump only. (If lifting the car by the rearend, attempt to estimate ride height when you torque down the bolts. You can also put the car on ramps to simulate this. 6. Reattach sway bar. Adjustable Upper control arms: Tools: Jack, Hammer, 2 Jack stands, Block of wood, 2 18mm wrenches, 2 1.5" wrenchs or 2 large crescent wrenchs (adjustable control arms only), Penetrating oil, Any 9/16" socket(adjustable control arms only), 2 3/4" wrenches Installation: 1. Raise vehicle high enough so that both rear wheels are off the ground and support under frame. Do not support under axle. 2. Using 18mm wrenches, remove both control arm bolts and remove control arm. (this is somewhat difficult to do w/ mufflers installed. What I found to make it easier was to wedge the open end wrench between the chassis and muffler to hold it still while you use a ratchet on the exposed bolt.) 3. If using adjustable control arms, adjust the BMR arms to match the length of the factory arms and snug the jamnuts. (approximate equal lengths on both sides of the jamnut !!) 4. (This is also a difficult step. It is also optional. I chose to postpone this step because I am changing rearends soon. This would be much easier with the rear removed from the car and using a press) Spray both upper rear end bushings with penetrating oil and let set up to an hour. Using the hammer, drive the factory upper bushings out of the rear end. Once the bushings have been removed, lightly sand the bushing mounting holes on the rear end and spray with penetrant. Using the hammer and block of wood, drive the new polyurethane bushings into place. Press bushing spacer ring onto small side of bushing once the bushings are in place. 5. Install both upper control arms using new bolts in rear mounts. The rear may have moved slightly so it may be necesarry to align the holes with a screwdriver or prybar in order to insert the bolts. Do not tighten bolts yet, the vehicles weight must be resting on the rear end before tightening to prevent bushing preload. 6. Lift car by rearend and support under the rear. (You may also put the car on ramps) Tighten all 4 upper mounting bolts. If using non-adjustable control arms, this is the final step, if using adjustable control arms proceed to step 7. 7. Adjustable upper control arms allow pinion angle adjustment by simply turning the adjuster. Make sure the car is supported by the axle so that the suspension is loaded. Using an anglefinder, measure the angle of the driveshaft and record the reading. This isyour driveshaft angle. Now rotate the driveshaft so that one cap of the rear u-joint is facing downward. Hold the 9/16" socket against the cap and the anglefinder against the socket. Record the angle. The difference between the two angles is your pinion angle. This angle is fixed at zero degrees from the factory. A typical drag race scenario may call for anywhere from -2 to -4 degrees(pinion pointing downward) depending on the vehicle. If the car is street driven regularly, do not exceed -2 pinion angle. |