| Shiver Star |
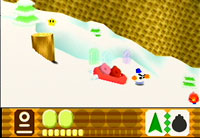
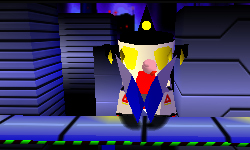
| Stage One: Leave all your favorite Power Mixes behind. You pick up what you need during this level. Shard one: Grab the Fire power while walking through the first scene of this stage. After a while, you'll find yourself in a bobsled, knocking over enemies and jumping when Waddle Dee goes, "!" signalling a hazard. In the middle, you'll find yourself jumping over an igloo if you time all your jumps right, and at the top of the igloo is a Shard. My advice is to stay alert, and jump as high as you can when you're signalled: You can't miss this Shard if you do so. Shard two: After the refreshing bobsled ride, you'll come face to face with a giant snowman! Be sure NOT to lose your Fire power during this battle, because you'll need it after. Once you've defeated this mini-boss, look up on the ceiling: A Shard stuck in a cube of ice! Use that Fire you've been saving to melt the ice and collect your Shard. Shard three: After the snowman fight, you should come to a scene with a frozen lake. You can throw away your Fire power now and take a safer Ice-Ice combo. To get the final Shard, go to a hole in the lake with a spiked enemy in the water trying to prevent you from getting in (not exactly visible unless you dive in the water with the Ice-Ice snowball). Go to the right and into a barely visible tunnel. Kill the next three enemies and collect the Shard beyond them. Stage Two: Bring the Needle-Spark combo Shard one: When you pass a few bobbing pink, yellow and green platforms up in the sky, keep going until you see a flying pink guy guarding a hole in the middle of a cloud. Defeat him and jump down the hole. You should fall onto another cloud, like magic! Walk to the left for a Shard. Shard two: Keep going through this stage, using the Needle-Spark combo on enemies above you or that are about to touch you. When you come to a green eyeball (called a Zebon), it should shoot you up into another one. This next Zebon spins around in every direction, and it stops where you want it to by pressing A. Have it fire when it points to the upper-left to shoot towards a Shard. You'll shoot back to the middle so you can move on by shooting up. Shard three: The last room of this stage puts you up against a cloud mini-boss. Defeat this guy as quick as you can, then break the box in the middle of the room your combo to get a Shard. Stage Three: Have any combo, no suggestions in this stage. Shard one: Inside the first room with the escalators, you will eventually come to one with two spiked foes at the top. Instead of going up some more, float up to a shard. Shard two: You'll eventually come to a room with a giant spider hanging from it's web. The guy's a pushover: Use whatever you want to hit it's body. Beat it up and get your Shard. Shard three: After fighting with the spider, you will come to a room where Adeleine paints three pictures in a background. Press the buttons in the next room that have the same color fruit as the one she draws. It's hard to tell which color is which because there are some unknown fruit. Let's hope you know your fruits, because here they are! Orange = Orange, Lemon = Yellow, Melon (With something else on) = Green, Coconut (Or pear?) = Brown Grapes = Purple (Psh, grapes are green too!), Cherry = Red, "Other Thing" = Brown Keep in mind you have to push them in order too ;) Stage Four: GRRR!!! This stage is evil and long! Bring the Rock-Needle combo. Shard one: When you go down the first ladder, you'll find yourself in some sort of factory! When you come to a part of this first room where Shotzos (cannons) are shooting at you on every other floor and a bunch of brown and orange boxes are on the right. Break those boxes with your Rock-Needle drill. Once the boxes are destroyed, a ladder will clearly be revealed! Go up that ladder to pick up your Shard. Now, toss away your combo and pick up a Spark-Cutter light saber. Shard two: Use your light saber to beat up a giant phoenix. Then cut open the chamber holding the shard at the ceiling to get a Shard. Shard three: After going through the evil squishing ceiling, you will come across a room with the walls closing in on you. On the third level, be sure to STAND AND WAIT on the raised platform in the middle. Let the smalls hit this platform and start turning back. Advance to the left for your Shard! AREA BOSS: HR-H/HR-E. Bring the Rock-Spark combo or the Bomb-Cutter combo since they have long range. This guy is more annoying than powerful. HR-H starts off in a mode where you can only damage its hands, and you don't have much time to strike them since it also attacks with them. You can only see a couple of cheap blows being thrown every now and then. Stay on the left and dodge its attacks, then use your combo when you can. After defeating the first form, stay on the left and watch it transform into HR-E. Attack it's bottom black portion to deal any damage while avoiding it's slow attacks. Finish it off and go liberate Ripple Star! |
 |
 |