 |
|
|
|
|
|
|
|
|
|
|
|
|
|
|
|
|
|
|
|
|
300 Hours - Fabuglas Bahama Restoration |
|
|
|
 |
|
 |
|
|
The gas tank is set in place. Somehow, the tank just doesn't rest straight. I plan to place a foam cushion on each side to straighten it out and keep the ever-required air space to prevent my gas tank from turning into a water tank during launch on a hot summer day. |
|
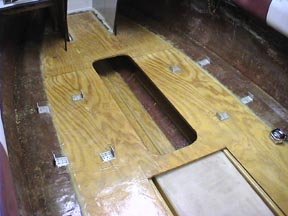
The seat bases are being epoxied in this pic. I am not using fiberglass reinforcement because they are already 10 times stronger than the original bases when the boat was new. |
|
|
|
|
|
 |
|
 |
|
|
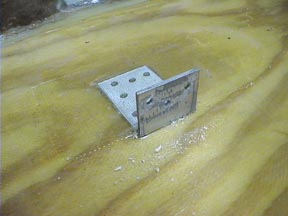
Here is a close-up of one of the seat mounts. Holes are drilled in the vertical section to mount the seat bases. The horizontal section is simply set in place and 'glassed down. The holes in the horizontal section should provide tunnels of epoxy from the surface glass to the floor. Theory states that this will strengthen the bond (my theory anyway - all rights reserved). |
|
Just another view of the seat base mounts. The original construction consisted of holes drilled through the bottom of the boat, and the seats were screwed down. Personally, I think that's a 'screwed up' way of mounting the seats. I'm not even thinking about drilling holes through the bottom of the hull. |
|
|
|
|
|
 |
|
 |
|
|
The cover for the gas tank - straight epoxy on the bottom and cloth on the top to match the floor of the boat. |
|
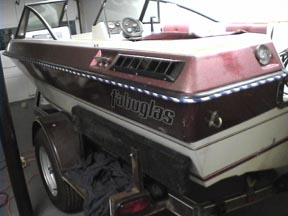
Awww, now ain't that special!!! The white and blue striped rub rail. No, I didn't special order a colored rub rail at $35/foot. It's an outdoor rope of a slightly larger diameter and pushed in (with excessive force) to the rub rail housing. It looks better and can't be beat for the price. |
|
|
|
|
|
Continue to 315 Hours - Fabuglas Bahama Restoration |
|