JAL Computing
![]()
![]()
![]()
![]()
![]()
|
|
|
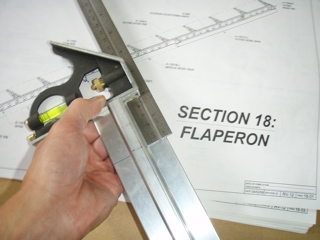
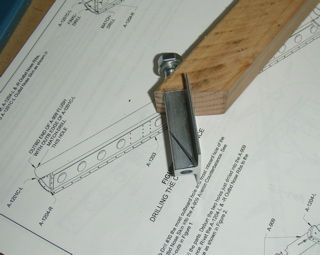
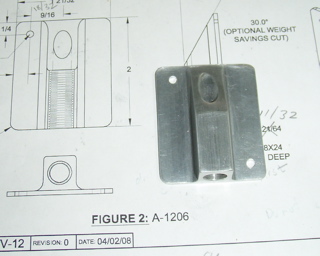
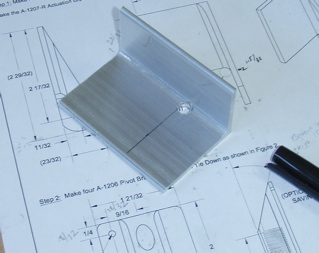
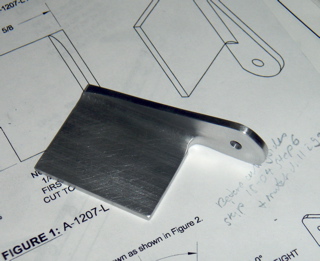
RV-12 Flaperon ConstructionWell I am the first to admit that I had some reservations about fabricating the parts for the Flaperon. I took some pictures of the fabrication sequence for the flaperon pivot bracket and actuation bracket. Note that you need to make the right actuation bracket as a mirror image of the left actuation bracket. Consider acid etch priming of these non-alclad parts. Consider pre-ordering a second set of AEX tie down and Aluminum Angle blanks as they are not very expensive. You can order the blanks from Van's online web store. Flaperon Pivot Bracket
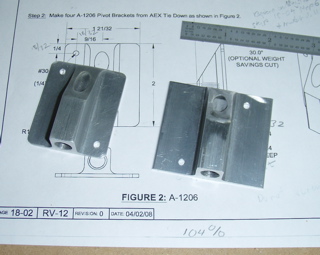
Step 1: I marked the AEX tie down at two inches. I also scanned page 18-02, saved it as a pdf file and then printed the pdf file at 104% for a more accurate template.
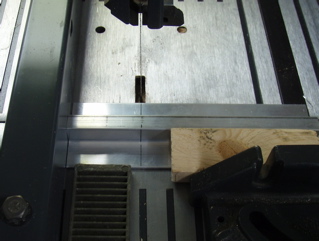
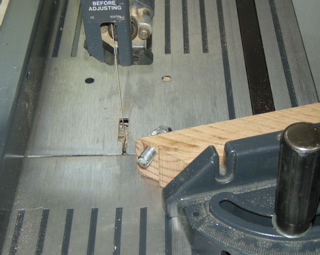
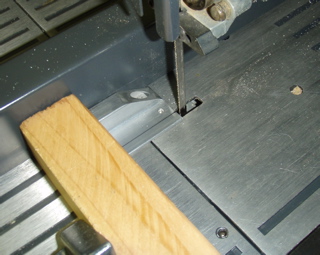
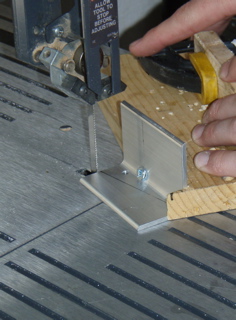
Step 2: I used a fence and sliding guide on the band saw. I used a drop of cutting oil.
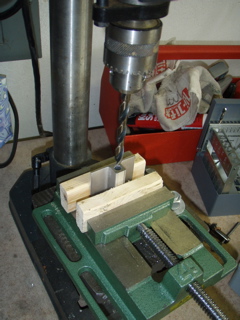
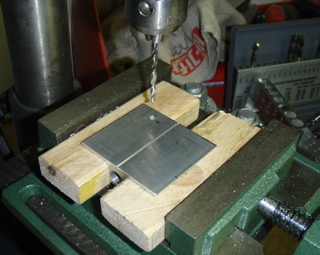
Step 3: Note the use of a four inch drill vise when drilling the 11/32 opening.
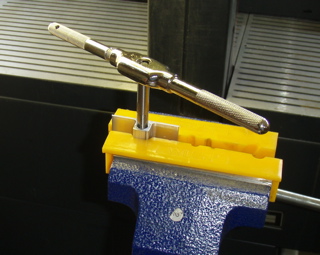
Step 4: I used cutting fluid and sequentially deeper passes to cut the threads. Make sure you use the 24 thread 3/8 inch tap. It really does help to use the drill press to start the process. Mount the tap into the drill press. Then apply downward pressure with the press while twisting the tap by hand.
Step 5: The AEX tie down mounted on a stick!
Step 6: Another view of the stick used to guide the AEX tie down for its weight loss program.
Step 7: Back drilling the #30 hole. Note my left right confusion. You should back drill on the right.
Step 8: Using the factory sides of the AEX tie down to align the pivot bracket for match drilling a single #30. (The critical angle is, IMHO, the angle between the pivot and the spar, not the angle between the pivot bracket and the spar. Consider inserting the pivot into the pivot bracket and confirming the proper alignment before match drilling the #30 hole.) Consider using a #3 VIX-BIT, a self centering 5/64 bit, to center the hole, then drill #30.
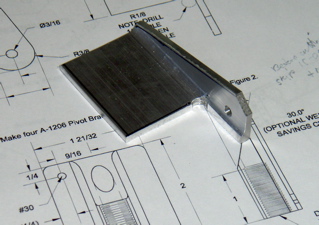
Step 9: The AEX tie down after the optional weight savings cut, back drilling and match drilling one #30 hole. Note how much smarter I was when I backed drilled the first pivot bracket.
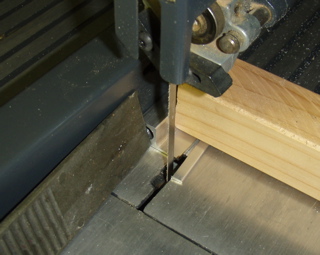
Step 10: The AEX tie down slipped under the fence on my band saw, so I left it that way for the side amputation.
Step 11: Safety first. Beware of the band saw magnetism for fingers! You can see that I have on eye protection :)
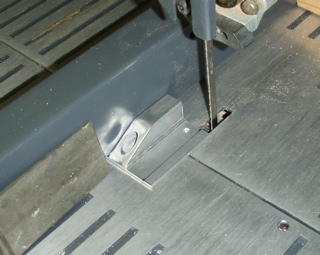
Step 12: I was able to just flip the AEX tie down around to make the second parallel cut.
Step 13: Here is the completed pivot bracket after rounding the corners. The two #30 holes allow for attaching the pivot bracket to the flaperon spar with two clecoes. You can then do the final match drilling of the remaining six #30 holes, applying clecoes as you go. Flaperon Actuation Bracket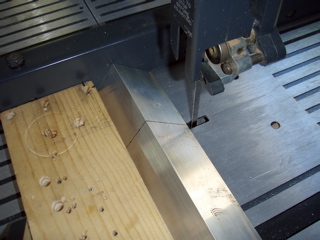
This picture demonstrates the band saw technique that avoids a vertical cut through the angle bar.
Angle bar after drilling a 1/4 inch hole for the left actuation bracket.
A jig and sliding guide (not shown) was used to fabricate the bracket.
The bracket after the rough cutting.
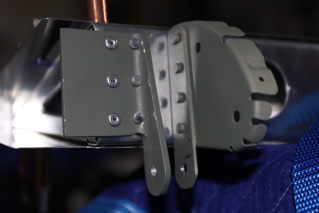
The completed left actuation bracket. Pivot and Actuation Brackets Completed 4/29/2009 Riveting Actuation BracketRiveting the actuation bracket to the flaperon spar can be challenging due to the proximity of the angle bar to the AN470 4-6 rivet. Various strategies include modifying a squeezer set, using a rivet gun with an AN470 rivet set or using a bucking bar, punch and hammer.
On the left flaperon, I used a 3X rivet gun with an AN470 1/8 rivet set to start the rivet. I then squeezed the rivet and finally hammered the rivet to mil specs using a bucking bar and large punch. On the right flaperon, I ground the flat head of the squeezer die to match the shape of the actuation bracket and was able to squeeze the AN470 rivet without difficulty.
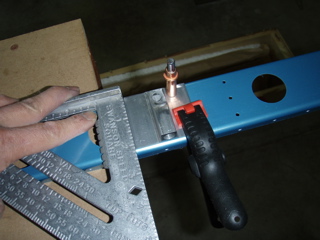
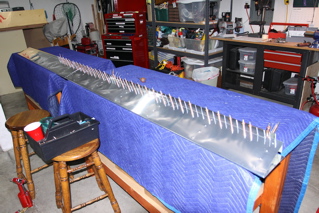
Match Drilling the Stainless Steel CounterweightSome builders have reported difficulties match drilling the stainless steel counterweight. I was able to match drill using an air drill at 80psi using the following technique. After securing the skin with clecoes, I used a spring punch to start the drill. With practice, I was able to angle the punch to center the point with repeated punches. I then used a #40 drill. I hand twisted the bit to cut the skin. I then did a quick burst to set the drill and then match drilled #40. After securing the skin with silver clecoes, I switched to a #30 drill. Again, I hand twisted to cut the skin. I set the drill with a short burst and then final drilled #30. I de-burred the inside of the counterweight using a 1/2 inch sanding drum glued onto a 1/2 wooden dowel. Preparing Trailing Edge SkinsThe skins of the trailing edge demonstrate a tendency to bow outward from the flaperon ribs. This tendency can be counteracted by using a towel and baking rolling pin to place a reverse curve in the trailing edge skin.
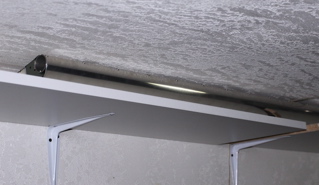
Final RivetingHere is the left flaperon before final riveting. I decided to store the flaperons on a shelf along a support beam that runs horizontally across my garage.
Left Flaperon
Completed 6/23/2009.
|
Send mail to [email protected]
with questions or comments about this web site. Copyright © 2001, 2002, 2003,
2004, 2005, 2006, 2007, 2008, 2009 ©
|