12-5-01 (cont.)
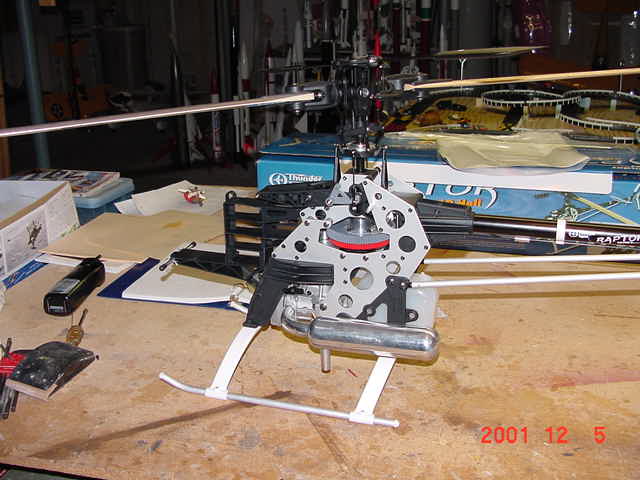
The completed tail boom was installed. This required the loosening of a few of the frame screws to allow the frame to split apart a bit to let the boom in and seat. Once the T/R drive shaft was engaged, a spin of the head confirmed the proper rotation direction. The tail boom support struts were installed as well as the horizontal stabilizer fin. Now it's starting to look like a helicopter!
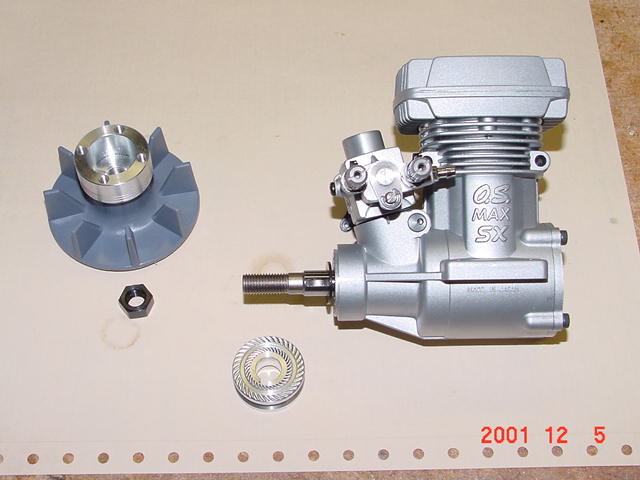
At this point I could have stopped for the evening but I decided to press on. The engine cooling fan was next. One thing that's never really stated anywhere is that you need to remove the thrust collar from the front of the engine. If you leave it on the fan will sit too high to allow the engine to be installed and the retaining nut will not go on since there will be little, if any, thread protrusion. A bit of Loctite is needed on the engine 'prop' nut. Just keep the thrust collar and woodruff key along with the engine box. The engine is mated to the supplied motor mount and the holes line up perfectly for the OS 61. I just loosely installed the mount to the frames since the gear backlash will need to be adjusted later
I installed the servos and made up the corresponding linkage rods. The instructions show the proper dimensions for the linkage balls to be on the servo horns, whether you are using Futaba or JR servos. I plugged the servos into my receiver and added power and did the initial linkage set up, made sure the servos were going in the right direction, set the desired control throws, preliminar revolution mixing and the pitch curves for normal, idle up 1 and throttle hold. I did need to add a spacer between the ball and the servo arm on the collective pitch servo. When the servo was at the lowest pitch setting the ball link would hit the throttle servo. A 3/32" stacked shim of small washers fixed this.
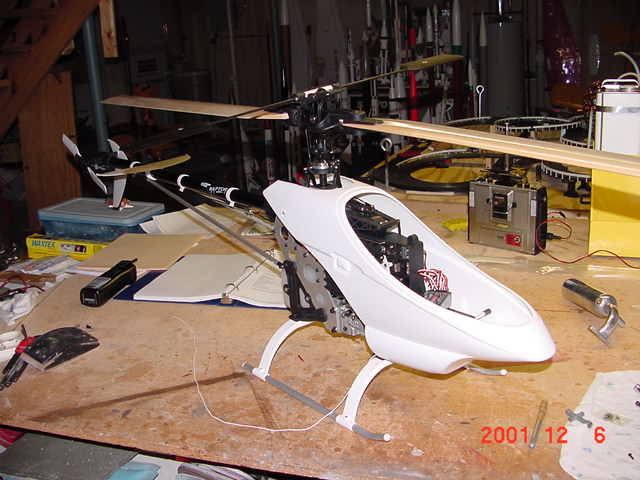
I also trimmed the molding excess off the canopy and trail fit it. You can really see where the new canopy support bar helps keep this assembly rigid. There is very little play in the canopy. I did notice that I will need a remote glow adapter. There is no way to access the glow plug with the canopy on. That was it for the night. It was late and I needed sleep. The only hold up is the gyro; it still hasn't arrived at the hobby shop. Hopefully in the next few days it will be here and I can finish the final set-ups and wire routings.
12-06-01
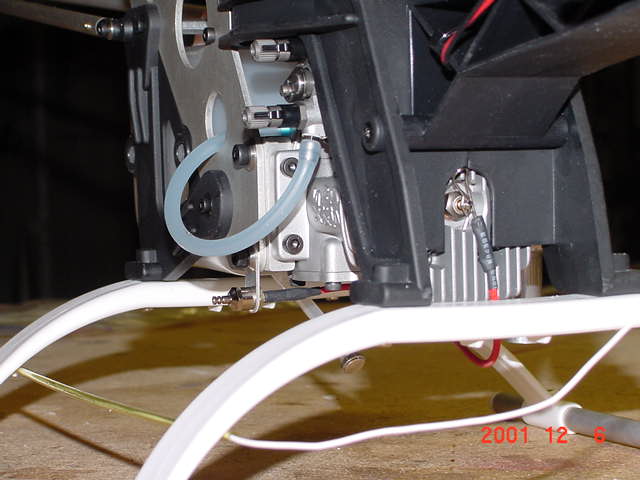
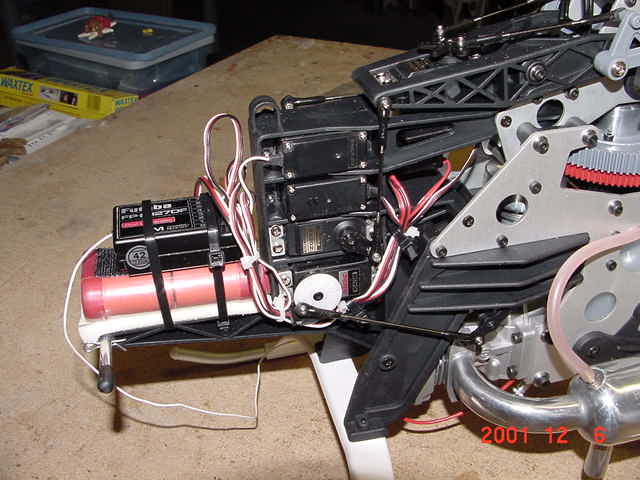
I applied some of the last touches today. The initial battery pack I chose was not giving good test results on the Accu-Cycle so I picked up a 1500mAh R/C car battery pack. I removed two of the cells to make up a 4 cell pack. This pack should do nicely. I also picked up a remote glow adapter from TT. The hole in the bracket of the glow adapter needs to be sized to 4mm so it can use the 4mm engine mountin bolts in the sideframe.
Unfortunately the gyro hasn't yet arrived. In the interim I have installed an old Futaba G-154 mechanical gyro. It was one I had in my GMP Legend several years ago and should work until the newer Futaba one arrives. The wire routing was accomplished using zip-ties. There are convienent lightening holes in the plastic frame peices to pass wires as well as zip-ties through. A neat wire installation is a must on a helicoptor. You can't risk having anything get loose and foul a control linkage. The battery rests on a foam pad and the receiver is velcroed to the battery. This stack is zip-tied to the equipment shelf at the front of the heli. Everything is nice and tight. The gyro amp will be rubber banded temporarily to the top of this stack. The new gyro has the amp built into the sensor unit so there won't be a need for it to be with the receiver or battery. it will be mounted on it's pad just aft of the main mast.
The blade grips were glued on both sets of blades (stock ones from the kit as well as the AeroMasters) I only balanced the kit blades since I'll be using these first. The blades were very close in weight and just one strip of tracking tape was all that was needed to get them in balance. I'll mount the Aeromaster baldes later. (I won't be using the furnished blade spaces with these blades; more on that later) I did a final check of the canopy mounting. The upper portion needed some more trimming to give clearance for the aileron cyclic rod on the right side.
As far as control throws go I set all the rod lengths per the manual. All the cyclic, rudder and collective ATV's are at 100%. Collective pitch range is -5 to +11, with hover right around +5 and the T/C stick slightly above the half position. The throttle ATV was reduced to 60% on the low end and 85% on the high. I may have to adjust this later to get 100% ATV to better match the throttle response to the pitch curve. it should be OK initially.
The heli is ready to fly; hover test actually. I am going to try and get the engine started tomorrow and begin the break-in. I have a new gallon of CoolPower 15% all ready for it. I'll let the batteries charge tonight then give it a go tomorrow.
|