12-3-01
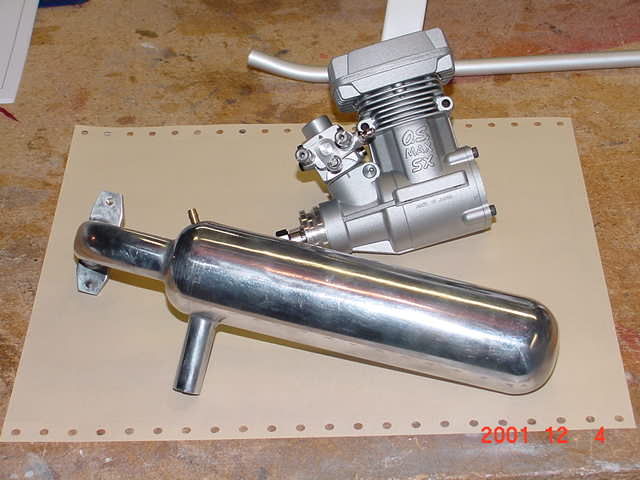
No work on the heli tonight. The engine, muffler/pipe and starter wand did arrive today. Typical OS quality and craftsmanship on the engine. A true jewel! All that remains is the gyro.Hopefully in the next week I'll have that. I also decided to go with all S9202 servos on the flight controls (collective pitch and cyclic). I got some feedback that the Hitec HS-605BB's were not the servo of choice for the heli. The one I had will be going on my Nexus. That heli will be fine with it.
12-4-01
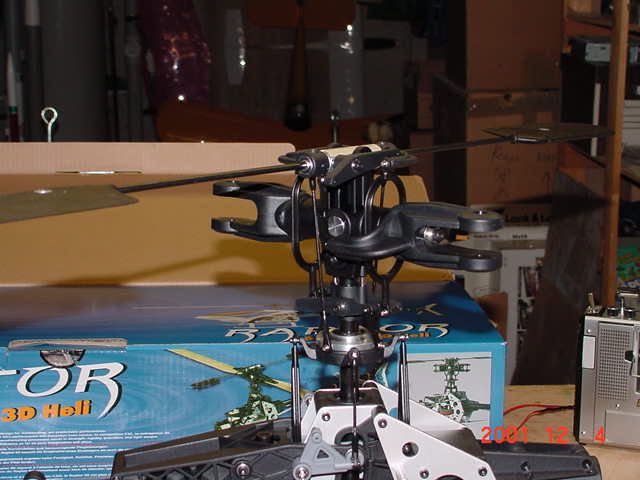
A pretty fun night of building. I had to go and get some silicone grease for the rotor head assembly. The 'helpers' at AutoZone have no clue as to what silicone grease is. The silicone grease was used to lube the thrust bearings in the blade grips as well as the rubber damper bushings. Unpacking parts bag G gave a few surprises. TT now includes shims and spacers for use when flying blades other than the stock ones. They also include M2 x 12 self tapping screws for the blade grip balls rather than the M2 x 10's that were originally used.
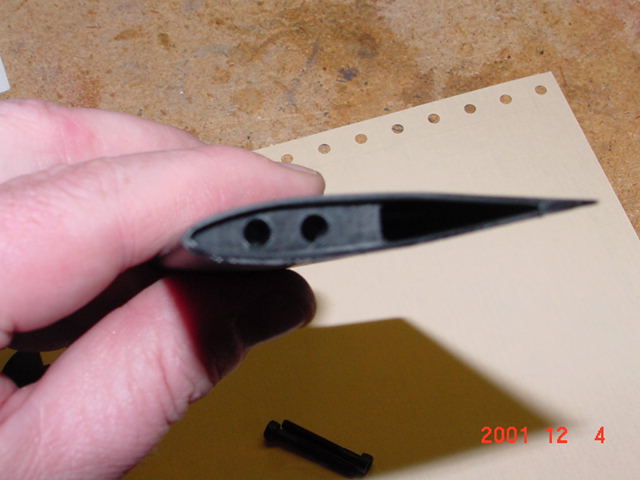
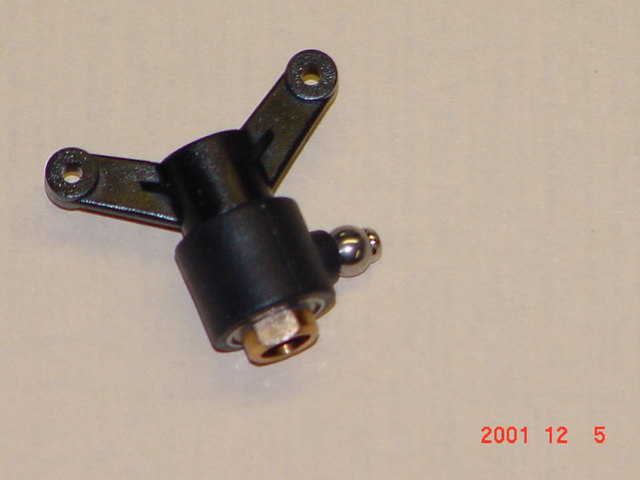
A big surprise was the flybar paddles. They are now 2-piece assemblies that can be taken apart to add or remove weight. A nice touch. The main rotor hub is the newer, improved version that had the holes drilled on center to correct the wobble problem in earlier Raptors. The rotor head was mounted and the 'Jesus' bolt fit with no slop. The 'O' shaped flybar control rods were hard to pop on the balls but they went okay without and sign of breaking. The blade grips have no end play and spin nicely. The whole rotor head has a tight feel to it with no play or slop.
12-5-01
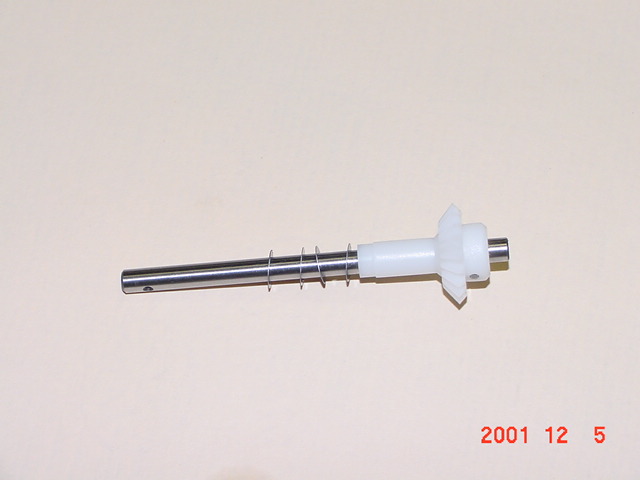
Much progress made this evening. The first job was to build the tail rotor gearbox and tailboom assembly. The V.2 kit includes the white nylon gears. These replace the previous red colored ones that were prone to breaking. The bevel gear on the T/R shaft is retained by a pin and then secured with a set screw that runs the long axis of the shaft. The pin was a pretty tight fit and needed a good tap to seat it. The set screw was installed with blue Loctite. Remember those 8 5mm shims that were furnished as an extra? Those are used to adjust the lash on the T/R bevel gears. Depending on which way you need to adjust the T/R shaft will determine which side you put them on. For me I needed them on the long side of the shaft. It took four as you can see from the picture. The gears were greased with silicone grease and the tail case was temporarily assembled. You'll need to take it apart a bit for installation on the boom
The pitch slider yoke is ball bearing supported. Apply a thin film of Loctite to the outside of the slider tube before slipping it thru the bearings. (Don't get Loctite into the bearings)You need to take care when installing the yoke on the bronze slider tube. I used an open end wrench to hold it while I threaded on the yoke. If you use pliers you could squeeze too hard and deform the tube. A bit of 3-in-1 oil is a good lubricant for the T/R shaft and pitch slider. TT also includes 2 new T/R hub set screws. The previous ones didn't fit well into the dimples on the end of the T/R shaft and needed to be filed to a point. The newer ones now have a good point to engage the dimples and prevent the hub from spinning on the T/R shaft.
The last tricky part was the installtion of the T/R drive shaft bearing. It needs to be located not quite in the middle of the shaft. (This prevents a harmonic vibration) I located mine about an inch from the center. Use a thin film of Loctite on shaft where the bearing is to go then slide the bearing on. Let the Loctite cure before installing the drove shaft into the tail boom. This is where it gets tricky. You need a tube (TT reccomends PVC tubing) that can go around the T/R drive shaft BUT also fit inside the tail boom. That way you can push the bearing in and not have to push on the shaft and risk bending it.I had a length of 3/8" aluminum, thick walled tubing whick worked fine (the tubing you use needs to be about 18" long. The T/R drive shaft will pretty much seat itself, just turn it a little to make sure it engages then push it all the way home. The rest of the tail boom builds per the instructions so I won't go into all the gorry details.
|