| Part One � Veggie Filter and Valve Assembly Introduction: In this section you will be making the main bracket to hold the filter assembly and the valves. Then you will be finding the best location for the valves and the filter assembly. Finally you will assemble the components all together and mount it to the car. |
| Tips Use some type of oil or cutting fluid to aid any metal drilling Look at the pictures below to check the orientation of the coolant fittings and the valves. You can tighten the coolant fittings before installation if you understand the picture and the coolant hose routing. You can also replace any of the straight barb fittings on the solenoid with 90 degree barb fittings to make the fuel line routing better based on your preference. Procedure 1. Assemble the Greasecar.com filter parts. I put the coolant only fitting on the bottom and the fuel fitting on the top in a vertical position. See pictures below. 2. Cut square mounting plate to size 8.5�x5.5�. 3. Cut angle bracket to size if needed. 4. Drill holes in both the mounting plate and the angle bracket to bolt them together. See Filter Assembly Front picture for location and orientation. 5. Drill holes in the mounting bracket to mount it to the car. 6. Drill holes in the mounting plate to attach the filter assembly bracket. 7. Assemble the three components together. 8. Next mock up the assembly. The mock up is used to find best locations for valves. You should be able to see the general layout from the pictures but mocking it up lets you pick the best location for your car. 9. In order to mock up the filter assembly use one of the existing holes in the car to help hold the assembly in place. The horizontal portion of the angle bracket will rest on the ledge in the engine compartment. See Mounting Ledge picture below. The bracket was mounted 0.75� from the edge of fuse box wall and all the way against the wheel well wall. 10. Next mock up the valves. I used some tape adhesive on the valves to find the best position first and then marked the valve bracket hole locations with a marker to guide drilling. Temporarily put fuel hoses on the fittings and run them in the general direction they will be traveling to make sure they are no obstructed. I labeled the valve ports to make it easier to remember. Don�t push the hoses on all the way or they will be hard to get off. I put the supply valve on top right and the return valve on the bottom left. The locations can be seen in the Filter Assembly Back picture. 10. Remove the assembly. Drill and tap the bracket for the valves once you are happy with their locations. 11. Hold assembly (with filter mounted) in place and use a marker to make marks in the car to guide drilling. Drill small holes in the car. Put self tapping screws in drill. Screw until it starts to thread in then tighten the rest of the way by hand. Tip - You may want to leave the bracket loose for easier installation of the coolant lines. |
 |
 |
 |
 |
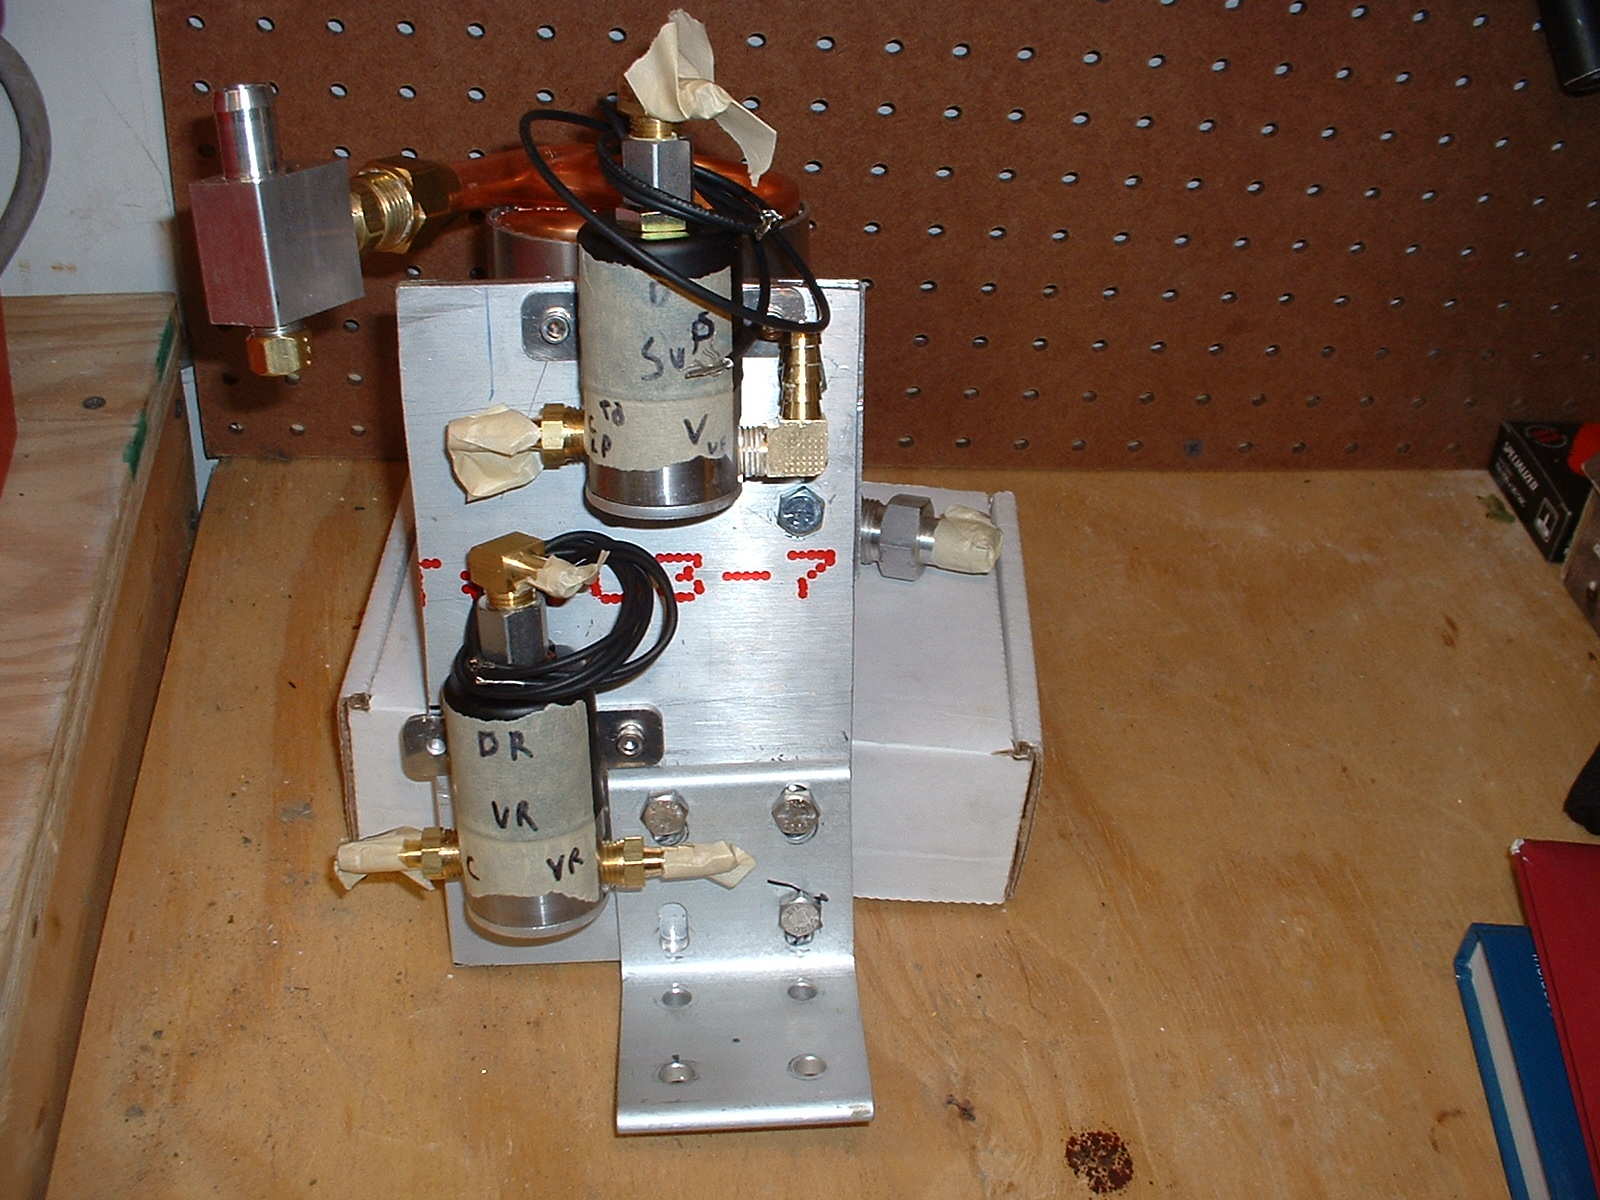
| Filter Assembly Front. Notice coolant fitting orientation |
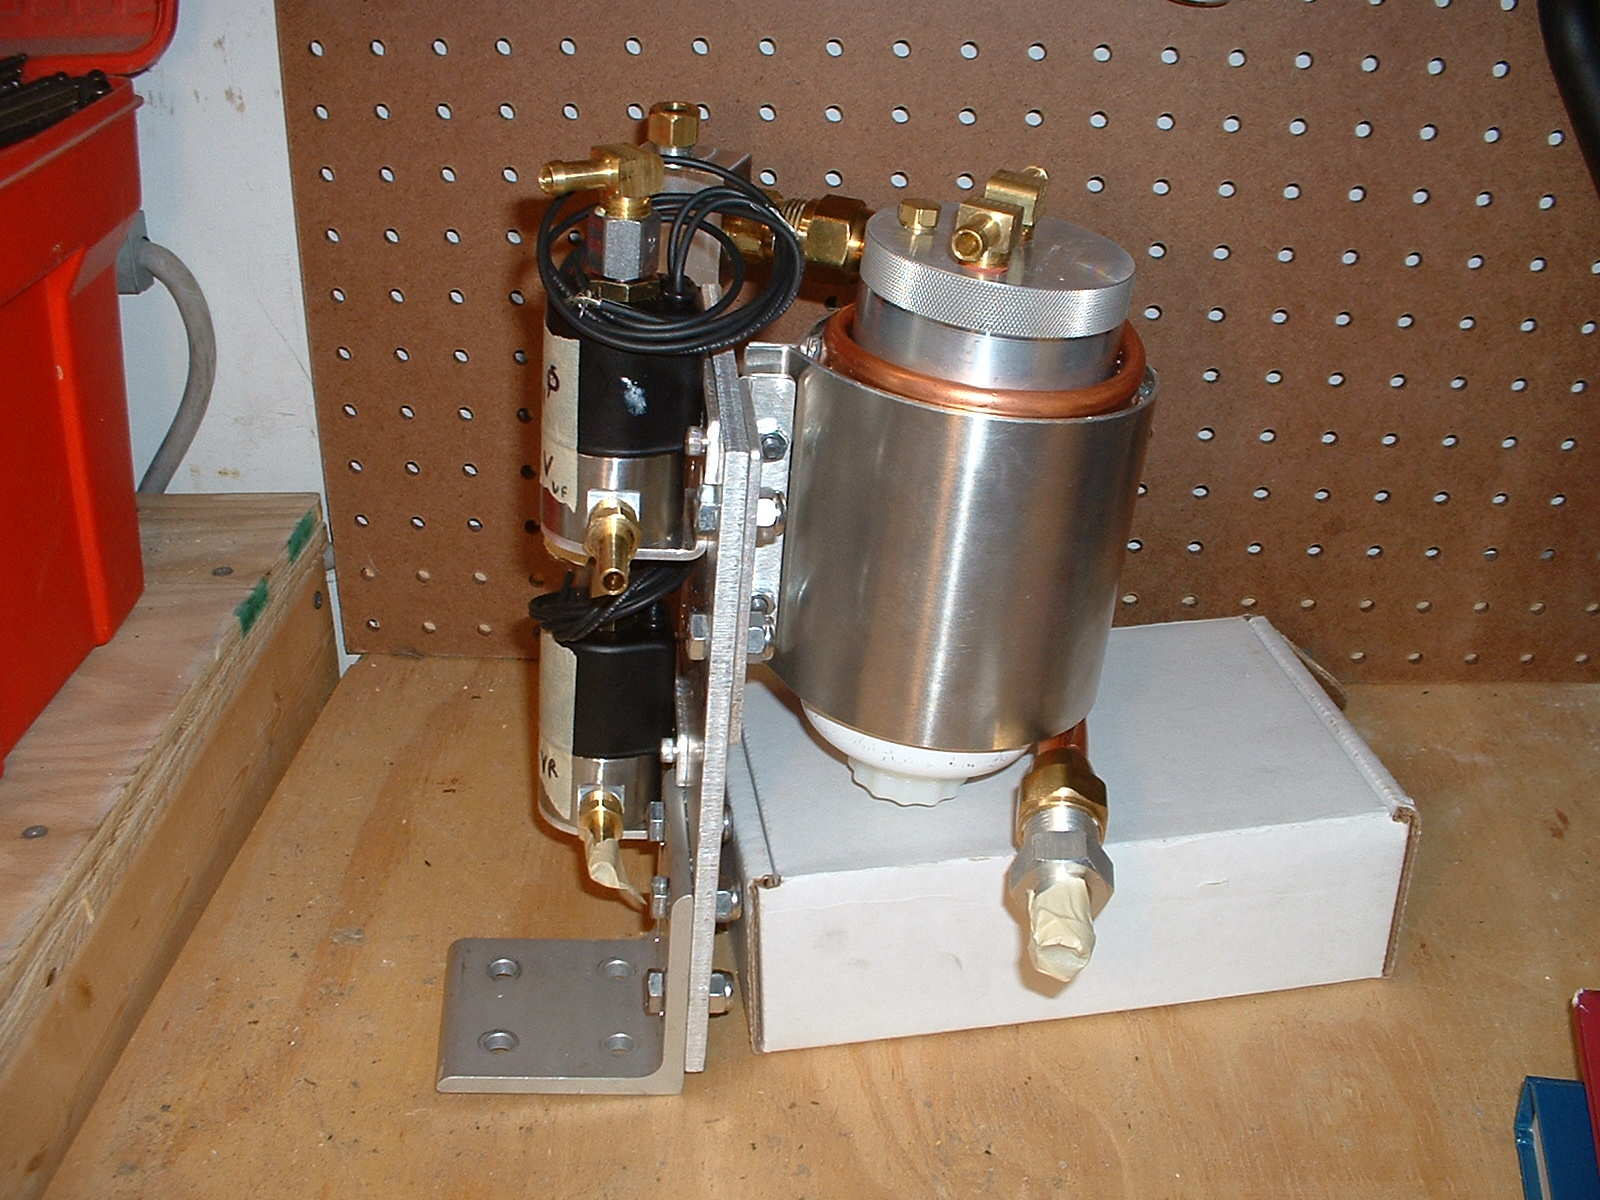
| Filter Assembly Side |
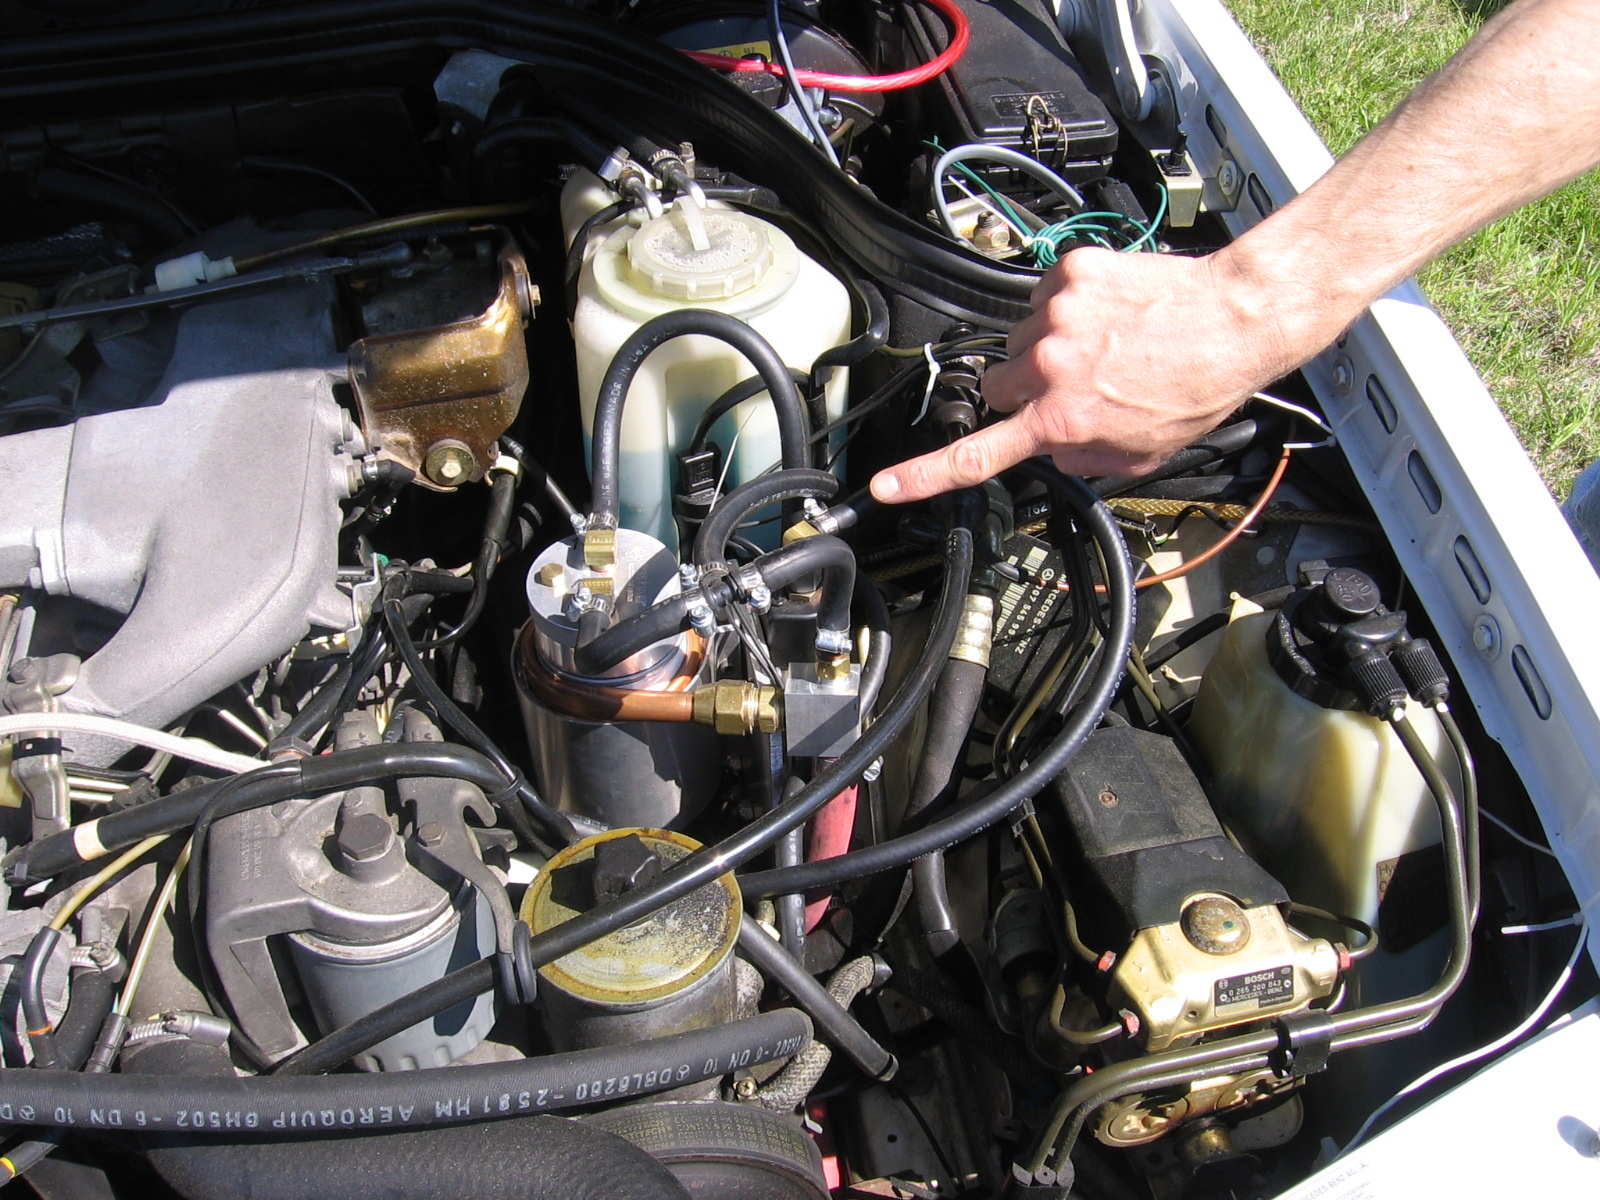
| Engine Compartment - Final Mount Location |
| Filter Assembly Back - Valve Mounting |
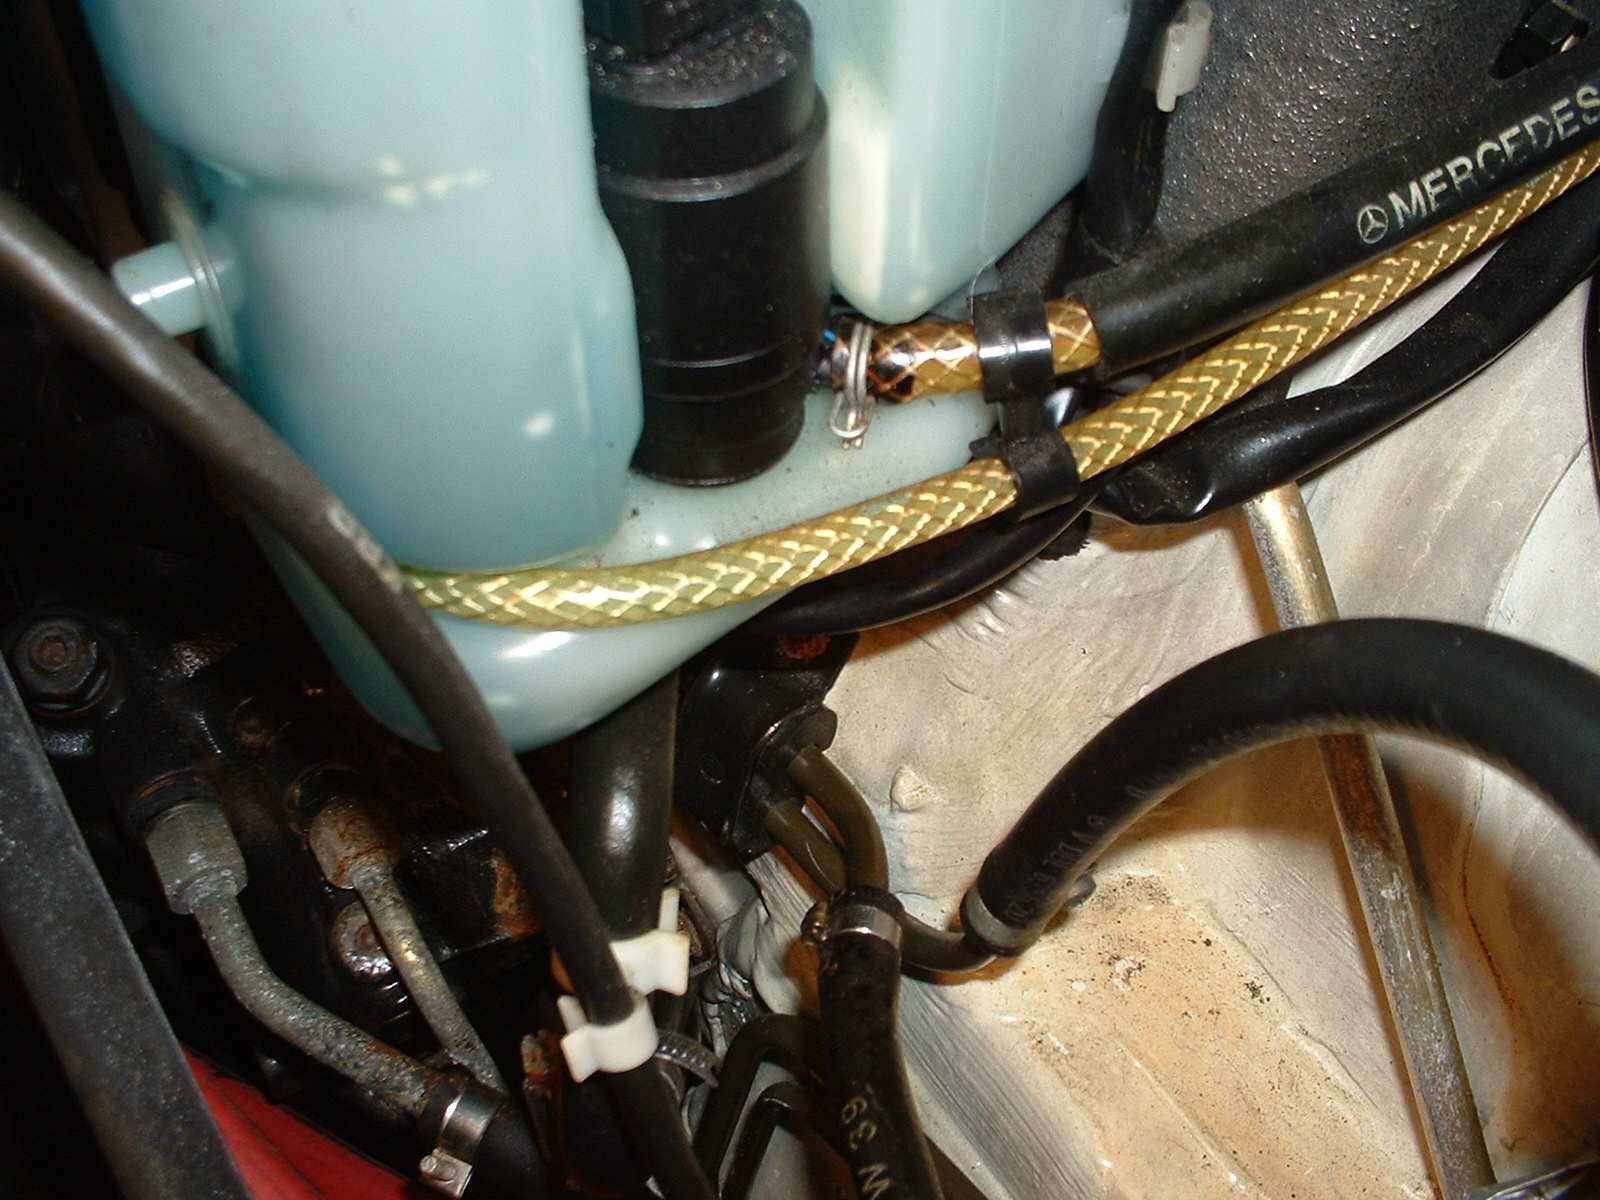
| Mounting Ledge - In the bottom right side of the picture you can see the white ledge that the filter assembly will be mounted to.. |
 |