Welcome To . . .
MWK Stationery Tutorial
Well here it is ~ a stationery tutorial. I hope you find
this tutorial helpful. I tried to include every detail and
make this very easy to follow. The tutorial begins with a
step-by-step process for creating your stationery picture
with Paint Shop Pro 6. The tutorial will end with a hyperlink
to two text files that you can copy and paste the html code
for setting up your stationery. One text file is the code and
the other text file explains what you need to change in the
code to add your stationery picture file; text font, color
and size along with the scrolling ticker. Now on with the
tutorial ~ enjoy and most of all ~ have fun! :o)
STEP EIGHT
Let's make sure your texture is set-up like mine.
If you are familiar with texture then this is where
you can play with the settings and do what you want
with the solid color but for the newbies to PSP you
can set-up your texture as shown in the picture below.
From the drop down menu choose texture number 44 and
set the rest as shown below . . . then click OK.
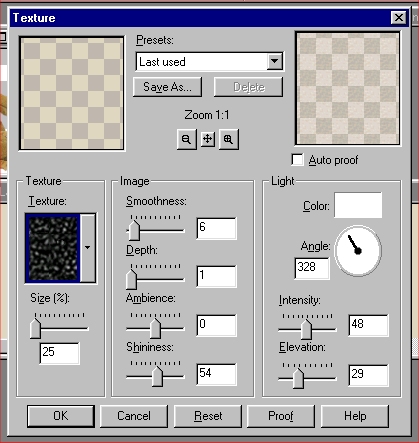
Step Eight: Creating Texture
STEP NINE
Your stationery is now starting to come to life.
Don't you love it! It is now time to work with the
graphic you chose in step one. I am assuming you are
using a tube graphic but if not you will need to fill
in any solid color around your graphic and add texture
to the solid color just as you did with the new box.
You can select just the solid color by using the magic
wand shown on the left side tool bar in PSP.
For those using a tube graphic this will be much easier.
Select your tube graphic by selecting the rectangle
selection tool on the left hand tool bar of PSP as shown
in the picture below. Be sure your settings in the
selection box are Rectangle, Anti-Alias checked and
feather set to zero.
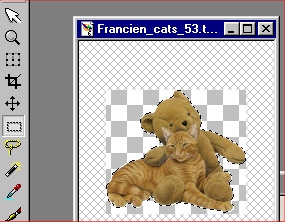
Step Nine: Select your stationery graphic
STEP TEN
Once you have selected your graphic you will need to
go to Edit and Copy as shown in the picture below.
Then click on the very top of the big stationery box
that has your textured color in it and go to:
Edit, Paste, As New Selection. This will paste your
selected graphic onto your stationery background.
Now move your graphic to the far left of the box and
center it in the box from top to bottom.
From this point if you know how to add a drop shadow
or do any other sort of effect to a graphic you can do
so at this point otherwise leave it as it is.
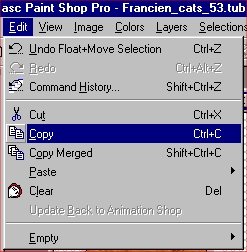
Step Ten: Edit, Copy and Paste Your Graphic
Click here to CONTINUE
Click here to RETURN HOME