Welcome To . . .
MWK Stationery Tutorial
Well here it is ~ a stationery tutorial. I hope you find
this tutorial helpful. I tried to include every detail and
make this very easy to follow. The tutorial begins with a
step-by-step process for creating your stationery picture
with Paint Shop Pro 6. The tutorial will end with a hyperlink
to two text files that you can copy and paste the html code
for setting up your stationery. One text file is the code and
the other text file explains what you need to change in the
code to add your stationery picture file; text font, color
and size along with the scrolling ticker. Now on with the
tutorial ~ enjoy and most of all ~ have fun! :o)
STEP FIVE
Now it's time to choose a color! You will need
to choose a color that will match the picture you
chose for your stationery in step one.
Click on the color box, as shown in the picture
below to choose your matching color.
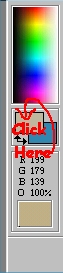
Step Five: Choose your matching color
STEP SIX
Now it's time to use the color you just chose!
To do this you will need to select the fill bucket tool
as shown in the picture below. Once you select the fill
bucket simply click on the new file box you created.
The fill bucket will fill your box with your selected
color ~ magic, huh! Don't you love it. :o)
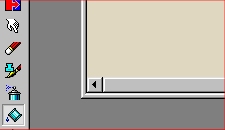
Step Six: Fill your box with your color choice
STEP SEVEN
Now that you've filled your box with your matching
color choice let's give it a texture effect! Cool!
Here we go! Choose Image, Effects and Texture as shown
in the picture below . . .
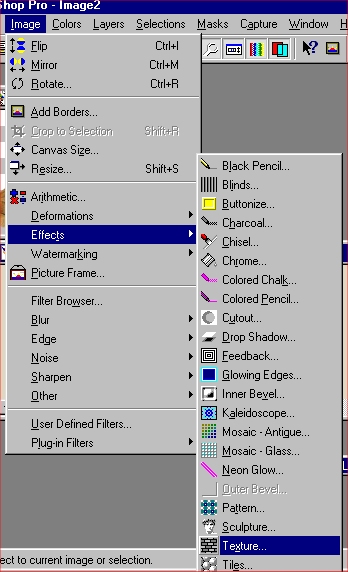
Step Seven: Selecting Texture
Click here to CONTINUE
Click here to RETURN HOME