 |
|
|
|
|
|
|
|
|
|
|
|
|
|
|
|
|
|
|
|
|
|
|
|
|
|
|
|
|
|
|
|
|
|
|
|
|
|
|
|
|
|
|
|
|
|
|
|
|
|
|
|
|
|
|
|
|
|
|
|
|
|
|
|
|
|
|
 |
|
|
|
Inserting Supports |
|
|
Step #2 |
|
|
|
|
|
|
|
|
|
|
 |
|
|
 |
|
|
|
|
|
|
A |
|
|
|
B |
|
|
|
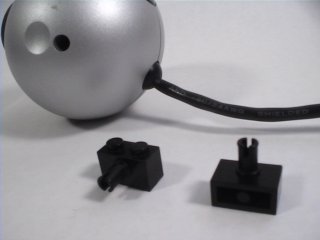
In this hole lies exactly 1/4 of the support system that makes this whole concept work. (Another 1/4 can be found in the 2nd hole on the other side of the cam) |
|
|
|
|
|
|
These two axles make up the other half of the support system. |
|
|
|
|
|
|
|
|
|
|
|
|
 |
|
|
|
C |
|
|
|
Stick 'em in the cam like this, and set this whole assembly aside. |
|
|
|
|
|
|
|
|
|
Laying the foundation |
|
|
Step#3 |
|
|
|
|
|
|
|
|
|
|
 |
|
|
|
A |
|
|
|
|
|
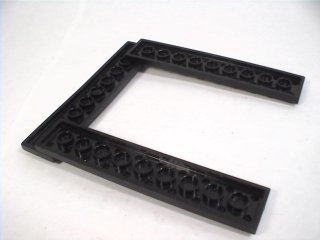
Place three 10x2 plates as shown. Make sure that the 2 end plates are only inserted one stud deep on the underside of the middle plate, as shown. Only two studs of the the 2 outer 10x2's make contact with the center. |
|
|
|
|
|
 |
|
C |
|
|
|
|
 |
|
|
B |
|
|
|
|
|
|
|
|
|
|
|
|
|
|
|
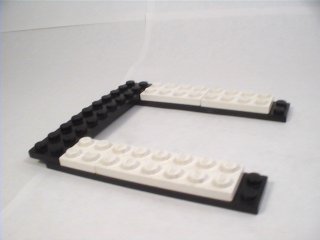
Flip over the assembly and add a 8x2 plate on each side as shown. (Make sure each end is not covered) |
|
|
|
Add a 10x2 brick to the rear of the assembly. |
|
|
|
|
|
D |
|
 |
|
E |
|
 |
|
|
|
|
|
|
|
|
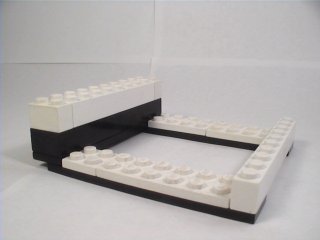
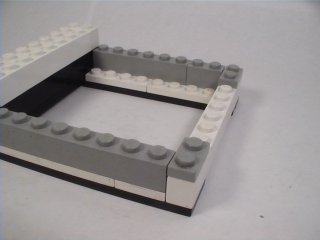
Put another 10x2 brick in the rear and also place a 10x1 brick in the front. |
|
|
|
Fill the in sides with two 8x1 bricks, and fill the front with the pair of 2x1 plates as shown. |
|
|
|
|
|
(Click "next" to continue) |
|
|
|
|
|
|
|
 |
|
|
 |
|
|
|
|
JFMP Home |
|
|
|
|
|
|
|
|
|
|
|