 
|
 Stretching StretchingStretching your netting fulfills the same purpose as putting cloth into an embroidery frame: it stabilizes the mesh and draws it taut enough to be easily worked upon. Most books I have encountered recommend fitting the mesh into a frame that exactly matches the finished size and shape of your lace. that's a laudable ideal, I'm sure, and I've done it from time to time. But it can get to be expensive and unwieldy, particularly if you are working a large volume of lace. So what is a cost conscious crafter to do? Same as always: improvise. My first stretching frame was actually a piece of cloth stretched tight in a lap-quilting hoop. I sewed my mesh down, and then cut away the cloth underneath. It worked very well, though I ran through all my scrap cloth in very short order. For smaller projects, a heavy wire coat hanger can be bent into the proper shape, and serves very well. However it's not as suitable for larger pieces, as the wire wants to bend under tension. Simply tacking or pinning a mesh to a board or pillow has worked for me in the past, but is not my favorite way of working; it is awkward to sew with wood or cloth under the mesh. An embroidery scroll-frame is ideal for most small projects, and is particularly good for long pieces, such as edgings and ruffs and such. It's even possible to work larger projects on one: simply replace the regular scrolls with longer dowels. 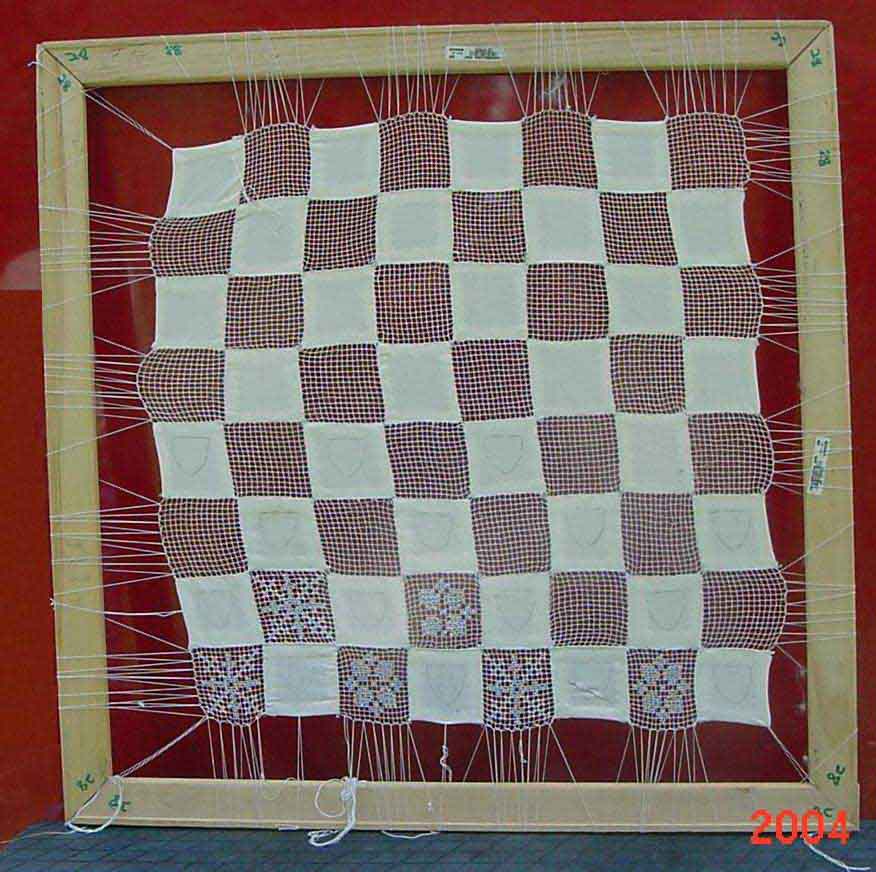 My current
favorite frame, however, are canvas stretchers. These are
wooden pieces (four of them to make a square) of picture
frames that painters use to prepare and mount canvasses
before painting. They are relatively cheap (between $2
and $20 for a set of four, in any good art supply shop),
easy to store, -- since they are modular -- and come in a
variety of sizes (ranging between 6 and 48 inches). Since
they are modular, they can be mixed and matched to
achieve the best size and shape for your project. My current
favorite frame, however, are canvas stretchers. These are
wooden pieces (four of them to make a square) of picture
frames that painters use to prepare and mount canvasses
before painting. They are relatively cheap (between $2
and $20 for a set of four, in any good art supply shop),
easy to store, -- since they are modular -- and come in a
variety of sizes (ranging between 6 and 48 inches). Since
they are modular, they can be mixed and matched to
achieve the best size and shape for your project.The frame I would most certainly NOT recommend is an embroidery hoop (including those new PVC ones). with a very few exceptions, it just doesn't work. The hoop ends up distorting the mesh around the outside, breaking threads, and generally spoiling your work. 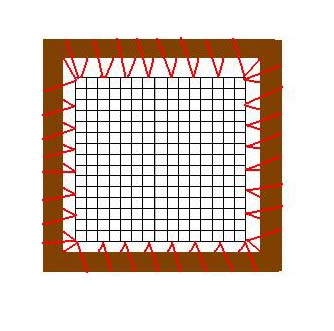 Regardless of
which frame you choose, the process of stretching is
essentially the same. The mesh is sewn into place, with a
sturdy thread looping between the frame and the edges of
the mesh, such as is illustrated in the diagram. As you
take up the slack, care should be taken to be sure the
lace maintains proper shape and isn't distorted. If you
are working with square mesh, you might want to take two
loops in the corners, to help to pull them square. Regardless of
which frame you choose, the process of stretching is
essentially the same. The mesh is sewn into place, with a
sturdy thread looping between the frame and the edges of
the mesh, such as is illustrated in the diagram. As you
take up the slack, care should be taken to be sure the
lace maintains proper shape and isn't distorted. If you
are working with square mesh, you might want to take two
loops in the corners, to help to pull them square.But don't fear about breaking the mesh; it's surprisingly strong, and can tolerate more tension than you might suppose. With a strong cotton-thread mesh, I can draw my own work as tight as a drumhead, without fear of breaking any thread. You don't really want it that tight; a very little slack will make darning easier But it is possible, as the mesh is stronger as a whole than it might seem.
|