Putting it all together
Let's continue building our set of stairs by putting everthing together. If you haven't seen the first part of this tutorial, you can check it out here:
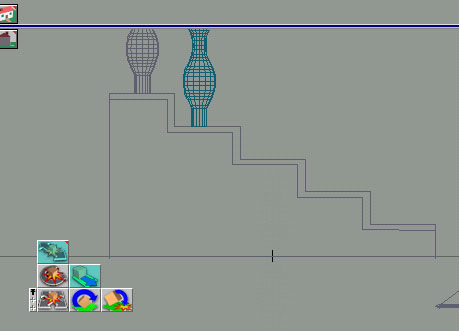
As before, start a new TrueSpace scene in 4 panel view and insert the Steps object that we created in Making the Steps. In the top view, right click on the Steps object to enter Point Edit mode. Select the Polygon Slice tool and click on the points shown below. Take care in ensuring that the lines are straight.
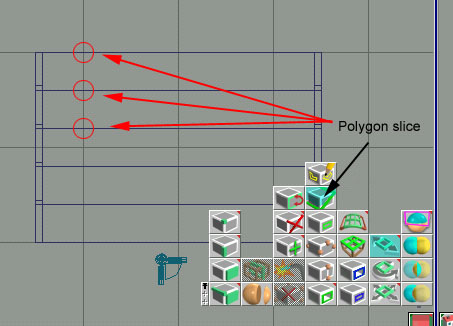
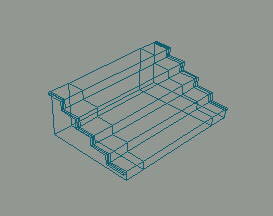
The Polygon Slice tool traces a polygon completly around an object using the three points to determine the location and angle of the slice. You should now have something like this:
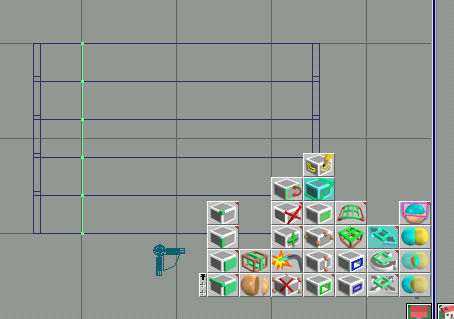
Select the Point Edit: Faces button and click on a face on the left side of the Steps to complete the slice. Then click on the Polygon slice tool again and slice the right side. These twp polygons will act as guides for the bannisters and also create faces for the carpet.
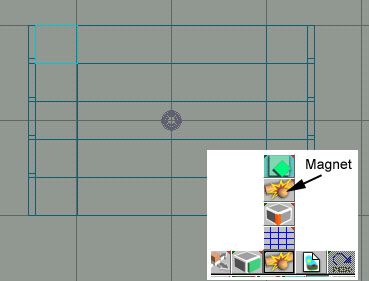
Now insert the bannister Post object that you create in Making the bannister. With the post selected, select the Magnet tool and click on the top left face shown below in the top view.
The post will snap to the top of the Steps onto the face you selected. Now press CTRL-C to copy the post and in the left view move the post copy to the right and down. The post will snap to the faces of the steps as you move it. Move the post to second top step as show below.
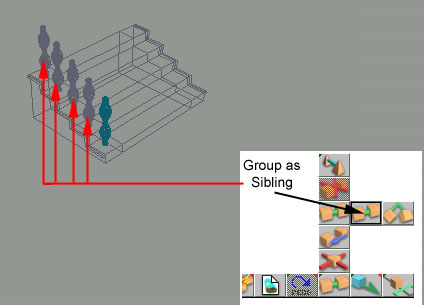
Repeat the process of copying the post object and moving the copy down a step until there is a post on each step.
With the bottom post selected, select the Group as Sibling button and click on each of the posts to group them together.
Now insert the Handrail object that you created in Making the bannister and using the top and left views, position and rotate it as shown below.
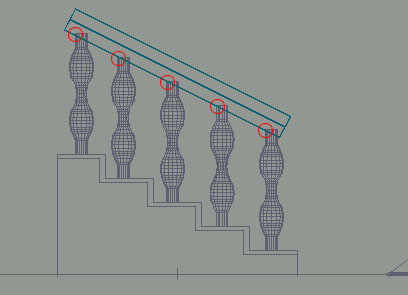
Select the bannister posts group and group the hand rail as sibling. Press CTRL-C to copy your bannister group and in the top view, move the copy to the right as shown below.
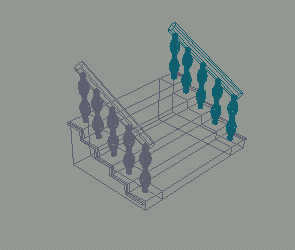
Now we want to group all of the stairs objects together. First, with the steps object selected, select the Group as Child button and click on the left bannister group. Now press the down key on your keyboard to enter the group and press the left key to select the bannister group. Now Group as Child with the right bannister group. Press the up arrow to return to the parent Stairs group. The stairs group should now work this way. The down arrow will allow you to select the steps or the the two bannisters. With the bannisters selected the down arrow will access the left and right bannisters. With a bannister selected the down arrow will access the handrail or the bannister posts. With the bannister posts selected the down arrow will access the individual posts.
Insert your Stairs object into the House objects library and call it Stairs
Colouring and texturing