Do not know what a Nixie is, do you? Read the F A Q . Want to flame me? See my Homepage. Want a simple project to start with? Try the Nixie Spinner.
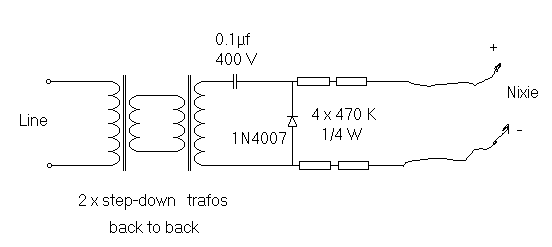
So you have a bag full of Nixies. Before plugging them in to your latest creation, it would be an idea to test them. Here is a circuit to test nixies and neons with:
The two transformers function as a single low power isolation transformer. You may leave these out if you know what you are doing.
The four resistors are for current limiting. DO NOT replace with a single one of equivalent value. And CHECK that value! Use a multimeter if you are unsure (yellow-violet-yellow-gold = 470K 5%).
Probe any two of the nixie's leads. The negative one will glow, probably over part of its area. Label those leads. The positive lead connects to the cup and grid enclosing the shaped electrodes.
Nixies have to be run at the correct current, overloading will cause them to blacken. Under running (i.e. insufficient current) will cause part of the electrode to be unlit. This tester is not intended to test nixies at the correct current, it only helps you to verify that the nixie does in fact light up and maybe identify which electrode is connected to which pin. If nixies lose their hermetic seal air would leak in and they would stop working.
You can solder wire ended nixies to a circuit board. If you have the type with pins, you MUST use a socket; soldering direct to the pins will ruin them for sure.
It would be a good idea to lash up some circuits using neon lamps before wiring up nixies. They are cheaper and electrically, behave the same way. That way, if you blow up a couple you will then know what to avoid when trying not to fry nixies.
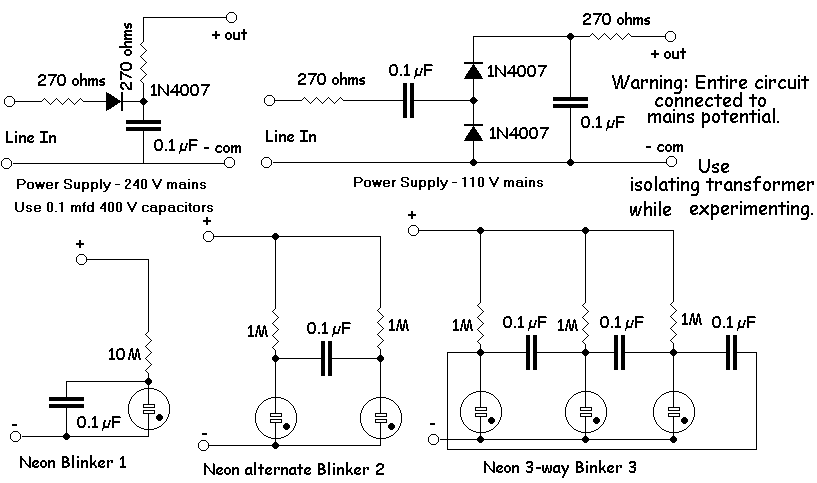
You might use some of these circuits to simulate electronic activity by building them in to fake tubes with Perspex tubes and electrodes of wire mesh and aluminium foil.
If you need a simple circuit, the Nixie Spinner might be something to start with.
You might have just one nixie, and wish to display it. Well, why not an illuminated house number display using a single nixie? This works if your house number is less than nine digits long. For example, if your number is four digits long, break the asterisked connection and connect pin 15 of the IC to output 5. Output 4 is left free and outputs 0 - 3 connect via transistors to the appropriate cathodes of the nixie. For repeated digits, just connect the collectors together. As it stands, the Nixie Spinner is an automated 0 - 9 counter suitable for testing nixies.
The following is the block diagram for a quartz clock using Nixie tubes.
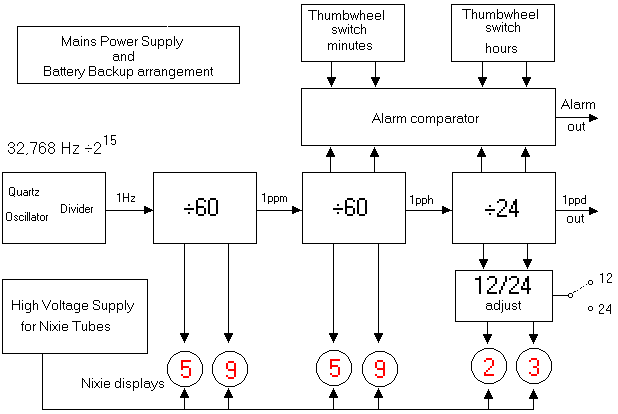
The mains supply is stepped down by a transformer and used to supply the clock. During power failure, or when you unplug the clock to move it to another location, it is desirable that the time is not lost. For this, a standby battery is utilised to keep the clock running. Depending on the user preference, the time can also be displayed with mains unplugged.
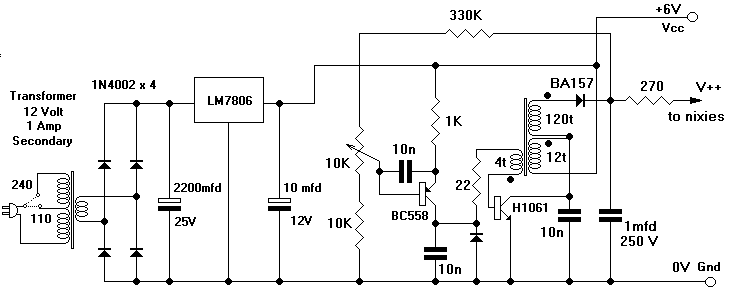
This makes necessary a circuit to step up the low voltage of the battery to the high voltage necessary to feed the nixies:
A quartz crystal has perfect frequency stability and is preferred over a mains timebase because in some countries the mains frequency may be off nominal by several percent. In the US, however, it is possible to drive a clock by counting down the mains frequency by sixty to derive the seconds pulses.
In principle, any quartz crystal may be used to derive the 1Hz pulses needed by our clock. A 1Mhz crystal would need to have its frequency devided by one million, and so on.
It is much easier, however, to make use of the quartz crystal and divider in a quartz clock. You need the type which has a sweep seconds hand moving in one step per second. This type of clock is driven by a small motor fed with 1Hz pulses from a quartz oscillator and divider powered by a 1.5V AA cell. A red LED has an approximate forward voltage of 1.5 V and thus the supply for this may be stabilized using one.
Nixies cannot be dimmed; to reduce their brightness you will have to switch them on and off at a high enough frequency to avoid flicker, varying the on-off ratio.
A circuit to do these functions, together with a noisemaker for alarm:

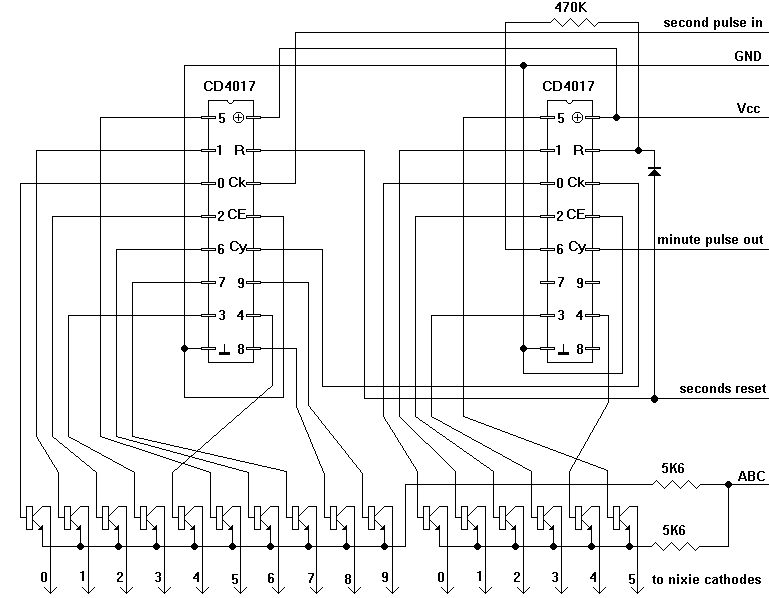
Once you have derived the seconds pulses, a divide-by-sixty stage is used to derive the minute pulses from it. You may, if you wish, drive two nixies from these counters to display seconds.
The divide-by-sixty stage is wired up as shown:
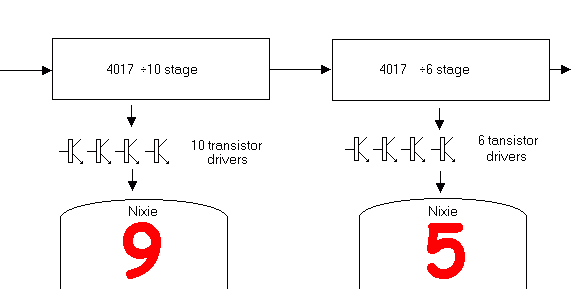
The divide-by-ten circuit is shown in detail:
The divide-by-six and divide by twentyfour circuits are built up using this basic arrangement. If you are doing printed circuits, it helps to make a batch of these. Each clock would require a minimum of six such boards, two for seconds, two for minutes and two for hours. If you want to add a day-of-week counter that is one more required.
For the divide-by-six stage, four transistors are omitted. That single emitter resistor sets the current for the nixie tube. It goes to the switched -ve supplied by the automatic brightness control circuit, which controls the brightness of the nixies according to the level of light in the room.
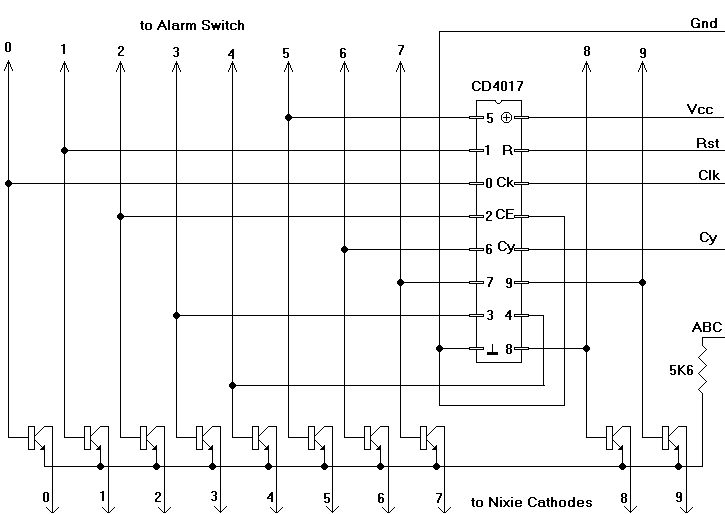
The divide-by-sixy seconds counter in detail:
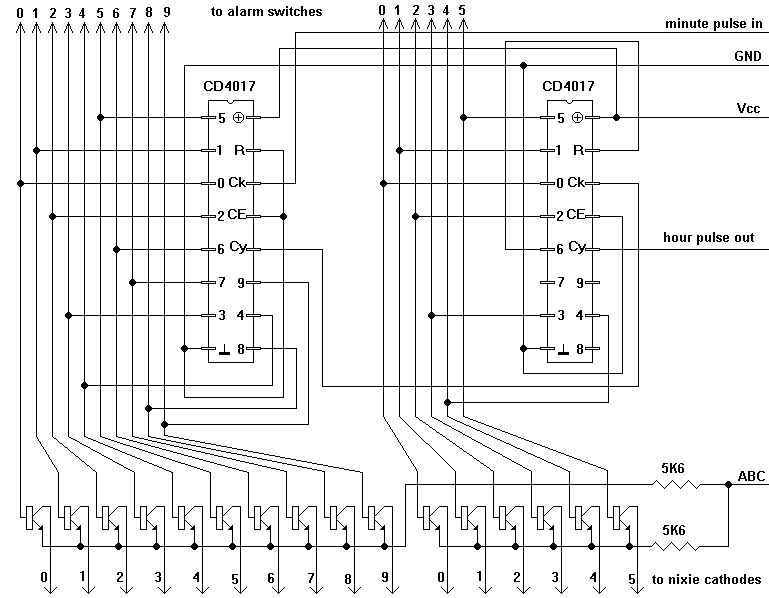
The divide-by-sixty counter for minutes follows the same form except for two differences: it does not need to be reset and it also feeds the alarm switch in addition to the nixies.
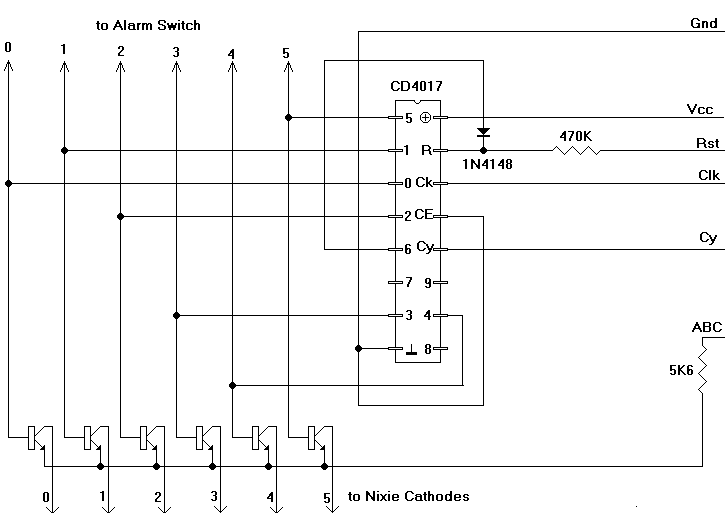
The minutes counter is shown in detail:
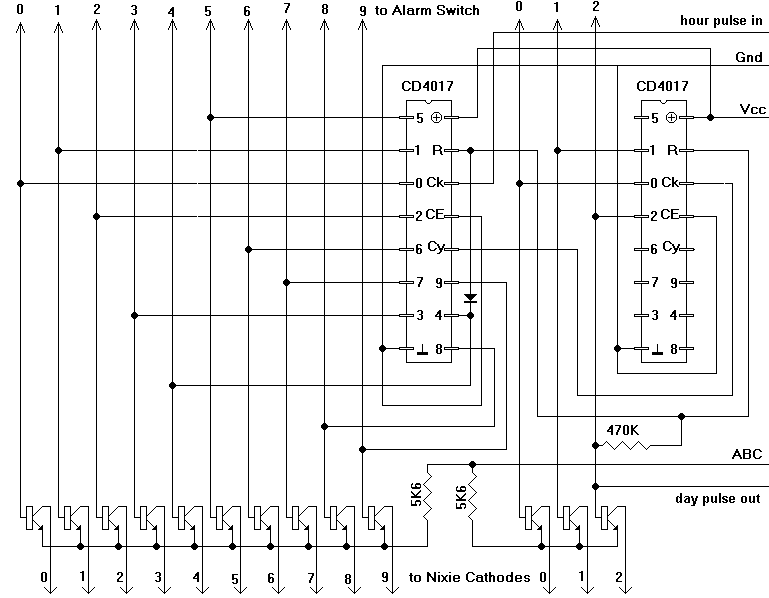
The divide-by-twentyfour counter for the hours is shown below. If you can live with a 24 hour display and do not need to switch to twelve hour mode the thirteen transistors may be fitted as shown and the nixies driven directly from the counters.
If, however, you need to switch between display of 12 and 24 hour modes then the transistors are omitted and a further display translation stage based on an EPROM is added.
The thirteen outputs of the 24 hour counter feed the address inputs of a suitably programmed EPROM. By switching an additional address line to ground or Vcc the displays may be made to display the time in either 24 or 12 hour format. In 24 hour format, the input is passed unchanged to the output. In 12 hour format, the AM - PM neons also have to be driven. Since the outputs of the EPROM are insufficient for this, two decoders are also fitted, as per the figure below:
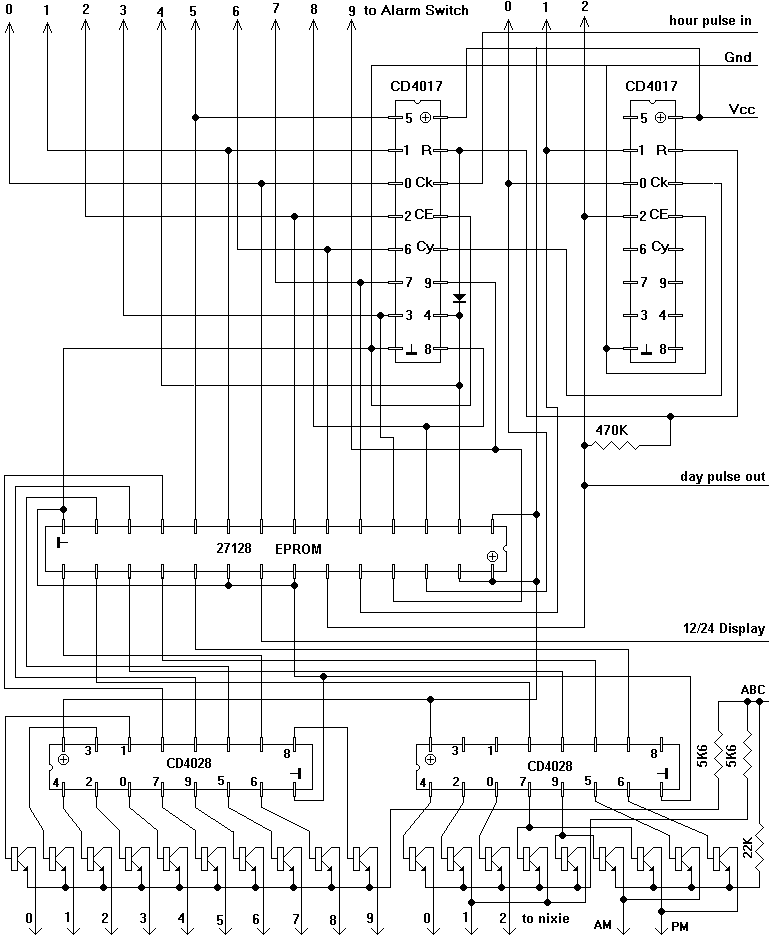
If you need to have distinct signals on the hour, quarter past, half past and three-quarters past the hour, they are decoded by four gates inside a CD4011 as shown. For the alarm selection, you will need two ten-way, one six way and one three way single pole switches. They are arranged as shown:

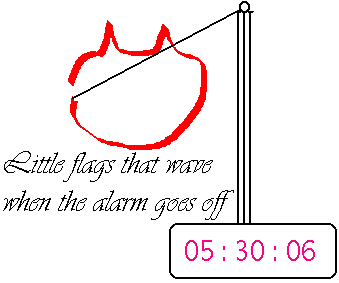
When the alarm goes off a pennant at the end of a stick waves, tracing the outline of a feline head.