Paint Shop Pro Advanced
Week Two - Part 1

This original image, Flower Power, had two layers, the background layer was white and the image was on layer 1.
I opened a new image with the same pixel dimensions and made the background layer white. I went to Image - Noise - Add and set the perameters to random 70%. I then went to Layer - New Raster Layer and I flooded this new layer (layer 1) with soft gray and no texture. I set the Apply Mode for this new layer to Multiply.
I went back to the Flower Power and activated the layer with the image. I pressed CTRL - A (select all) and then CTRL - C (copy).
In the new image I went to Edit - Paste - As New Layer. Now my flower image is on layer 2 of my new image. I set the Apply Mode of this layer to Overlay. Then I saved the image both as a PSD and as a JPEG.
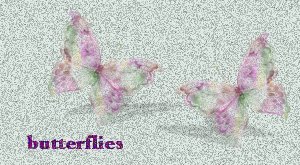
The butterfly image was done much the same way. But my layer with the image was done with a tube that I downloaded from the internet and I also had a text layer.
Original Image

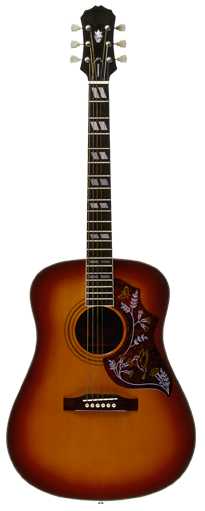

I created a new image with the same pixel dimensions as the guitar image and I set the background to white.
I then created a new layer (layer 1) with transparency where I painted with a tube (musical notes) that I downloaded from the internet.
I selected the guitar from the original image and copied it to the clipboard. In the new image I pasted it in as a new layer. I then set the Apply Mode of the guitar layer to Multiply and the opacity to 70%.
Animated Button
I created an image that has the button as the background layer. I then duplicated that layer and added the "L" Then I duplicated that layer and added the "i" I continued to duplicate each layer and add another letter to my name until I had six layers. I saved the image as a PSD. I then opened the image in Animation Shop and all the layers were already put into frames. I then clicked on each of the original frames and went to Effects - Insert Image Effects. I selected Animation Frame for both start and end frames, Effect - Fade, Transition - .5 sec., and Frames/Sec - 10. This is how I got the letters to fade into view. This way of transitioning between frames is very similar to Tweening in Adobe ImageReady or Transitions in PowerPoint. Next I had to time each frame, optimize using the Optimize Wizard, and save.
At first I did this by copying each layer from PSP and pasting it as new frames in Animation Shop. That was the hard way.
I created these animations with some clip art that I found in the ClickArt 300,000 collection. I used the Animation Wizard. These little guys would drive anyone crazy!