 |
|
|
|
|
|
|
|
|
|
|
|
|
|
|
|
|
|
|
|
|
|
 |
|
|
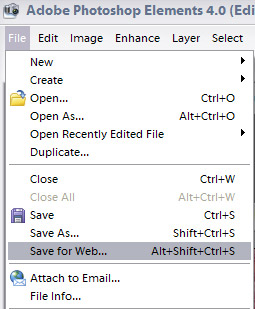
Here�s how it looks now, after I have dragged and dropped my left picture to the right picture and shrank down the right picture. Notice how the layers window now shows both pictures. The original one underneath is labeled background and is locked. The other one on top is labeled Layer 1. Now, as I understand it, in Photoshop Elements you are ready to save this as a gif file. Go to File, Save As Web. (This picture is specific to Photoshop Elements). |
|
|
|
|
|
|
This is the right hand side of the new page. You want to make sure that GIF is selected and that the other boxes are set this way. The larger the number in the colors box, the better your pictures will look. It makes a larger file but it will be alright. The image size and new size info will be different depending on the size of pictures you have, so don�t be alarmed there. Trimming you pictures to 4x6 is a good idea (see above).
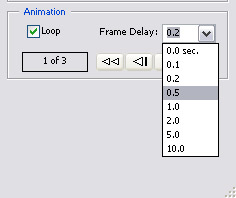
(This picture is of Photoshop Elements.) Make sure the check mark appears in ANIMATE. Next you need to select your animation options (speed and looping). Make sure there is a check in Loop and under the frame delay choose how long of a pause you want in between pics. This show .5 sec. I would do 1 or 2 we like to see your faces!! Once you have you settings, press ok and save your file. |
|
|
 |
|
|
|
|
|
|
 |
|
|
|
|
|
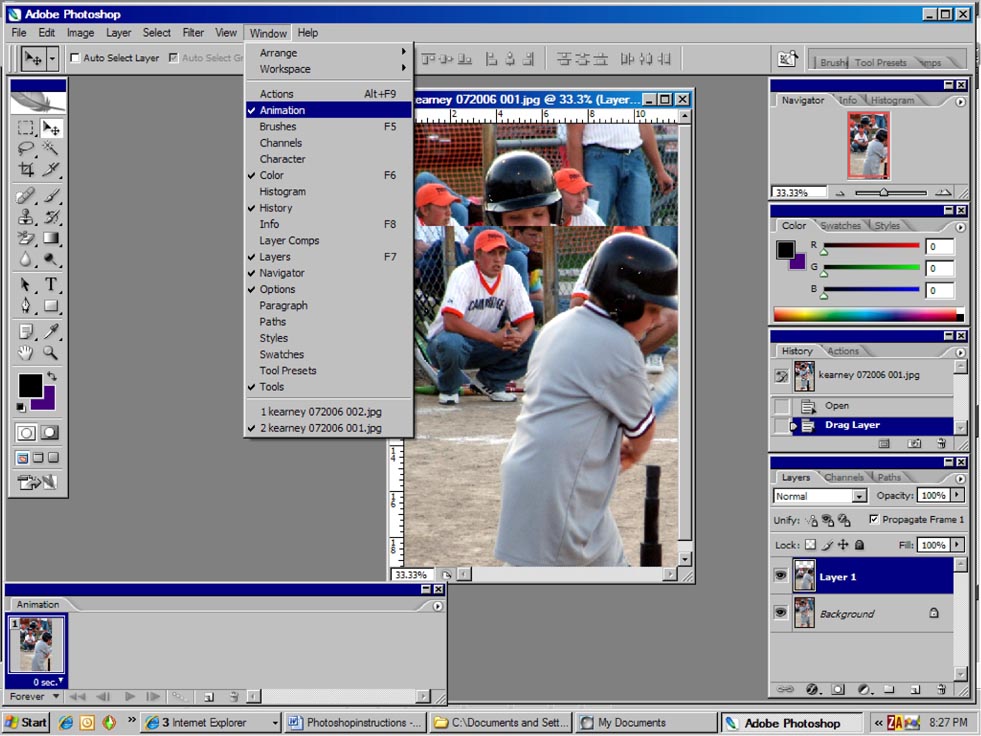
NOW in Photoshop CS2 it�s a bit more than that. Let�s review. We have our pictures �piled� into one window and they all show up in the Layers Window. Now you need the animation window open. It doesn�t open in default, so go to Window, Animation (note the checkmark will not be there when you first click, it is on mine because my animation window is already open). |
|
|
|
 |
|
|
|
The Animation Window at the bottom left hand corner will show only one frame. Don�t bug out!! You must click on the little arrow in the circle and choose Make Frames From Layers and then all the Layers will show up: |
|
|
|
 |
|
|
|
Continue to last page. |
|
|
|