LOOM-page #5. Twill-cords and lashing twill to outside poles
The two ends(of the triple twill cord) are now tied to the light rope on the other side also, so the
piece may be turned over and the same may be done to the loops of warps at the opposite side of the opposite end, at the same distance from the bottom of the piece.
It is now time to tie-off our piece to its permanent poles, so that the ones inside our warps may be removed. These permanent outside poles will remain in position until we have finished weaving our piece. A note about the position of our twilled cords should be made here. Their location is not at the very top and bottom of our piece at this time. That would make the process of tying them in place, as well as tying the outside poles in place most difficult. Rather, they are located above the inside poles at a distance of four or five inches, at the least. This is so a ball or skein of cord may pass easily between the pole inside the loops and the inside twill cords. As well as between the inside pole and the outside pole in the next step. So too, it may now become apparent, because of the warps being in a figure-eight, as to why we must do one end on the opposite side of the other. When one is moved to the very end of our piece, the other will move to the opposite end also, instead of toward its middle. As would happen if both were placed on the same side.
It's enough to just measure from the bottom, and work the twilled cords
at the same height from the bottom, and on opposite sides from each
other, at enough distance from the bottom pole to work unimpeded.
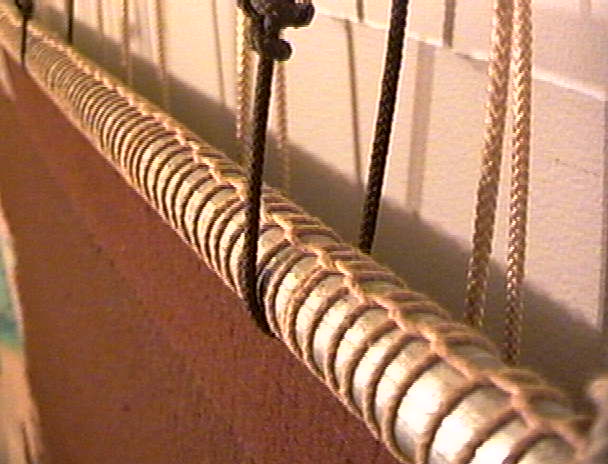
Now is the time to lace the permanent, STRAIGHT poles to our twilled end cords with a strong cord.
I like to use a square knot, then a series of half-hitches for an inch or more. Tying the three twilled cords to the pole, then pass between the first two loops of warp. The pole has been positioned along the twilled cord by tying it at the twilled cords ends to stretch it along the poles length.
Continue to wrap the cord BETWEEN the loops of warps and around the
twilled cords and the pole, taking a half-hitch along the back or opposite side of the pole from the twilled cord, at each turn of the
stout cord until passing the final warp and tying the three twilled
cords at the other end. Then just turn the piece over and do the same at the other end.
While this pole will not need to be extremely stout, it must be
straight and long enough to go beyond the ends of the piece being woven
by several inches.
For the ones from five to eight ft. wide, I like to use a single-walled conduit pipe. Though wood is preferred over medal when it can be had, because of slippage from the cord tied to it, less noise, as well as more aesthetic value.
Though I will confess to a certain beauty in an all metal, chromed and
polished stainless loom of modern and technical looks, and a primitive
corded and traditional patterned piece being woven on it.
| ||||
|