Page #6.-six (Top and bottom beam poles: Now that we have attached our piece to the top and bottom poles with the aid of a stout cord, wrapped with half-hitches BETWEEN the looped ends of warp and around the poles, it is now time to tie these primary poles to our stouter secondary "beam-poles." (Sky Pole & Earth Pole)
��These will be the two poles that will be tied to the beams at top and bottom, in order to stretch our piece with enough tension to begin
weaving. When the sky is pulled down to touch the earth, then you may have too much tension.
��These two poles need to be strong enough to allow the tension of the
process without becoming overly distorted between where they tie to the
primary poles.
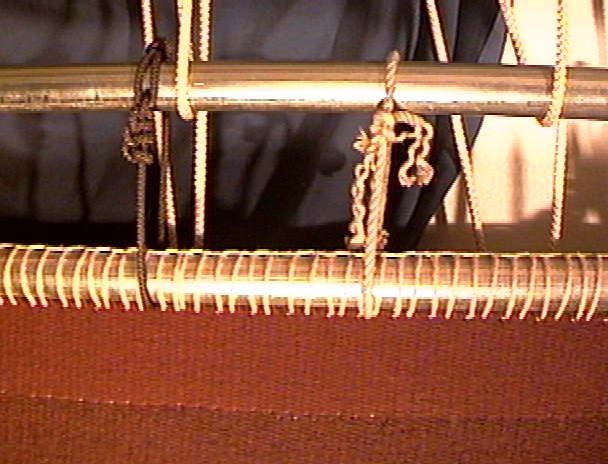
��From the photos, it can be seen that another conduit pipe has been used
here.
��Tying the two poles together is done here with a light braided rope of
about a 3/32" thickness.(black parachute cord)
��Of main import here, is getting all the tied loops of the same tension
and size.
��It will also be helpful to tie both ends first. Then tie one loop in the middle and place the piece under tension to be able to tie the remaining ties fairly snugly, working from both ends toward the center.
��This may cause the first ones placed at the center to become looser
than the last ones tied out toward them.
��Use as many as possible while remembering to keep enough room to work
between them.
��If there is a concern that the cord is not stout enough for the distance apart they are required to be. It is possible to double them on both sides of a warp.Then let them go back together around the other (secondary) pole. ��This is preferred to doubling them in the same place around the twilled cord, as it will cause too large an opening in your piece at that point.
��Basically, what is being done here, (see photo.) is the tying of the
two poles together, and a small distance from each other,
(larger than your fist.) with single loops of light rope or heavy cords.
��The reason to insure that you do NOT capture a loop of warp with these ties, is to prevent them from stopping the warps being allowed to slip around the twilled cord at each end of the piece being woven. ��It is also important to not catch a loop of warp with the passing of the primary cord that ties the twilled end-cords to the primary poles. The thought being to not restrict the slippage of the warp cords in this way also.
��Even though I find it to restrict the slippage somewhat. It does not
impede it to a point of being a problem. The slippage is still enhanced
by the fact of the differences in the cotton to the wool cords, as well
as the fact that under tension there is enough play or stretch in the
cotton to allow what play is needed.
��The advantage of having the warp loops incorporated into the temporary
cord that ties the twilled end-cords to the primary poles is that it
takes the strain off the twilled cords while the piece is being woven,
and under tension. Because of this extra tension the continued sawing effect caused from the working of the loom would cut through the twill cords were they not reinforced from having the stout cotton tie cord hold them to the tie pole. Another thing worth a mention is as follows:
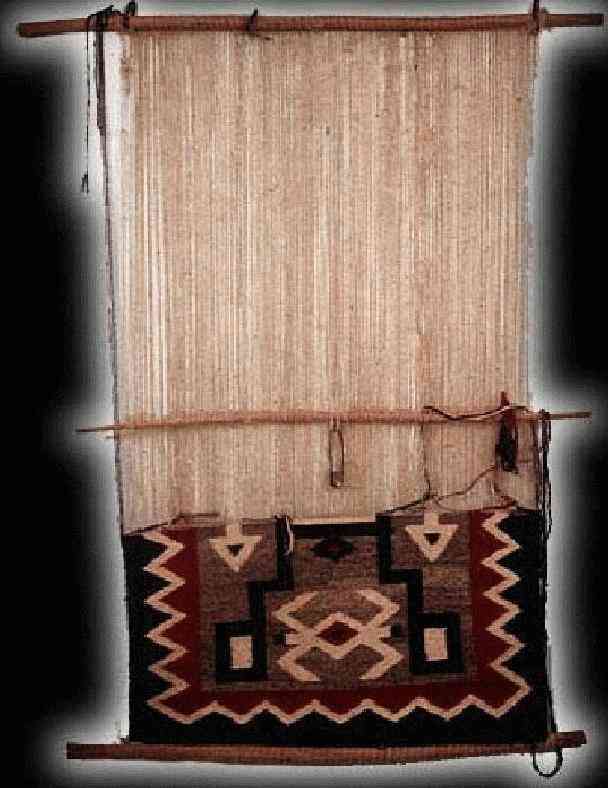
��At the point that the two primary and secondary poles are tied to the
twilled end cords of our piece. It should be noted that those four poles
and the two tied in the two shed openings of our piece's warp loops, are
the Navajo loom.
�This will remain true until the piece being woven is complete.
Thus we have a Navajo loom, and yet the lack thereof..
| ||||
|