|
Beginning
Builders Tips
This page is just a list of things
that I have found along the way that have worked for me and I thought could be
useful for someone that is not as far along in their project that I am.
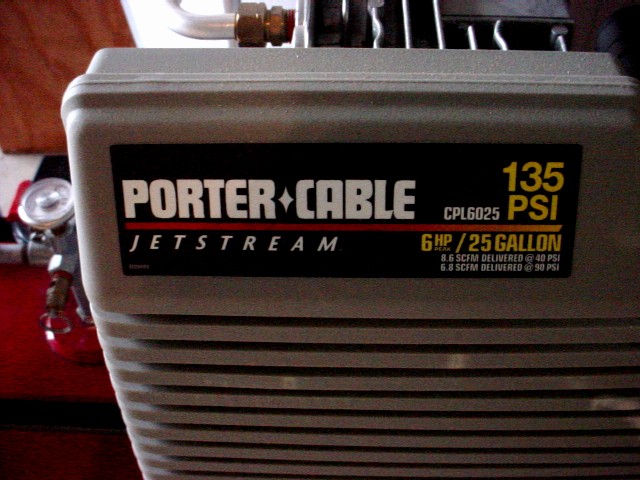
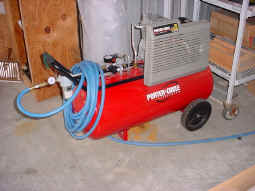
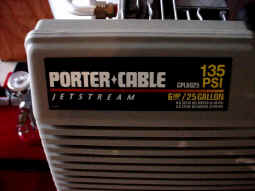
A lot of people ask how big of air
compressor is needed. here is the one that I bought at Lowes and it works
great. I did have to run a separate outlet from the breaker box just for it. I
only had one outlet in the hanger and I have lights, chargers, and a small
refrigerator on it. The compressor would trip the breaker. Don't get an
oilless compressor, they are very loud., this one is oil lubed. 6 HP, 25 Gal.
6.8 SCFM @ 90 PSI. Model# CPL6025
One of the first things that I
learned was something that I already knew but had forgotten.
Air Pressure when priming parts: 35 psi
I had forgotten this and shot my first parts at 90 psi and wasted a lot of
paint, it just blows all over and you loose it thru the air.
The next thing I learned was:
Air pressure when riveting 1/8 rivets: 65 psi
I set the pressure gauge about 75 because it will drop as soon as you pull the
trigger.
Air pressure when riveting 3/32 rivets: 45 psi
I set the pressure gauge about 55
You will need about 100 silver
clecos to cleco the skins on the Horizontal Stabilizer.
When we started riveting the skins on the Horizontal Stabilizer when found
that the bucking bar would not sit square. It was causing the rivets shop head
to be deformed. So we needed a different surface that would make a good shop
head. I used my table sander to sand a smooth flat on the side the the bucking
bar then I use a scotch Bright wheel to polish the surface. Work great.

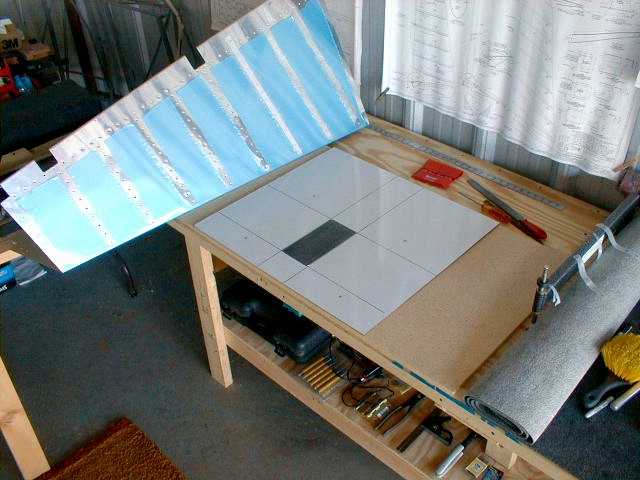
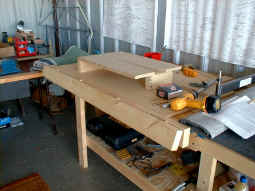
Back Rivet Panel
Here is a picture of the
Back Rivet panel that I made. I used a 4x2 piece of particle board with two
layers of masenite drilled to it. I cut a hole out of the masenite and place the
Cleveland back rivet plate into it. I then drew line showing the edge of the
back rivet plate so I could tell when I was getting close to the edge of the
plate. 1hr of work not counted in the airplane construction time.
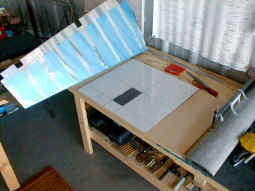
Bending Break and
V-Block
Here is a picture of the
bending break I made and attached to the front of my work bench, two bolts and it
comes right off. Also in the picture is a V-block being constructed. 1.5 hr of
work not counted in the airplane construction time.
Trim Tab Rivets
My
regular hand squeezer yoke wasn't fitting and my no hole yoke wasn't fitting
over the hinge. After giving it some thought this is how I got those rivets
squeezed. It is a hex handled punch I had laying around.

Wing Stand Brackets
You will have to cut notches in the outboard end bracket to allow room for the
wing skins.

Double Offset
modification
You will have to modify the double offset to be able to rivet the outboard
leading edge to the main spar, the beach sander did a fine job.

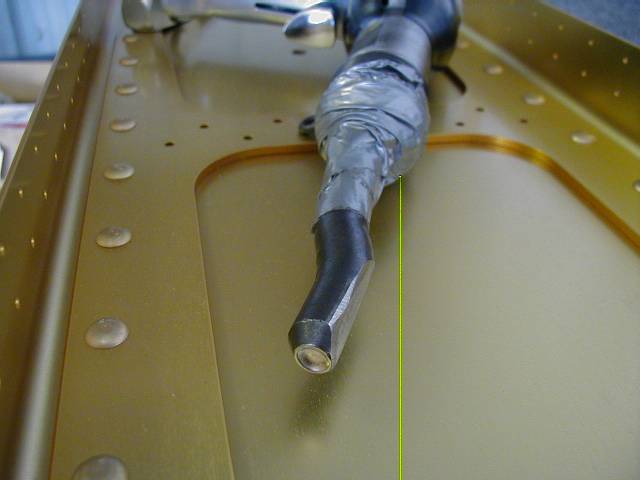
Flush Set
Here is a picture of the mushroom set and the swivel flush set with rubber
guard. The mushroom set came with the Cleaveland Aircraft tool - RV Empennage
tool kit. I used it on the tail and ended up with a few smileys. I heard from
some of the guys on the RV list that the swivel set would keep the smileys from
happening. I ordered it and haven't had a problem since.

Cold Weather
Prosealing
I got one tank done in the summer, but my second tank wasn't ready to assemble
until it turned cold. I was worried that the proseal would not cure properly. I
asked about it on the RV List and got a good suggestion from someone. I made a
stand and mounted two 500 watt holagen lights on it facing down into the tank.
This seems to be working good. It keeps the tank about 40 degrees warmer than
the temp outside the hanger. I also found that when the hanger temp is near the
low 50's the proseal is pretty stiff when mixing. I mix it on a small plastic
plate. I sit the plate with a batch of proseal under the light for a few minutes
and it soften right up and is easy to work with. I also tried to heat the tank
up before starting.


|