 |
|
|
|
|
|
|
|
|
|
|
|
|
|
|
|
|
|
|
|
|
|
|
|
|
|
|
|
|
TJ Rear Flare Install |
|
|
|
The following photos document my installation of TJ rear fender flares on The '83. The body on The '83 comes from a '95 YJ onto which I had already fitted a TJ filler neck, as can be seen in the pictures. Although it prevented me from locating the flare about 1/2" further back as I would have preferred, I think it's a nice mod, and makes using your CJ gas tank with the YJ tub just that much easier.
The '83 sports a 2.5" Rancho spring lift and about 1/2" of Currie shackles, swaybar disconnects and no body lift. I wanted to be able to run 33s without any more suspension or any body lift, but was concerned about rubbing when flexed. Based on the results of those who have gone before me, I decided that TJ flares were the way to go. I used a Bosch jigsaw with a 24 TPI blade and got excellent results. This is the "short form" of the rear flare install procedure. For the more detailed story click here. |
|
|
|
Before you start make sure you check behind what you will be cutting. There may be support brackets, differential vent hoses or that pesky wheelwell behind the sheetmetal you're so joyously buzzing through. Also, I hope you're wearing your mechanic's gloves and safety goggles. :) |
|
|
|
 |
|
|
 |
|
|
|
|
|
|
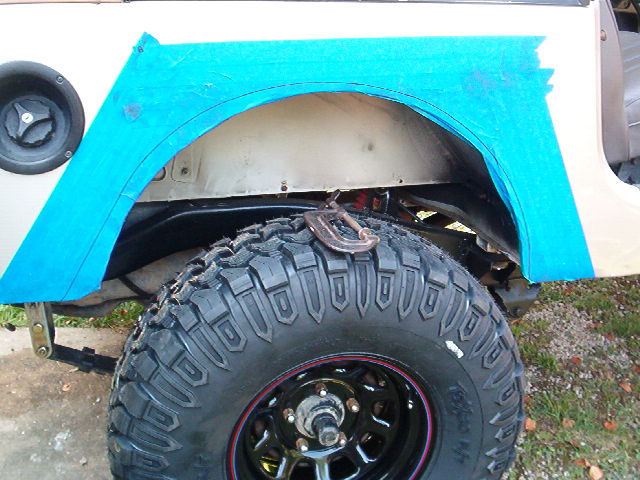
After clamping the flare to the body with a couple of small C-clamps to test-locate it, a line was traced following the lower lip of the flare. I decided to cut about 1/8" above the line so the flare would fit properly. Line up the front and rear tips of the flare with the bottom of the body, with the rear tip falling about 1/4" to 1/2" behind the quarter panel seam. There is an area where the wheelwell comes extremely close to the body panel that you are cutting away. You'll have to trim what you can and shave a little material off the lip of the flare in that area to make it fit properly. |
|
|
After mounting the new 33" Interco tire to help visualize the ideal flare placement, the area to be cut was covered with blue painter's tape, both to add some measure of protection to the body and aid in marking for the cutting and drilling. Additionally, it does not leave any residue the way masking tape sometimes does. |
|
|
|
|
|
|
 |
|
|
 |
|
|
|
|
|
|
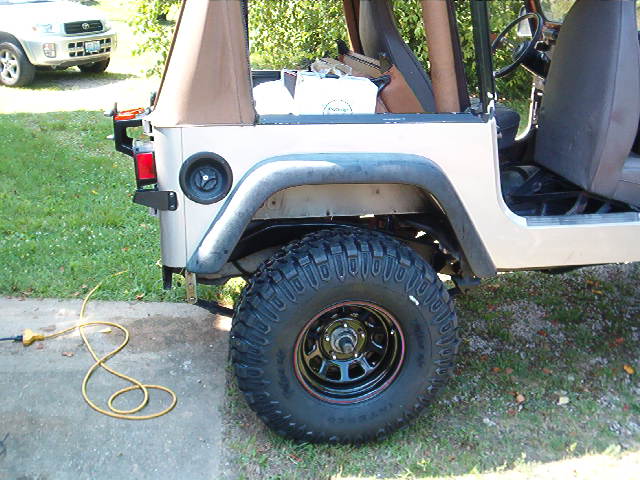
After drilling holes for the mounting pegs and shaving a little material off of one area of the lower lip of the flare (in the area where the fenderwell is too close to the side body panel to properly follow the ideal line) the mounting bolt holes are marked and drilled, the blue tape removed, and the flare is placed in position and bolted down with the old hardware from the CJ or YJ flares. |
|
|
|
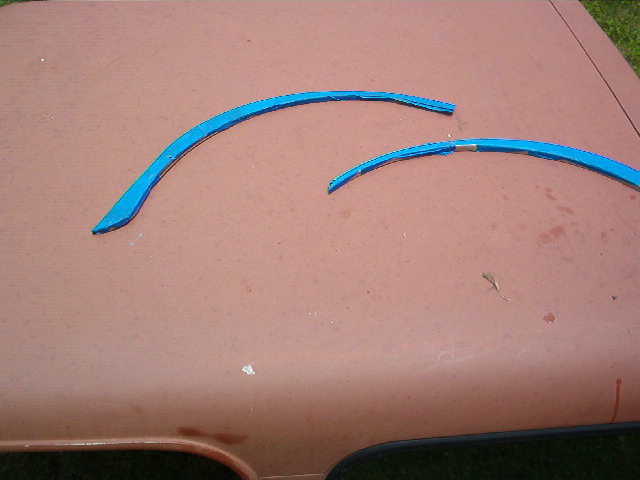
This is more or less what came off, not counting the bits that came off with the careful shaving I had to do near the front of the wheelwell area. Only about an inch at the largest areas, and closer to 5/8" in the smaller areas. Ideally, you want to be taking more from the back of the wheelwell, as this is the direction your tire will move when the spring flexes. |
|
|
|
|
|
What's next? |
|
|
|
I still have a little welding to do in some areas, especially up by where the side panel touches the wheelwell. Also, I'm thinking about taking a piece of 1/4" rod and welding it along the wheel opening in order to give it a little more rigidity now that the lip has been cut away. A little POR-15 or even just some rattle can paint on the freshly cut steel wouldn't be a bad idea either. |
|
|
|
Not detailed enough for you? My left side rear flare install is much more detailed. Check it out. |
|
|
|
Back |
|