
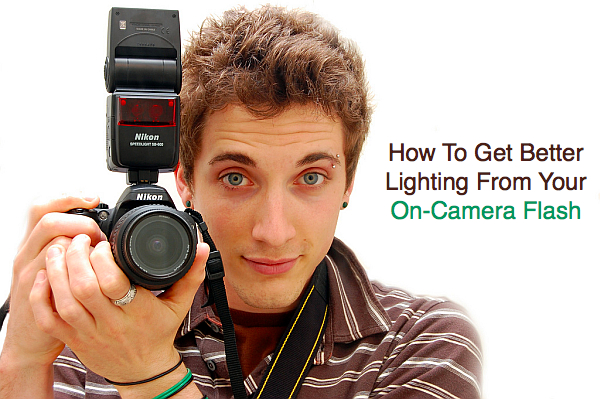
On-camera flash bounced off wall and ceiling, camera left.
| HOME | PHOTOGRAPHY | POTRAIT PHOTOGRAPHY | WILDLIFE PHOTOGRAPHY | STREET PHOTOGRAPHY | FLASH PHOTOGRAPHY |
You can get great lighting for your portraits with on-camera flash. And there’s no need to purchase expensive attachments to modify your light, because everything you need is already there. The thing to understand is that your flash unit is just another light source at your disposal. Fortunately, you can learn to control the light it produces and shape it to your needs. Plus, it has the added benefit of doing some of the thinking for you when you need it to.
Since the light your unit produces directly can appear rather harsh, you’ll have to do one or both of the following in order to get more pleasing lighting from it:
The following tips will help you accomplish these goals:
This is the number one secret weapon when it comes to on-camera flash techniques. Indoors, a typical room with light-colored walls and ceilings will provide you with all the bounce surfaces you need to make beautiful pictures. Using this technique, you can achieve softbox-style lighting, or even very broad lighting, with your flash unit alone.
Although the flash unit itself is a relatively small light source, it will cover a wide area of a wall and ceiling. This newly illuminated area will provide a wider, more diffuse “light source” for the subject.
On-camera flash bounced off wall and ceiling, camera left.
To create a portrait with the bounce technique, I generally tilt the flash unit to hit the ceiling and wall as I visualize a large softbox there, at the traditional portrait lighting angle, to my subject. This technique is very versatile as it can give you everything from very dramatic split-lighting to soft, even illumination. The subject’s orientation, and the resultant secondary bounce around the room (providing fill light) are the keys to creating the effect you want.
You can even angle your flash up and behind you to fill a small to normal-size room up with beautiful light. Spin it around and up at about 45 degrees to hit the wall and ceiling behind you.
Something most people don’t realize is that light comes out of your flash unit in a wide pattern, not in a straight beam. While most of the light is focused forward, there is a good amount actually spilling out perpendicular to the flash head lens.

Even when your flash is set to a narrow zoom, plenty of light still spills off the sides. A small flag can be used to block this effect from your subject.
When bouncing your flash, at certain angles close to that perpendicular plane, direct light will hit your subject. This isn’t necessarily something you have to avoid, but it can result in “point-and-shoot” type shadows, especially if there is a wall or other flat surface just behind your subject.
To eliminate this effect, you can place a small piece of opaque material or black foam just long enough to block the direct part of the light from hitting your subject. That one little change can make a big difference in the overall look of your shot.
The size of your light source, relative to your subject, affects the overall look of the picture. This is generally because a larger light source will create a smoother transition between light and shadow, or what you might call softer light.

Craft foam bounce card with rubber band.
We’ve already discussed how bouncing your light off a wall and ceiling will make the relative size of the light illuminating your subject larger. But what if you don’t have a wall or other surface to bounce your flash off of? You can still make your light source bigger by using a simple bounce card. Because the light being directed toward your subject is at least twice as large as the face of the flash, you’ll get that much more surface area coverage. This usually results in more pleasing illumination if you’re not too far away from your subject.
Indoors, a bounce card like this has the added benefit of throwing light onto your subject from two directions, forward and bounced off the ceiling.
Simply use a piece of white cardboard or crafting foam attached to your flash head. Of course, you can orient the flash in various ways to direct the light as you like.
Most modern flash units offer a variety of modes to shoot with. For example, I will often use my flash units off-camera, in manual mode. This allows me to maintain consistent manual control of the flash’s output power in relatively static shooting situations, like traditional portraiture.
Through-The-Lens (TTL) mode, on the other hand, puts the flash unit’s output under the control of the camera and flash. The camera and flash essentially work together to decide how much light the flash emits in order to properly expose the subject. Most modern TTL systems like Canon’s E-TTL and Nikon’s i-TTL are really great at what they do.
TTL can be used in just about every shooting situation including shooting in your camera’s manual mode, outdoors, and even when using bounce techniques. Since TTL can make life a whole lot easier for you, especially in fast-moving shooting situations, there’s no reason not to use it extensively for on-camera flash work.
When you’re ready, you might want to learn more advanced techniques using Flash Exposure Compensation and general Exposure Compensation controls in conjunction with TTL flash. These controls allow you to make easy adjustments to flash and overall exposure while still letting the TTL system do most of the thinking for you. Very handy indeed.
If your flash unit has a high-speed sync setting, turn it on. Most normal sync speeds for your flash will be limited to about 1/250 – 1/350 sec. That’s fine for situations where you’re in an environment with dim light. When shooting indoors, for example, you are free to shoot at any appropriate shutter speed UP TO your normal flash sync speed limit. That means you can just as easily shoot at 1/40 second to record ambient light, or faster if you choose to isolate the subject or really freeze the action.

1/2500 sec. exposure required high-speed sync for this promotional shot using f/2.8 outdoors.
However, whether indoors or out, if your exposures require a higher shutter speed, high-speed sync will allow you to shoot at virtually any shutter speed, generally up to 1/8000 sec.
You’ll usually need to work with higher shutter speeds if normal sync at your chosen aperture and ISO will result in overexposure of the ambient lighted portions of the image. This can happen easily in outdoor portrait situations, where the ambient background is rather bright, and you’d like a little fill flash on your subject. High-speed sync to the rescue!
Leaving your high-speed sync mode on all the time doesn’t mean it’s always in use. Your camera and flash will only use it if you are shooting beyond the normal sync speed. Otherwise, the flash will simply revert to its normal behavior.
DSLRs have the advantage of overall color control via the white balance (WB) setting you use. And if you’re shooting in RAW format, you easily have enough information in the image file to adjust for proper WB after the fact in something like Adobe’s Lightroom.
But there are times when you want to make sure the light coming off your flash unit is close to the same color as the ambient light. This will ensure that most of the light in your images are in the same ballpark, color temperature-wise.
Again, you’ll likely get the best results if you adjust WB during post processing, but this way the images will have a more consistent color throughout.
To bring your flash into the tungsten range of color for most ambient situations, you can use a Color Temperature Orange (CTO) filter over the flash lens. Set your camera’s WB to tungsten, if you like, and fine tune the WB in post as necessary.
Another tell-tale sign of misused on-camera flash is the dark tunnel effect. This happens when the camera is exposing well enough for the flash illuminated subject, but not enough environment light is being recorded. Allowing the ambient light and surroundings to appear in the image will place your subject in context and give the image a sense of atmosphere.

Bounce card combined with 1/40 sec. exposure.
Even if your camera has a preset flash mode for achieving this effect, I strongly recommend switching over to the camera’s manual mode. This will allow you to manually determine slower shutter speeds to achieve exactly the amount of ambient light you want for the image.

Creative use of direct flash and long shutter speed.
I find that shutter speeds of 1/15 – 1/40 second work for most environments, including outdoors at night. Regular TTL should still be employed in order for the camera and flash to make a good determination about the exposure of the subject (what the flash is concerned with). But, you are in control of the ambient with the shutter speeds you select.
Sometimes, the best thing you can do with your on-camera flash is nothing at all. As you become more proficient with it, you might be tempted to use it all the time. However, you don’t want to become dependent on it. After all, there’s plenty of good light available in most situations. But when you need a little extra here and there, it’s nice to know you can always slap on that flash and get great shots on demand.