Terrain tutorial - tutorial.zip Here is everything I used to make this.
First I would like to say that this tutorial is most adventageous if you follow along with me.
Ok, you will need 4 files for this, a metashader, an alphamap, a heightmap, and your .map file. I will go through the processes to use/link all these files together. First we need to make our heightmap. I named mine height.bmp, it needs to be an 8bit .bmp file, which means it has to be 256 colors. I made mine a greyscale image 32x32 (you may want to make yours larger and reduce it when you are finished) as the first step. As you can see it's all shades of black or white, I filled my image with a color of Red 128, Blue 128, and Green 128. This is a base grey color. Then I took darken rbg and darkened in the spot in the corner for my water, then I turned the opacity down and darkened the slope for the hill. Then I took the lighten RGB tool and lightened the edges for the slope. The image's pallette will contain 256 colors that shades pure black to pure white. Pure white will be the highest point and pure black will be the lowest. Each color stands for a certain amount of units, the default is a total of 256 units from pure white to pure black, however we can change this so we can make larger hills.
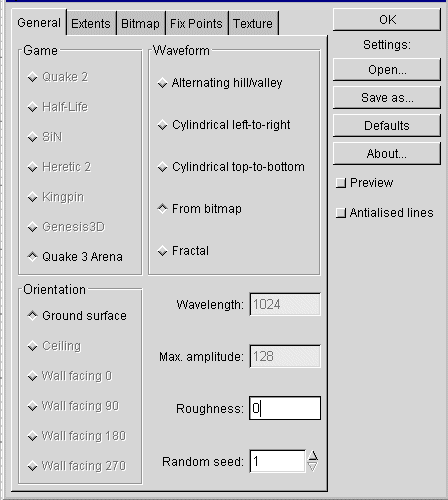
Now in Gtk you want to go to the Plugins Button on the top of the program, then go to GtkGensurf, and lastly click on ground surface. This should bring up a little window like below. You should see a screen like below, click on the "From bitmap" diamond, and set the roughness field to 0. Then click on the "From bitmap tab" for the next section.
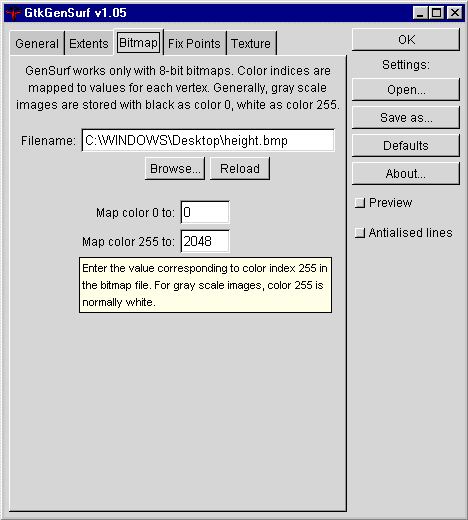
Here is where you load your heightmap in, just browse to the directory where you saved it and open it here. Here is where we can change the max colors. I made mine larger then 256 as you can tell(*note* as you can see it says map color 0 to 255. Computers commonly count things from 0 up, so its still 256 colors. I changed my max color to 2048. I can't really tell you what to set this to as it will take some expirimenting with your terrain in question. However the higher your max map color is the higher and lower your points will be. This is how we can make huge hills, otherwise if we left the max colors at 255 we would only see a difference of 256 units between our pure black and pure white color.
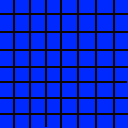
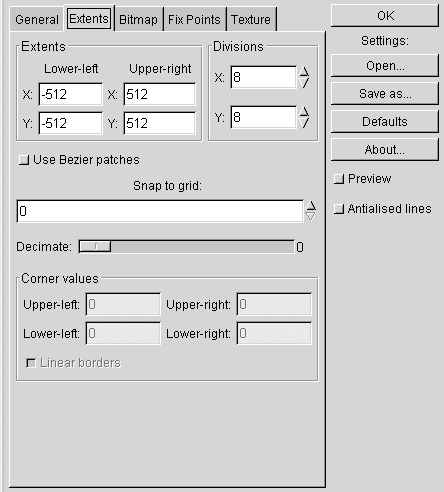
Now click on the extents tab in the window. This window does 2 things. It allows you to control how big your terrain func_group will be and how many triangles will be used it in. For the extents you have to set each corners point. So my terrain will be 1024x1024. the lower left corner being at point -512,-512 and the upper right at point 512,512. This is actually quite small, but I don't want to make you download a giant file so this is easiest. The more divisions we have the more triangles are used. I changed my divisions for the tutorial to 16, but the screenshot says 8. Lets use 8 as an example that means that it will break the block of 1024x1024 into 8squares in both the x and y direction in this picture here. It then breaks that into triangles. So the more divisions you have the more triangles you have. The manual suggests that you use as many divisions as your resolution of your heightmap(I haven't noticed a difference, however this does come into play later with the alphamap).
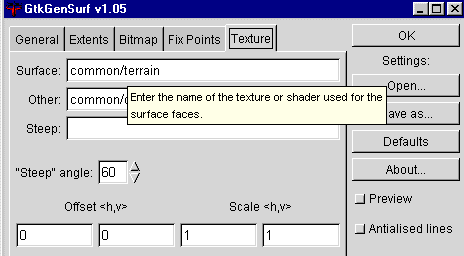
Now the last step in generating the surface. We have to make sure that the surface is textured with common/terrain, and that the "other" field is textured with common/caulk, which will help cut down on tris, and keep r_speeds down. Just leave the steep field blank and leave the offset and steep angles as they are. You can preview your terrain with the preview button below, and if you are happy hit ok, if you don't see something visually right you can change your max map color, or you can go back, change your heightmap and reload it. Lastly always make sure your settings are right, some don't save between sessions.