| FRAME POLISHING |
| Well, you are still here, so I haven't scared you off yet. This is where you have to really say to yourself "self, I can and will polish this frame". I will assume you have everything I mentioned on the previous page. Now you need to make another decision. Are you going to COMPLETELY polish the frame or just the areas visable when the bike is together and ridable? I choose the easier route. If you want to do the entire frame, you will have hundreds of hours of disassembly and assembly ahead of you. But if you are taking my road, you need to mark your frame to know where and how much paint you need to strip off. |
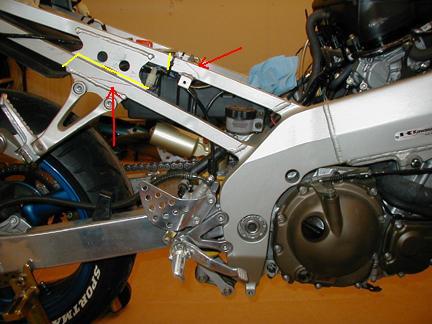 |
| If you look closely at the rear sub frame you will notice 2 red lines. I drew red arrows to the lines on the frame. The first is above the rear foot peg bracket. The other is above the tab on the upper sub frame arm. These are where the body work covers the frame. I stripped the frame about 1.5" past these marks. The yellow lines on the frame are where I actually stripped the frame to. |
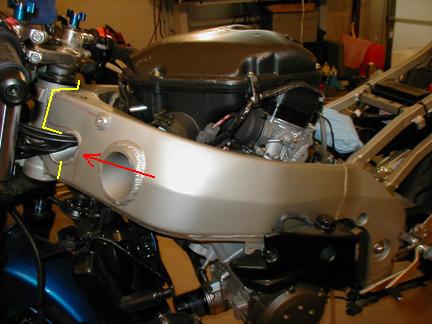 |
| Here is the area I marked on the steering head. The red arrow points to the red line I marked on the frame indicating which part of the frame is exposed when the body work is on the bike. Also like the picture above, the yellow lines indicate where I actually stripped the frame. |
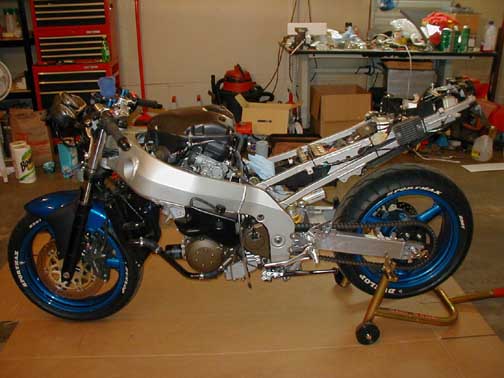
| O.K. now that you have your frame marked you need to get everything off the bike the might get in your way, might get damaged or you decide needs to come off to be cleaned. I took off just about everything. When the pic below was taken I still didn't have everything off that needed to come off. I removed all the foot controls, kickstand and coolant tank. Some things that you can't see in the pic that were also removed was the VIN stick, emissions stick and the Kawasaki badge that is rivited to the frame. The stickers when put on a 3x5 card and carried on the bike with my registration papers. The Kawasaki badge was rivited back on the frame after I finished polishing. |
 |
| Time to cover and plug up everything that you don't want stripped, filled with paint, aluminum, or any other crap that will be flying arround the garage when you do this task. You can do this in a few different ways. I taped up some items with electrical and masking tape just to cover small holes, like hoses and holes in the frame. The other things that need to be covered are things like your chain, tires and wheels, handlebars and forks, radiator, engine, any and all electronics and like I said anything that you don't want stripped or full of aluminum dust. |
 |
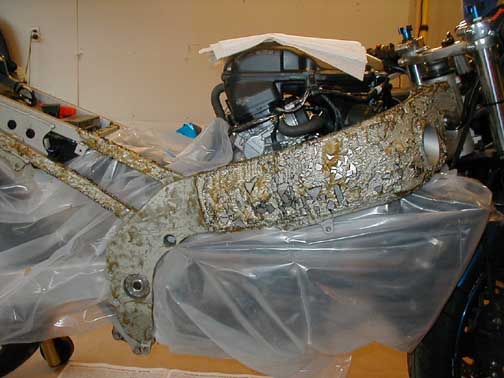
| Here is a pic further in the covering of the bike before stripping. I still covered more, but unforunately, I didn't get any pictures. Remeber, use your head. If the paint stripper comes in contact with anything painted, the paint will be damaged even if you wipe the stripper off immediately. |
| Well, here is your last chance to change your mind. But, if you went this far, you might as well finish the job. Nobody likes a quiter anyway! O.K. you are still here, so I guess I will talk about stripping the frame. This will be the easiest thing you do in this project. Using the suppiles stated earlier, get your brushes, loaf pans, stripper, rags or paper towels and gloves. Follow any safety information that is on the container of stripper! I am not responsible if you hurt yourself or anyone helping, or if you wreck your bike, garage, friends bike, or house because of your neglect! I had to make sure I put that in here somewhere. I put a small amount of stripper in the loaf pan, about 1 cup. No need to measure this, you will learn how much it takes to cover a certain area really quickly. Never put any of the stripper that you poured out of the original container back in the original container! If you have some left in your loaf pan, cover it with a plastic wrap (sran wrap) and use it later, or dispose of it properly. Looking at the picture below you can see the tan colored goop is the stripper. You can see the paint just bubbles up and some of it actually fell off. Per the instructions on the strippers's container, I applied the stripper, waited 15 to 20 minutes, and then wiped off the paint and stripper. I found that some paint adhered better in some places that other and required 2 or 3 applications of stripper. I stripped one side at a time, and stripping the total stripping portion took under 3 hours. This is just like painting, the better the prep the better the final outcome. After the paint has been removed, I rinsed the entire frame with water to ensure that no stripper was left on the frame. |
 |
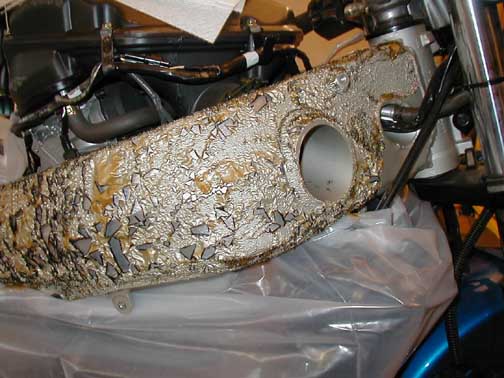 |
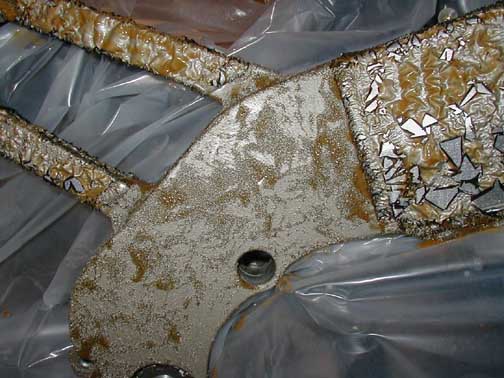
| Above - wide shot of the right side stripping. This was the first application of stripper. Right - this is a close-up of the right upper spar near the steering head. Below - this is a close-up of the center section of the frame. If you remember I stated that this section is sand-cast, because of this, it is harder to strip the paint off and when is is stripping, is looks different that then rest of the frame. |
 |