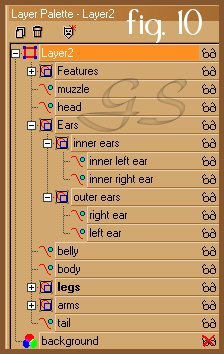
Let's give our monkey some special PSP treatment ;) 12. Let's work a little with our layers first. We'll go to our layer palette view, and click on left ear. Now we'll hold the "Shift" key down, and click on our right ear. The two ear vectors are selected, so let's right click, and choose "Group" from the menu. Now, let's select inner left ear, and holding the "Shift" key, select inner right ear, and select "Group" from the menu. We'll rename those "inner ear" and "outer ear". Now let's select the two groups, and right click, "Group" and rename the group "Ears". (fig.10)
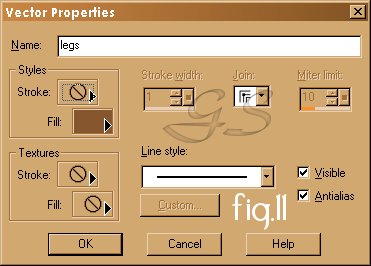
Let's make some more groups. I grouped his eyes, nose, mouth and brows together in "Features", his two legs in "legs"..etc. Now we'll reveal the reason for doing our groups :) 13. Let's select the group title "Legs". Right click and select "Properties". We can change both legs at the same time to anything we wish! We can outline his legs in a broad purple line, filled with a green gradient if we want, or fill them with a pattern of fur...the choice is ours and with vectors, it's so convenient! For now, let's just remove our black outline from our legs. We'll be adding shading to define the areas of our monkey's body.
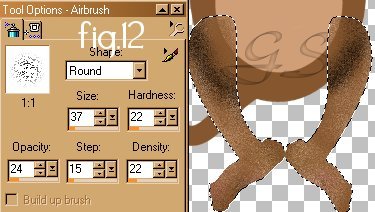
14.Let's right click on our "Legs" group again, and at the very bottom of the menu, we'll select " Create Raster Selection" Up at the top, click "Selections", then "Float". Now we'll select our airbrush tool, with these settings: (fig.12) Round shape, sized 37, hardness 22, opacity 24, step 15, density 22.
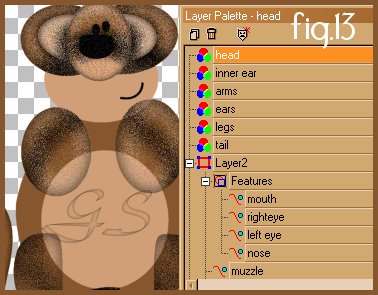
Let's lightly brush on some of our "belly brown", or a light beige, some light yellow (I used #FBE28B) a little pink-beige blush (#DAB89B)for highlights, and where the legs meet the body, we need to spray some black for shadow (to add a drop shadow to our body would make it difficult to tube our monkey ;). If it goes on a little thick in places, we can just use our original dark brown to "wash-out" the colors a bit. 15. Let's click on our "Effects" menu, and click "Noise, add" and give our legs about 10-14% uniform noise. 16. Now we'll go back to the "Effects" menu, and choose "3D Effects", "Cut-Out", with these settings: Horizontal and Vertical Offsets 0, Opacity 75, Blur 25, Shadow Color Black, Fill interior with color UNCHECKED. 17. Let's go to our layer palette and right click on "Floating Selection", "Promote to Layer" and rename it "Legs". 18. Now we'll select the tail, go to properties and remove the black outline, right click, "create raster selection", "selection", "float" and airbrush it(Be sure to spray on quite a bit of black on the upper part of the tail, to define it as being behind the legs and body), add noise, cut-out(Change the opacity to 90 and the blur to 10), promote to layer and rename it "Tail" following the settings for steps 14, 15, 16 and 17. 19. Let's select our group "arms", and repeat our steps above, but we'll change cut-out back to opacity 75, and blur 25. 20. Next, we'll do the outer ears, ( spray black where the inner ear will be, to create some depth there)changing the cut-out back to opacity 90, and blur 10. We'll follow that with the inner-ear layer, then the head layer. Let's arrange our layers, so they appear from bottom to top: Background layer, Layer 2 (all our vectors are in there) next raster layer is tail, then legs, ears, arms, inner ear, head, and next comes his body. So far, he looks a little silly, but with potential ;) (fig.13)
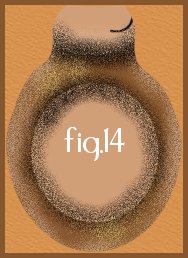
21. Ok, let's select the body, create raster selection, float and spray it. We need lots of shading on this one (fig.14) especially where the belly will be.
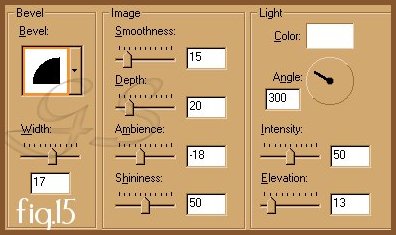
Next, we'll add some noise, and cut it out with an opacity of 95 and blur of about 30. Let's promote it to layer, and rename it "Body". 22. We'll select the muzzle and repeat the above steps for it, but for cut-out, we'll use an opacity of 50 and a blur of 40. Promote it to layer and rename it "muzzle". My, he's looking quite adorable :) Let's repeat the steps and do his belly, add a bellybutton if you wish. Promote to layer and rename it "belly". (Later, if we decide to change something or add more shadows, or highlights, all we do is click on the vector layer of the body part we need, make the raster selection, then click back on the layer we want the changes made :) 23. Let's select the group "features", "create raster selection", "float" and drag that floating selection up to the top, above the muzzle layer. For this one all we are going to do is an inner bevel and a drop shadow with these settings: inner bevel (fig.15) drop shadow, horizontal and vertical on 1, opacity 45, blur 1.1 color black.
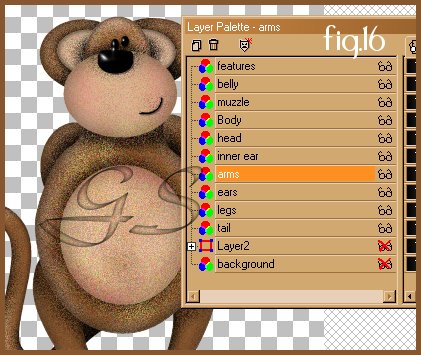
Now isn't he just the cutest little guy?! Let's be sure to save him as a .psp file so we can experiment with different effects later. Hair, eyelashes, clothing, animations...there's so many possibilities :) (fig.16) he should look similar to this:
We could save him as a tube now too, if we go to our layer palette window and turn off the visibility in our background, and right click, select "convert to raster layer" our vector layer. Merge all visible layers, and hit "File", "Export", "Picture Tube" with the settings of 1cell across 1 cell down and name him. Thanks for joining me in making a monkey. I hope you enjoyed it as much as I did and I wish you a long and prosperous vectoring future ahead :) If you encountered any trouble throughout this tutorial, please don't hesitate to e-mail me. I'd love to see your how your monkey turned out too! :) Your's truly,
|