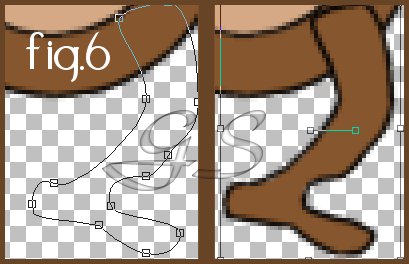
7.Now let's give our monkey some legs and feet(fig.6, a zoom-in of my nodes). With our preset shape, ellipse, and our dark brown, we'll draw a long thin ellipse. Then, we click on our Vector Object Selector again, and then "Node Edit". It might be easier to see these if we zoom in by 1 or 2 from our VIEW menu. We'll need to add several new nodes here to get a nice leg shape, so let's press CTRL and click to add some to our ellipse.
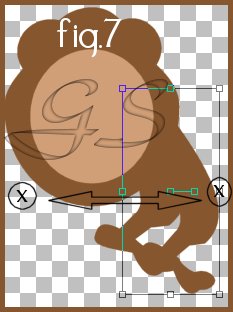
After we are happy with our leg shape (it takes a little playing to get it the way we want, but we can paint on details like toes later if we wish, and we will keep these vectors separate so we can change it later if we like:) we will now rename "ellipse" on our layer palette window, to "right leg". Let's hit CTRL + C to copy it, and CTRL + G to paste it as a new VECTOR selection (or choose those options from the EDIT menu). Let's click on our little square at 3 o'clock, and pull it over to 9 o'clock. We just mirrored our leg! We'll now rename that layer "left leg".
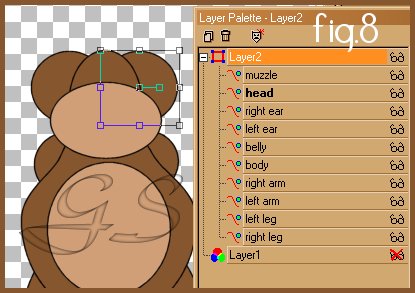
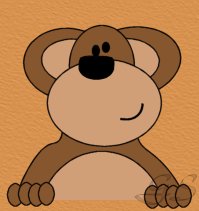
Don't forget to save all this work often! We just got done the hardest part of the whole tutorial!!! The rest is lickety-split. 8.With our dark brown, and prior settings, let's draw a circle for the head. We'll rename it in the layer palette as "head". We'll draw two more circles, with the same settings, for our ears. We'll rename those as well, "left ear" and "right ear" (fig.8). With our light color, let's draw an ellipse for a muzzle (rename it "muzzle") We are almost done! (all the more reason to save often:) So far in our layer palette view, from bottom to top, we should have: (fig.8) 2legs, 2arms, body, belly, 2ears, head and then our muzzle.
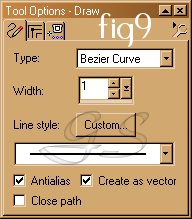
9.For our monkey's tail, let's draw a long rounded rectangle chosen from our preset shapes. We'll use our dark brown again. Draw a long thin tail, click our Vector Selector button again, and then "Node Edit". Let's play with our nodes again to give our monkey a nicely curved tail. Rename the vector "tail", and place it below the leg vectors. 10. Now we'll choose our light color again, and with our preset shape 'ellipse' we'll draw two inner ear circles. Let's move those right under the head, and above the outer ear vectors. 11. Almost done! This is the part you can really show your personality. Draw some eyes, a nose, and a mouth. Use your imagination and be creative :) For demonstration purposes, I'll go through the bezier curve tool. It's soooo handy in applications like this and so many others! Let's choose our Draw icon from our toolbar. Choose Bezier Curve, line width of 1 antialias and draw as a vector (fig9) I used stroked with black, NO FILL.
We'll now click once where we want the curve to start, and again where we wish it to stop. Click again where we would like it to curve. Guess what?! It's a VECTOR so you can edit that curve's nodes to any shape you desire and add more nodes just as any vector. We LOVE this tool, don't we !!!!!!!!!! That's it. We have made vector shapes into a monkey! Let's give him some more character on page three, and learn some awesome things we can do with vectors you'll really go ape for :)
|